

Tutorial: document an undocumented repository
This tutorial takes a repository that has no documentation and turns it into a structured documentation set: an overview, a getting started guide, and an API reference. You start from an empty session and finish with a single pull request that adds all three pages, written to a consistent style.
By the end, you can:
- Have the agent survey a codebase and propose a documentation structure.
- Generate several linked pages in one session.
- Teach the agent your style and terminology so the pages read as one set.
- Review every new page and ship them all in one pull request.
The whole path takes about 30 minutes. Getting started generates a single README, and Tutorial: document a code change updates docs that already exist. This tutorial covers the case in between: a real product with working code and nothing yet written for the people who use it.
Before you begin
Section titled “Before you begin”You need:
- An EkLine account with Docs Agent enabled. Don’t have access? Email support@ekline.io with your organization name.
- A repository that contains working code but little or no documentation. A small library or service works best for a first run.
- Permission to open pull requests on that repository.
You don’t write any documentation by hand in this tutorial. You direct the agent, review what it drafts, and refine it with follow-up prompts.
Step 1: Connect your repository
Section titled “Step 1: Connect your repository”The agent documents only code it can read, so connect a repository first.
- Log in to your EkLine dashboard.
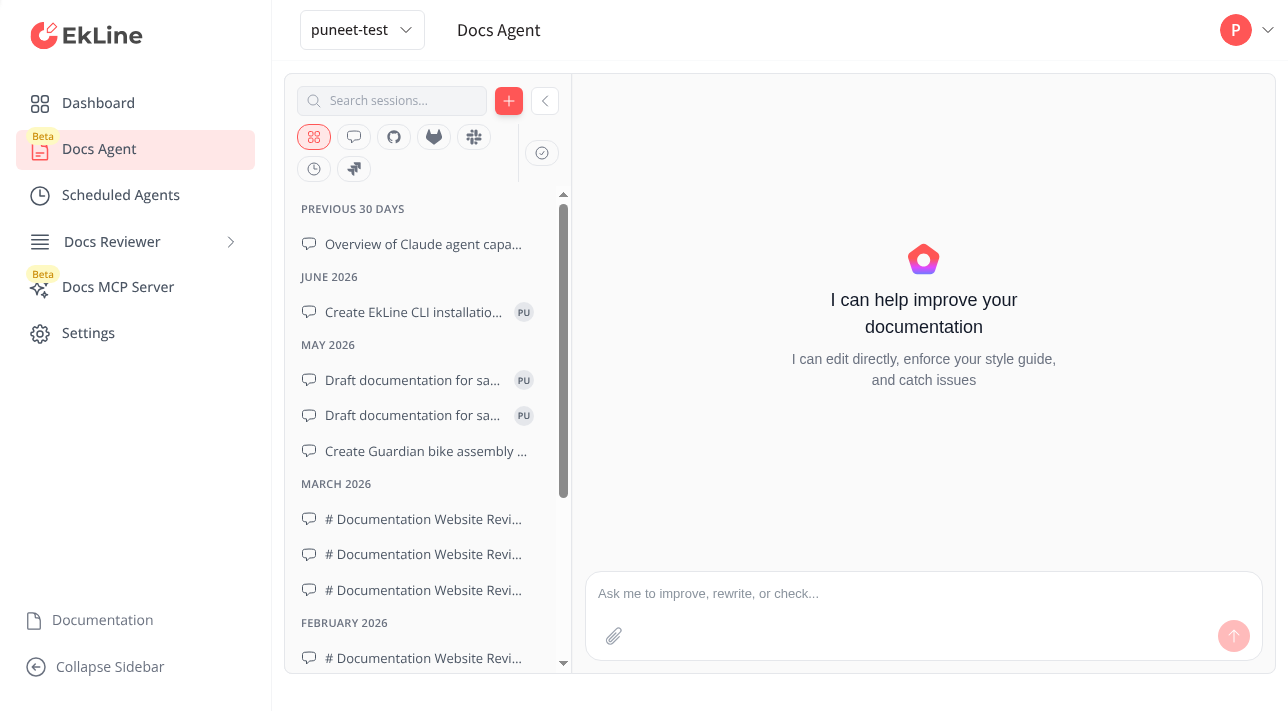
- Click Docs Agent in the left navigation.
- If you haven’t connected a repository yet, follow Connect GitHub to EkLine to install the GitHub App and choose which repositories the agent can access.
Verify: The editor opens with a chat panel on the right and an editor panel on the left.
If you use GitLab instead, follow Connect GitLab to EkLine. The rest of this tutorial is the same.
Step 2: Survey the codebase
Section titled “Step 2: Survey the codebase”Before you generate a single page, let the agent read the repository and tell you what a documentation set should contain. This grounds every later page in what the code actually does.
In the chat panel, type:
This repository has no documentation. Survey the codebase andpropose a documentation structure. List the pages to create, whateach page should cover, and who it is for.The agent reads your repository structure, source files, and configuration, then responds with a proposed outline.
Verify: The agent responds with a list of proposed pages and a short description of each. Read it and decide which pages to create first. This tutorial creates three: an overview, a getting started guide, and an API reference.
Step 3: Generate the overview page
Section titled “Step 3: Generate the overview page”Start with the page that frames everything else. Give the agent the page, the audience, and where it belongs.
Create an overview page at docs/index.md. Explain what thisproject does, who it is for, and its key capabilities. Keep itto a short introduction that links out to the other pages.Verify: A draft of the overview appears in the editor panel on the left. Read it and confirm the description of the project matches what the code does.
Step 4: Generate the rest of the set
Section titled “Step 4: Generate the rest of the set”With the overview in place, add the remaining pages in the same session. The agent keeps each new page consistent with the ones already drafted.
- Generate the getting started guide:
Create a getting started guide at docs/getting-started.md.Cover installation, the minimum configuration, and a firstworking example pulled from the code.
- Generate the API reference:
Create an API reference at docs/api-reference.md for thepublic functions in this repository. Include parameters,return values, and an example for each.
- Switch between the drafts in the editor panel to read each page.
For more ways to generate each page type, see Create documentation and Generate an API reference. To pull in a spec or a design doc from a connected tool, see Combine multiple sources.
Verify: Enable View All Changes in the toolbar. The diff shows three new files: docs/index.md, docs/getting-started.md, and docs/api-reference.md.
Step 5: Make the pages read as one set
Section titled “Step 5: Make the pages read as one set”Separate prompts can drift in tone and terminology. Bring the set into line with a single follow-up.
Review these three pages together. Use the same term for eachconcept across all of them, match the heading style, and makesure every link between the pages resolves.Verify: The agent updates the drafts so the pages share terminology and heading style, and the cross-links between them point to real pages.
Step 6: Review the whole set
Section titled “Step 6: Review the whole set”Never ship a first draft unread. You know your product, so check the set before it becomes a pull request.
- Open each file in the editor panel and read it in full.
- With View All Changes enabled, scan the diff for content that doesn’t belong.
- Check three things on every page:
- Accuracy: Does each page describe what the code actually does?
- Completeness: Does the getting started guide take a reader from nothing to a working example?
- Consistency: Do the three pages use the same terms and structure?
If something is off, ask the agent to fix it rather than editing by hand. For example: "The installation command in the getting started guide is wrong. Read the package configuration and correct it."
Verify: The three pages are accurate, complete, and consistent, and the diff contains nothing you didn’t ask for.
Step 7: Ship the set in one pull request
Section titled “Step 7: Ship the set in one pull request”When the set reads well, publish all three pages through your normal review process.
- Click Raise PR in the toolbar.
- The agent prefills a prompt such as
Open a pull request. Edit it to add a title or description if you want, then press Enter. - The agent creates the pull request and responds in the chat with a link to it on GitHub.
Verify: The chat shows a link to a new pull request. Open it. The PR adds your three documentation pages and nothing else.
Summary
Section titled “Summary”You took a repository from no documentation to a review-ready pull request. Along the way you:
- Had the agent survey the codebase and propose a structure.
- Generated an overview, a getting started guide, and an API reference in one session.
- Brought the pages into a single, consistent style.
- Reviewed every page and shipped the whole set in one pull request.
You now have a documentation set to build on. Each time your product changes, you update it with the same review-and-refine loop rather than starting over.
Next steps
Section titled “Next steps”- Customize for your organization: save your voice and terminology so every future session matches them.
- Prevent documentation drift: catch pages that fall out of date as your code changes.
- Tutorial: document a code change: keep the set you created in sync with your code.
- Integrations: pull context from Slack, Notion, Linear, Jira, and Confluence into your prompts.