

Getting started with Docs Agent
Before you begin
Section titled “Before you begin”You need:
- An EkLine account with Docs Agent enabled
- At least one repository connected to EkLine
New to EkLine? Connect GitHub to EkLine to install the GitHub App and choose which repositories the agent can access.
Don’t have access? Email support@ekline.io with your organization name.
Open the editor
Section titled “Open the editor”- Log in to your EkLine dashboard.
- Click Docs Agent in the left navigation.
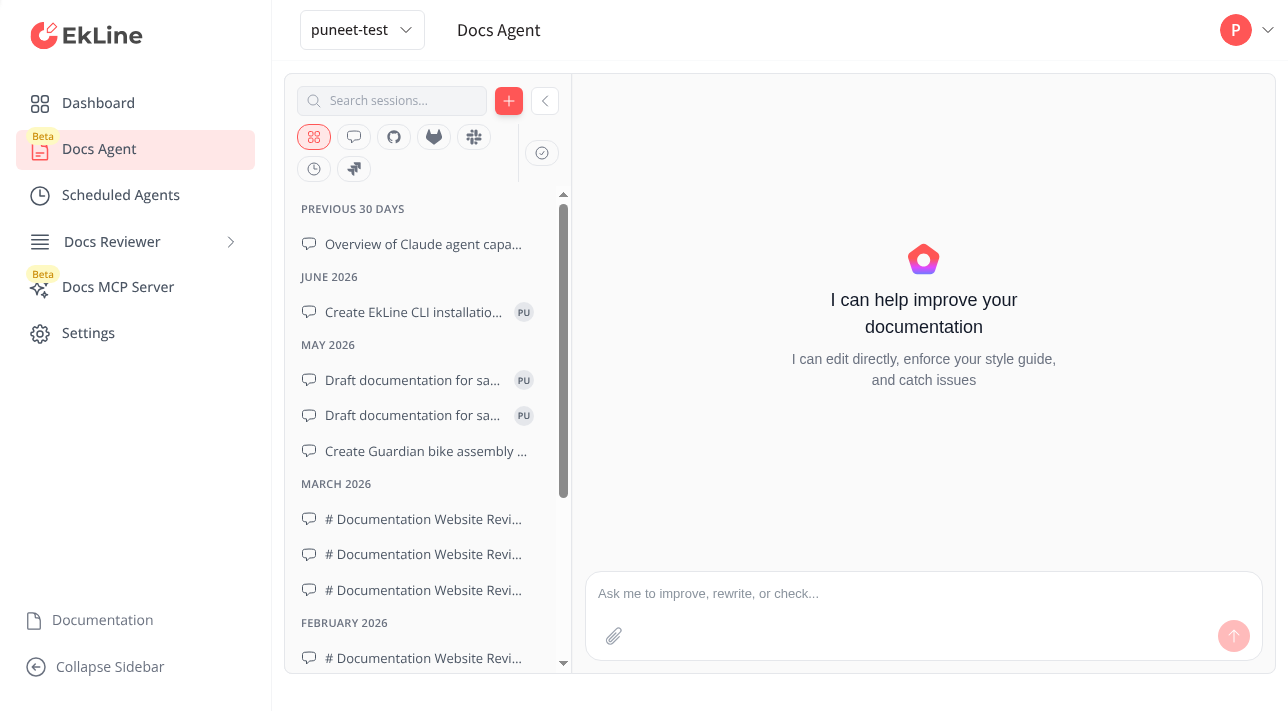
The editor interface has three main areas:
| Area | Location | Purpose |
|---|---|---|
| Editor panel | Left | View and edit generated documentation |
| Chat panel | Right | Interact with the AI agent |
| Toolbar | Top | View changes, switch files, create PRs |
Create your first document
Section titled “Create your first document”Generate a README for your repository:
-
In the chat panel, type:
Generate a README for this repository. Include installationinstructions, usage examples, and contributing guidelines. -
Wait while the agent analyzes your repository structure and code.
-
Review the generated content in the editor panel.
-
Enable View All Changes to see a diff of what the agent created.
-
Click Raise PR to open a pull request with the new documentation. The agent prefills a prompt in the chat — press Enter to send it, or edit the prompt first to add instructions.
The agent creates the pull request and responds in the chat with a link where you can continue the review process on GitHub.
Control the agent while it works
Section titled “Control the agent while it works”The chat input button changes color to reflect what the agent is doing:
| State | Icon | Action |
|---|---|---|
| Send | Arrow up | Send a new message (agent is idle) |
| Stop | Stop | Cancel the current turn (agent is working, text field empty) |
| Queue | Plus | Queue a follow-up that sends after the current turn finishes |
Click the Stop button to cancel a turn mid-flight. Any partial work stays in the editor for you to review. To queue a follow-up, type your message while the agent works and press Enter. Queued messages appear with a clock icon and are delivered together when the turn completes. Click a queued message to edit it, or click the X icon to cancel it.
Watch the agent browse
Section titled “Watch the agent browse”Some tasks lead the agent to open a browser — for example, to capture a screenshot of your product or to read a page you asked it to document. When the agent starts browsing, a panel opens in the bottom-right corner of the editor and mirrors the browser in real time, so you can watch each page it visits. The panel header shows Live browser while the agent is browsing.
The live view is read-only: you see what the agent sees, but you can’t click or type inside it. Use the panel to:
- Reposition it — Drag the panel by its header to move it out of your way.
- Resize it — Drag the left edge to make the panel wider or narrower.
- Collapse it — Click the collapse icon in the header to hide the view while keeping the panel open, then click again to expand it.
- Close it — Click the X icon to dismiss the panel.
When the agent finishes browsing, the panel header changes to Recording. The live view switches to a replay of the session, so you can review what the agent did even if you weren’t watching at the time.
Write better prompts
Section titled “Write better prompts”The more context you give, the better the output.
| Instead of… | Try… |
|---|---|
| ”Write docs" | "Create a getting started guide for Python developers" |
| "Update the README" | "Add a Docker installation section to the README" |
| "Help with API docs" | "Document the POST /users endpoint in src/api/users.ts with request and response examples" |
| "Make release notes" | "Generate release notes for tickets ENG-100 through ENG-105, grouped by Features and Fixes” |
Next steps
Section titled “Next steps”- Create documentation — Generate READMEs, API refs, and guides.
- Update and review — Keep docs in sync with code changes.
- Integrations — Pull content from Slack, Notion, Linear, and more.
- Set up automated style checks — Enforce style guides and catch quality issues on every pull request with Docs Reviewer.