This is the full developer documentation for EkLine
# How EkLine Docs Reviewer works
> Learn how EkLine Docs Reviewer automates documentation quality checks, enforces style guides, and catches errors in GitHub, GitLab, and Bitbucket pull requests.
EkLine treats documentation like code. We lint your prose, enforce your style guide, and catch errors before they merge.
[Run your first doc check ](/reviewer/quickstart/)Pick your setup and get started in 3 minutes.
## How EkLine works
[Section titled “How EkLine works”](#how-ekline-works)
EkLine provides two AI-powered tools for documentation:
### Docs reviewer — quality assurance for docs
[Section titled “Docs reviewer — quality assurance for docs”](#docs-reviewer--quality-assurance-for-docs)
The Docs Reviewer agent runs in your CI/CD pipeline and reviews documentation changes in every Pull Request. It catches:
* **Style violations** — Active voice, sentence length, readability
* **Grammar issues** — Spelling, punctuation, syntax
* **Terminology inconsistencies** — Enforce product names, technical terms
* **Structural problems** — Heading hierarchy, link validity
When issues occur, EkLine posts inline comments directly on the PR. You can configure it to block merges until you resolve the issues.
**Supported platforms:** GitHub Actions, GitLab CI, Bitbucket Pipelines
### Docs Agent — AI-powered documentation generation
[Section titled “Docs Agent — AI-powered documentation generation”](#docs-agent--ai-powered-documentation-generation)
Docs Agent analyzes your codebase and generates documentation automatically:
* **API references** from function signatures and types
* **README files** with project overviews
* **Getting started guides** for onboarding
Access it from the [EkLine dashboard](https://ekline.io/dashboard) or directly in VS Code.
## Configuration
[Section titled “Configuration”](#configuration)
EkLine is fully customizable. You can manage rules, have custom guidelines, implement AI rules, add company specific terminology, and configure your own dictionary for your documentation creation and review.
**Configuration options:**
* [Configuration file](/reviewer/integrations/cli-integration#configuration-file) — Store settings in `ekline.config.json` for team consistency
* [Ignoring rules](/reviewer/configuration/ignoring-rules) — Handle false positives with inline comments or config
* [Framework support](/reviewer/configuration/framework-support) — Configure EkLine for Mintlify, Docusaurus, Astro, and more
* [Custom rules](https://ekline.io/guidelines/rules) — Create your own style rules
Tip
Start with a preset style guide (Google, Microsoft, or Marketing) and customize from there.
## Integrations
[Section titled “Integrations”](#integrations)
| Platform | Use case | Guide |
| ------------------- | ------------------------------- | ------------------------------------------------------------ |
| GitHub Actions | PR review automation | [Setup guide](/reviewer/integrations/github-integration/) |
| GitLab CI | MR review automation | [Setup guide](/reviewer/integrations/gitlab-integration/) |
| Bitbucket Pipelines | PR review automation | [Setup guide](/reviewer/integrations/bitbucket-integration/) |
| VS Code | Real-time feedback + Docs Agent | [Setup guide](/reviewer/integrations/vscode-integration/) |
| CLI | Local checks, CI flexibility | [Setup guide](/reviewer/integrations/cli-integration/) |
## Support
[Section titled “Support”](#support)
* **Email:**
* **Dashboard:** [ekline.io/dashboard](https://ekline.io/dashboard)
# Style-guide enforcement for GitHub pull requests
> EkLine is a complete style-guide enforcement tool for GitHub pull requests: bundled rules, inline PR review, and merge-blocking checks, no linter to assemble.
EkLine is a complete, standalone tool for enforcing a style guide on every GitHub pull request. It reviews your documentation changes, posts the issues inline on the PR, and blocks the merge until they’re resolved. You install one GitHub Action, add one token, and EkLine handles the rest.
You don’t assemble a linter, wire up an output adapter, or hand-write rule files. The rules, the style guides, the AI review, the link checking, and the inline PR comments all ship in the product.
[Set up your first PR review ](/reviewer/quickstart/github-action/)Add the GitHub Action and run a review in about 3 minutes.
## What EkLine enforces out of the box
[Section titled “What EkLine enforces out of the box”](#what-ekline-enforces-out-of-the-box)
Every PR review checks your prose against a full style guide, not a handful of regular expression rules you maintain yourself:
* **Style guides** — Choose Google, Microsoft, or Marketing, or build a custom standard from your own rules. Set it once and every PR uses it.
* **Grammar and spelling** — Typos, punctuation, and syntax, with a project dictionary for your product names and jargon.
* **Voice and tone** — Active voice, present tense, sentence length, and readability.
* **Terminology** — Consistent product names and technical terms across the whole repository.
* **Structure and links** — Heading hierarchy, plus broken-link and broken-email detection.
Browse the [rules reference](/reviewer/rules) to see every rule EkLine enforces.
## Set it up on GitHub
[Section titled “Set it up on GitHub”](#set-it-up-on-github)
Two steps put EkLine on every pull request. For the full walkthrough, follow the [GitHub Action quickstart](/reviewer/quickstart/github-action).
1. Add your EkLine token as a repository secret named `EK_TOKEN`. Get the token from **Settings > Organization > Access** in the [EkLine Dashboard](https://ekline.io/dashboard).
2. Add this workflow at `.github/workflows/ekline.yml`:
```yaml
name: EkLine
on: [pull_request]
jobs:
docs:
runs-on: ubuntu-latest
permissions:
contents: read
pull-requests: write
steps:
- uses: actions/checkout@v4
- uses: ekline-io/ekline-github-action@v6
with:
content_dir: .
ek_token: ${{ secrets.EK_TOKEN }}
github_token: ${{ secrets.GITHUB_TOKEN }}
reporter: github-pr-review
```
Open a pull request and EkLine reviews it automatically, posting inline comments on the lines that break a rule.
Tip
Set `content_dir` to your docs folder, such as `./docs`. Use `.` to scan the whole repository.
## Configure your rules
[Section titled “Configure your rules”](#configure-your-rules)
EkLine reads its settings from an `ekline.config.json` file at your repository root. Commit it so every pull request and every teammate enforces the same standard:
ekline.config.json
```json
{
"contentDirectory": ["docs"],
"styleGuide": "google",
"ignore": ["EK00001", "EK00004"]
}
```
* **Pick a style guide** with the `styleGuide` key. See [Choose and apply a style guide](/reviewer/configuration/style-guides).
* **Disable rules that don’t fit your project** with the `ignore` key, or suppress a single line with an [inline ignore comment](/reviewer/configuration/ignoring-rules#inline-ignore-comments).
* **Add your own rules and terminology** for a custom standard. See [Custom rules](https://ekline.io/guidelines/rules).
* **Accept product names and jargon** with a [project dictionary](/reviewer/configuration/dictionary) so spell-check leaves them alone.
For every configuration key, see the [configuration file reference](/reviewer/configuration/ignoring-rules).
## Block merges until docs pass
[Section titled “Block merges until docs pass”](#block-merges-until-docs-pass)
By default, EkLine posts its findings as comments without failing the check, so a pull request can still merge. To turn the review into a required gate:
1. Add `fail_on_error: true` to the action so the job fails when EkLine finds an issue:
```yaml
- uses: ekline-io/ekline-github-action@v6
with:
content_dir: .
ek_token: ${{ secrets.EK_TOKEN }}
github_token: ${{ secrets.GITHUB_TOKEN }}
reporter: github-pr-review
fail_on_error: true
```
2. In your repository, go to **Settings > Branches** and add a branch protection rule for `main`.
3. Under **Require status checks to pass before merging**, select the EkLine check.
GitHub then prevents the merge until EkLine passes. See the [GitHub Actions integration reference](/reviewer/integrations/github-integration) for every reporter and filter option.
## EkLine compared to assembling Vale and reviewdog
[Section titled “EkLine compared to assembling Vale and reviewdog”](#ekline-compared-to-assembling-vale-and-reviewdog)
Teams that want style-guide enforcement on GitHub often reach for a do-it-yourself stack: the Vale linter, a set of hand-written rule files, and reviewdog to turn the output into inline PR comments. That works, but you own every piece of it. EkLine delivers the same outcome as a single managed tool.
| Capability | EkLine | Vale + reviewdog (DIY) |
| -------------------------- | ----------------------------------------------------------------- | --------------------------------------------------------- |
| Style-guide rules | 60+ rules plus Google, Microsoft, and Marketing presets, built in | You install and maintain rule packages, or write your own |
| Inline PR comments | Built in | You configure reviewdog separately |
| Merge blocking | GitHub check you mark required | GitHub check you mark required |
| AI-powered suggestions | Built in | Not available |
| Terminology and dictionary | Built in | You maintain vocabulary files |
| Link and email checking | Built in | Separate tooling |
| Setup | One token, one workflow file | Multiple tools to wire together and keep updated |
| Maintenance | Managed by EkLine | You own upgrades and rule tuning |
Choose EkLine when you want style-guide enforcement on every pull request without building and maintaining a review pipeline yourself. Choose the DIY stack when you need total control over each component and are ready to maintain it.
Note
EkLine also runs on [GitLab CI](/reviewer/integrations/gitlab-integration), [Bitbucket Pipelines](/reviewer/integrations/bitbucket-integration), the [CLI](/reviewer/integrations/cli-integration), and [VS Code](/reviewer/integrations/vscode-integration), so the same style guide applies wherever your team writes.
## Related
[Section titled “Related”](#related)
* [GitHub Action quickstart](/reviewer/quickstart/github-action) — Run your first PR review in about 3 minutes.
* [GitHub Actions integration reference](/reviewer/integrations/github-integration) — Every reporter, filter, and configuration option.
* [Choose and apply a style guide](/reviewer/configuration/style-guides) — Pick the standard EkLine enforces.
* [Configuration file reference](/reviewer/configuration/ignoring-rules) — Every `ekline.config.json` key.
# Docs Agent — AI-powered documentation assistant
> AI-powered assistant that generates, updates, and reviews your technical documentation. Create API references, guides, and READMEs from your codebase.
Request access
Docs Agent is available to all plans, but we grant access on request. Contact to request access.
## See Docs Agent in action
[Section titled “See Docs Agent in action”](#see-docs-agent-in-action)
[Docs Agent Demo](https://www.youtube.com/embed/xn3cq_dfQVY)
Docs Agent is an AI assistant that helps you create documentation from your codebase, keep docs in sync when code changes, and improve existing content.
## What you can do
[Section titled “What you can do”](#what-you-can-do)
Generate new docs
Create README files, API references, and guides from your code, videos, or external sources.
Update from tickets
Reference a Linear or Jira ticket and the agent updates relevant documentation automatically.
Review and improve
Get feedback on clarity, completeness, accuracy, and consistency.
Pull from integrations
Reference Slack threads, Notion pages, Confluence docs, or Google Docs in your prompts.
Trigger from GitHub
Mention `@ekline-ai` on any pull request comment to generate docs linked to the PR context.
## How it works
[Section titled “How it works”](#how-it-works)
1. **Describe what you need** — Tell the agent what documentation to create or update.
2. **Agent analyzes your sources** — It reads your codebase, tickets, or linked content.
3. **Review the output** — Edit the generated content in the built-in editor.
4. **Create a pull request** — Publish changes through your normal review process.
The agent learns from your existing documentation to match your style, terminology, and structure.
## What you can create
[Section titled “What you can create”](#what-you-can-create)
* **README files** — From repository structure and code.
* **API references** — From function signatures, types, and comments.
* **How-to guides** — From support threads or internal knowledge.
* **Release notes** — From completed tickets in a milestone.
* **Getting started guides** — For new users or contributors.
* **Troubleshooting docs** — From incident resolutions or FAQs.
## Next steps
[Section titled “Next steps”](#next-steps)
[Getting started ](/agent/getting-started/)Create your first document in 5 minutes
[Integrations ](/agent/integrations/)Connect Slack, Notion, Linear, and more
[Enforce style guides ](/reviewer/quickstart/)Catch quality issues automatically with Docs Reviewer
# 404
> We couldn't find that page. Try searching, or head back to the docs home.
# Automatic documentation review on pull requests
> EkLine automatically detects when pull requests need documentation updates and suggests or creates them based on confidence level.
Request access
Docs Agent is available to all plans, but you must request access. Contact to request access.
When you open a pull request, EkLine automatically analyzes the changes and determines whether your documentation needs updating. Depending on the confidence of the assessment, EkLine stays silent, posts a suggestion, or triggers a documentation update automatically.
## How it works
[Section titled “How it works”](#how-it-works)
```
flowchart TD
A[Pull request opened] --> B[EkLine analyzes PR diff]
B --> C{Documentation impact?}
C -->|Low confidence| D[No action taken]
C -->|Medium confidence| E[Posts suggestion comment]
C -->|High confidence| F[Posts auto-trigger comment]
F --> G[Docs update flow runs automatically]
G --> H[Documentation PR created]
E --> I[You decide whether to trigger]
```
When a non-draft pull request is opened or converted from draft to ready, EkLine:
1. Reads the PR diff, title, and description.
2. Compares the changes against your existing documentation.
3. Assesses whether the changes have documentation impact.
4. Acts based on the confidence of that assessment.
Note
EkLine runs the assessment once per pull request. New commits pushed to the same PR do not trigger a re-analysis.
## Confidence tiers
[Section titled “Confidence tiers”](#confidence-tiers)
EkLine categorizes each assessment into one of three confidence tiers:
| Tier | When it applies | What EkLine does |
| ---------- | ------------------------------------------------------------------------------------- | ---------------------------------------------------------------- |
| **Low** | Refactoring, test additions, bug fixes with no user-facing impact | Stays silent — no comment posted |
| **Medium** | Behavioral changes that might affect documented features | Posts a suggestion comment on the PR |
| **High** | New API endpoints, renamed configuration, removed features, changed public interfaces | Posts a comment that automatically triggers the docs update flow |
The high-confidence threshold is conservative. EkLine only auto-triggers a documentation update when the impact is clear. When uncertain, it defaults to staying silent.
### Medium confidence
[Section titled “Medium confidence”](#medium-confidence)
EkLine posts a comment on the pull request explaining what documentation might need updating. The comment mentions `@ekline-ai` so you can trigger the update manually if you agree.
No automatic action is taken — you decide whether to proceed.
### High confidence
[Section titled “High confidence”](#high-confidence)
EkLine posts a comment that automatically triggers the [GitHub PR bot](/agent/github-integration/) flow. The bot creates a documentation session, generates a draft, and opens a docs pull request — without any manual intervention.
This works the same way as manually mentioning `@ekline-ai` on a PR comment, except EkLine initiates it for you.
## Prerequisites
[Section titled “Prerequisites”](#prerequisites)
Before automatic PR review works on your repositories, you need:
* An EkLine organization account.
* The [EkLine GitHub App](https://ekline.io/settings) installed on the repository.
* Docs Agent access enabled for your organization (includes the GitHub PR bot integration).
* The repository **selected in your GitHub integration settings** — as either a Documentation Repository or a Code Repository. EkLine only reviews pull requests from repositories you have selected; PRs from other repositories the app can access are skipped. See [Configure repositories](/agent/github-app-setup#configure-repositories).
Automatic PR review is enabled by default for organizations with Docs Agent access, and runs on the repositories you have selected in your GitHub integration settings.
## What you see on the pull request
[Section titled “What you see on the pull request”](#what-you-see-on-the-pull-request)
| Scenario | What appears on the PR |
| ----------------------- | ---------------------------------------------------------------------------------------- |
| Low confidence | Nothing — EkLine stays silent |
| Medium confidence | A comment suggesting a documentation update, with `@ekline-ai` mentioned for convenience |
| High confidence | A comment that triggers the docs update flow, followed by a link to the documentation PR |
| Error during assessment | Nothing — EkLine stays silent and logs the error internally |
At most one automatic review comment appears per pull request.
## Relationship to the GitHub PR bot
[Section titled “Relationship to the GitHub PR bot”](#relationship-to-the-github-pr-bot)
Automatic PR review builds on top of the existing [GitHub PR bot](/agent/github-integration/) integration:
* **Manual flow**: You mention `@ekline-ai` in a PR comment to trigger a documentation session.
* **Automatic flow**: EkLine posts the `@ekline-ai` mention for you when it detects high-confidence documentation impact.
Both flows create the same type of documentation session. If EkLine already posted an automatic comment and you mention `@ekline-ai` manually on the same PR, the existing session resumes rather than creating a duplicate.
## Run a manual assessment
[Section titled “Run a manual assessment”](#run-a-manual-assessment)
You can also trigger a PR documentation assessment on demand using the `/analyze-pr-for-docs-needs` command in the EkLine Docs Agent. Provide the PR URL as an argument:
```text
/analyze-pr-for-docs-needs https://github.com/your-org/your-repo/pull/123
```
The agent analyzes the PR diff against your existing documentation and acts based on the same confidence model described above. Use this when you want to assess a specific PR without waiting for the automatic trigger, or to re-assess a PR after significant changes.
## Current limitations
[Section titled “Current limitations”](#current-limitations)
* **Assessment runs once**: New commits pushed after the initial assessment do not trigger a re-analysis.
* **Fixed confidence thresholds**: You cannot customize the confidence thresholds that decide whether EkLine stays silent, suggests, or auto-triggers. You can control which pull requests EkLine reviews with [review rules](/agent/review-rules/).
* **PR context only**: The assessment uses the PR diff, title, and description. Linked Jira or Linear tickets are not included.
* **Current PR changes only**: EkLine assesses documentation impact for changes introduced by the PR, not pre-existing documentation gaps.
## Troubleshooting
[Section titled “Troubleshooting”](#troubleshooting)
| Issue | Solution |
| ------------------------------------------------ | --------------------------------------------------------------------------------------------------------------------------------------------------------------------------------------------------------------------------------------------------------------------------------------------------------------------------------------------------------- |
| No comment appears on my PR | Verify the repository is selected in your GitHub integration settings (as a Documentation or Code Repository) — pull requests from unselected repositories are skipped. Also confirm the EkLine GitHub App is installed and Docs Agent access is enabled for your organization. Draft PRs are skipped, and low-confidence assessments produce no comment. |
| EkLine posted a suggestion but I want the update | Mention `@ekline-ai` in a new comment on the PR with a description of the documentation changes you need. |
| The auto-triggered docs PR is inaccurate | Comment on the generated docs PR mentioning `@ekline-ai` with feedback. The agent resumes the session and pushes new commits. |
| EkLine triggered on a PR that does not need docs | The assessment is best-effort. You can close or ignore the generated docs PR. |
## Next steps
[Section titled “Next steps”](#next-steps)
* [Control which PRs are reviewed](/agent/review-rules/) — Scope automatic PR review per repository by branch, title, author, label, or changed files.
* [GitHub PR bot](/agent/github-integration/) — Trigger documentation sessions manually from PR comments.
* [Create documentation](/agent/create/) — Generate documentation from your codebase, videos, and external sources.
* [Update and review](/agent/update-review/) — Keep documentation in sync with code changes.
# Combine multiple sources into one document
> Reference a ticket, pull request, Slack thread, and spec in a single Docs Agent prompt to produce one authoritative document, then open a pull request.
Request access
Docs Agent is available to all plans, but we grant access on request. Contact **** to request access.
The full story of a feature is rarely in one place. The implementation lives in a pull request, the requirements sit in a Jira or Linear ticket, the edge cases surface in a Slack thread, and the original design lives in a Notion or Confluence spec. This guide shows you how to hand all of those sources to Docs Agent in a single prompt so it reconciles them into one document and opens a pull request for review.
## Before you begin
[Section titled “Before you begin”](#before-you-begin)
You need:
* An EkLine account with Docs Agent enabled.
* At least one documentation repository [connected to EkLine](/agent/github-app-setup/).
* The integrations that hold your sources connected under **Settings > Organization > Integrations**. See [Integrations](/agent/integrations/) to connect Slack, Notion, Linear, Jira, Confluence, Google Drive, GitLab, and PostHog.
* Permission to view each source. The agent reads content using your own access, so it can only pull sources you can already open.
## How multi-source synthesis works
[Section titled “How multi-source synthesis works”](#how-multi-source-synthesis-works)
When you reference several sources in one prompt, the agent fetches each one, combines what it learns, and writes a single document that draws on all of them:
1. **Fetch** — The agent recognizes each URL or ticket ID and pulls the content from the connected integration.
2. **Reconcile** — It reads every source together, resolves overlaps, and decides which detail belongs in which section.
3. **Draft** — It writes one document grounded in the combined context and places it in your repository.
4. **Review** — You check the draft in the editor, iterate in the chat, and open a pull request.
The more each source contributes a distinct piece — requirements, implementation, edge cases, design intent — the more complete the result.
## Combine your sources
[Section titled “Combine your sources”](#combine-your-sources)
1. Gather the sources that describe the same topic. For a feature launch, that is often the ticket, the pull request, the Slack thread where the team discussed it, and the original spec.
2. Open Docs Agent and write one prompt that lists every source and states what to produce. Paste exact URLs or ticket IDs — the agent recognizes the service automatically:
```plaintext
Write a feature guide for our new rate limiting, drawing on:
- Linear ticket ENG-1234 for the requirements
- GitHub pull request #482 for the implementation details
- This Slack thread for the edge cases the team found:
https://workspace.slack.com/archives/C01234/p1234567890
- The original design in Notion:
https://notion.so/your-workspace/rate-limiting-spec
Put it in the docs repo under guides/. Cover what rate
limiting does, the default limits, the response headers,
and how to handle a 429 error.
```
3. Wait while the agent fetches each source and drafts the document. It reports the sources it read as it works.
4. Review the draft in the editor panel. Confirm that each source contributed the part you expected — requirements from the ticket, behavior from the pull request, edge cases from the thread.
Tell the agent what each source is for
Naming the role of each source — “the ticket for requirements, the PR for implementation” — helps the agent decide which detail belongs in which section, instead of treating every source as interchangeable.
## Write an effective multi-source prompt
[Section titled “Write an effective multi-source prompt”](#write-an-effective-multi-source-prompt)
The agent produces a sharper document when your prompt assigns a purpose to each source and names the output.
| Instead of… | Try… |
| ------------------------------------------------- | -------------------------------------------------------------------------------------------------------------------------------------------- |
| “Document this feature from ENG-1234 and PR #482” | “Write a feature guide for rate limiting. Use ENG-1234 for the requirements and PR #482 for the implementation details.” |
| “Combine these links into docs” | “Create one deployment guide from the runbook in Confluence and the checklist in this Slack thread. Prefer the runbook where they disagree.” |
| “Update the API docs with everything about auth” | “Update the authentication reference using ENG-1234 (the OAuth change) and PR #501 (the new token endpoint). Keep the existing structure.” |
**Include in your prompt:**
* Each source as an exact URL or ticket ID.
* What each source contributes.
* The document type and where it belongs in your repository.
* The sections you want, so the agent maps sources onto structure.
## Handle conflicting sources
[Section titled “Handle conflicting sources”](#handle-conflicting-sources)
Sources drift. A ticket describes the plan, but the pull request ships something slightly different; a spec predates the final design. When sources disagree, tell the agent which one wins:
```plaintext
Where the Notion spec and PR #482 disagree, follow the pull
request — it reflects what actually shipped. Note any
requirement from ENG-1234 that the PR did not implement.
```
If you don’t set a precedence, the agent flags the conflict in the chat so you can decide. Ask it to reconcile a specific difference, and it revises the affected section.
## Verify before publishing
[Section titled “Verify before publishing”](#verify-before-publishing)
1. Enable **View All Changes** in the toolbar to see a diff of everything the agent wrote. Confirm no source was dropped and no section mixes up details from different sources.
2. Check that claims trace back to a source. If a detail looks unsupported, ask the agent where it came from — for example, `Which source says the default limit is 100 requests per minute?`
3. Click **Raise PR** in the toolbar. The agent prefills a prompt in the chat panel — press **Enter** to send it, or edit it first to add instructions.
4. The agent opens the pull request and replies with a link where you finish the review on GitHub.
The agent validates links and email addresses in the generated content and regenerates any section with a broken reference before you open the pull request.
## Troubleshooting
[Section titled “Troubleshooting”](#troubleshooting)
| Problem | Cause | Fix |
| ------------------------------------- | ------------------------------------------------------------------ | -------------------------------------------------------------------------------------------------------------------------------------------- |
| A source was skipped | The integration isn’t connected, or you lack access to that source | Connect the integration under **Settings > Organization > Integrations**, confirm you can open the source yourself, then reference it again. |
| The draft leans on one source | The prompt didn’t say what each source contributes | Restate the prompt and assign a role to each source, such as “use the ticket for requirements, the PR for behavior.” |
| Details from two sources are mixed up | The sources overlap and no precedence was set | Tell the agent which source wins for the overlapping topic, then ask it to revise that section. |
| The agent asks which source to trust | Two sources give conflicting facts | Reply with the source of truth — for example, “follow the pull request; the spec is outdated.” |
| A pasted link isn’t recognized | The URL is malformed, or the service isn’t connected | Paste the exact URL from the source, and confirm the matching integration is connected. |
## Next steps
[Section titled “Next steps”](#next-steps)
* [Integrations](/agent/integrations/) — Connect Slack, Notion, Linear, Jira, Confluence, Google Drive, and more.
* [Create documentation](/agent/create/) — Generate READMEs, API references, and guides from a single source.
* [Update and review](/agent/update-review/) — Keep documentation in sync with code changes and tickets.
* [Customize for your organization](/agent/custom-instructions/) — Set standing instructions so every session follows your conventions.
# Integration authentication requirements
> The integrations EkLine Docs Agent supports, the authentication each uses, the role required to connect it, and the exact scopes the agent requests.
EkLine Docs Agent connects to the tools your team already uses — source control, issue trackers, knowledge bases, and chat — to gather context and publish documentation. Before you approve a connection, review what it grants. This reference covers every integration the agent supports: the authentication method, the account role needed to connect it, whether the agent reads or writes, and the exact scopes each connection requests.
## How authentication works
[Section titled “How authentication works”](#how-authentication-works)
Docs Agent connects to your tools with one of three methods. In every case, you authorize the connection — EkLine never asks for a user password.
| Method | How you authorize | What EkLine receives |
| ----------------------- | --------------------------------------------------------------------------------------------------------------------- | ----------------------------------------------------------------------------------------------- |
| OAuth 2.0 | You approve the connection on the provider’s authorization screen, which lists the exact permissions EkLine requests. | A scoped authorization the provider issues. Revoke it anytime from the provider or from EkLine. |
| Access token or API key | You create a scoped token in the provider and paste it into EkLine. | The token you created, with the scopes and role you granted it. |
| GitHub App | You install the EkLine GitHub App on the repositories you select. | Short-lived installation tokens that GitHub issues for those repositories. |
You approve the exact scopes
For OAuth 2.0 integrations, the provider’s authorization screen shows the exact scopes EkLine requests before you approve. Review that screen at connection time, and match it against the [scope tables](#oauth-integration-scopes) below.
## Data access and permissions
[Section titled “Data access and permissions”](#data-access-and-permissions)
These principles apply to every integration:
* **The agent inherits the connecting account’s permissions.** Docs Agent can only read or change content that the authorizing account can already access. It cannot reach anything that account cannot.
* **Connections are organization-level.** An administrator connects an integration once, and members use it inside Docs Agent sessions. The agent acts with the permissions of the account that authorized the connection.
* **You choose the scope.** Select the specific repositories, spaces, or knowledge bases the agent can work with. Content you do not select stays out of reach.
* **Credentials are stored encrypted.** EkLine stores integration tokens and connection credentials encrypted at rest.
* **Read and write access is explicit.** The **Data access** column shows the level each connection is granted. Several integrations are granted write access. The [scope tables](#oauth-integration-scopes) list exactly what every connection requests, so your reviewers can see each permission.
Use a service account for Atlassian
For Jira, Confluence, and Atlassian Teamwork Graph, connect a dedicated Atlassian service account rather than an individual’s account. A service account keeps the connection working when a team member changes roles or leaves. It scopes access to only the spaces the agent should reach and makes activity easy to audit under a recognizable name such as `EkLine AI`.
## Supported integrations
[Section titled “Supported integrations”](#supported-integrations)
Integrations marked † are enabled on request. Contact to turn them on for your organization.
| Integration | Authentication | Role required to connect | Data access | How Docs Agent uses it |
| ------------------------ | -------------------------------------------------------------------------------------- | --------------------------------------------------------------------------------------------- | -------------- | --------------------------------------------------------------------------------------------------------------------------------------------------------------------------------------------- |
| GitHub | GitHub App installation | GitHub organization owner | Read and write | Reads repository code and pull requests for context, commits changes to open documentation pull requests, and posts or updates pull request comments. |
| GitLab | Access token (group, project, or personal) with the `api` and `read_repository` scopes | Group Owner for a group token, or a member who can create a token with both scopes | Read and write | Reads merge requests, issues, and repository files, commits changes, and opens merge requests in your documentation projects. |
| Jira | OAuth 2.0 | A member with access to the projects, or an Atlassian service account | Read and write | Reads issue titles, descriptions, and comments to update documentation or generate release notes. Jira auto-trigger † manages a webhook so the agent can start updates when an issue changes. |
| Linear | OAuth 2.0 | A member with access to the issues | Read and write | Reads issue titles, descriptions, and comments to update documentation or generate release notes. |
| Confluence | OAuth 2.0 | An Atlassian account with access to the spaces, ideally a service account | Read and write | Reads pages and spaces as source material. With knowledge base management †, updates managed pages and their images and publishes changes back to Confluence. |
| Notion | OAuth 2.0 | A member with access to the pages | Read and write | Reads pages and databases, such as product specs and design documents, as source material. |
| Google Drive | OAuth 2.0 | A member with access to the files | Read and write | Searches, reads, creates, uploads, and organizes files and folders on behalf of the connecting account. |
| Slack | OAuth 2.0 (workspace app installation) | Slack workspace owner or administrator | Read and write | Reads channel, group, and direct message threads as source material, then posts drafts and diffs, adds reactions, and uploads files in reply. |
| PostHog | Personal API key with a selected region | A member who can create a personal API key | Read | Reads insights, HogQL query results, and feature flag configurations to ground release notes and feature documentation in usage data. |
| Pylon | API token | An administrator who can generate a Pylon API token | Read and write | Reads, updates, and creates help center articles, and publishes changes back to Pylon. |
| Atlassian Teamwork Graph | Atlassian API token, ideally a service-account token | An Atlassian administrator who can create a service-account token with read and search access | Read only | Searches your whole Confluence site to find source material across every space the account can access. It never writes back. |
## GitHub App permissions
[Section titled “GitHub App permissions”](#github-app-permissions)
The EkLine GitHub App requests these repository and organization permissions. GitHub shows the exact set on the installation screen before you approve it.
| Permission | Access | Why the app needs it |
| -------------------- | -------------- | --------------------------------------------------------------------------------------- |
| Contents | Read and write | Read repository files for context and commit documentation changes on a new branch. |
| Pull requests | Read and write | Read pull request details and open, update, and comment on documentation pull requests. |
| Issues | Read and write | Post and update comments, add labels, and react on pull request threads. |
| Metadata | Read | Baseline access GitHub requires for every app. |
| Organization members | Read | Confirm that a requester belongs to the connected organization. |
You choose which repositories the app can access when you install it — either all repositories or a selected list. EkLine acts only on the repositories you add under **Documentation Repositories** or **Code Repositories**.
## OAuth integration scopes
[Section titled “OAuth integration scopes”](#oauth-integration-scopes)
For OAuth 2.0 integrations, EkLine requests the scopes below. The provider lists them on its authorization screen when you connect, and the connecting account’s own permissions still bound what the agent can reach. A scope grants a capability — it does not mean the agent uses it in every session.
### Slack
[Section titled “Slack”](#slack)
Bot-token scopes granted when you install the app on your workspace:
| Scope | What it permits |
| ----------------------------------- | ------------------------------------------------------------ |
| `channels:read`, `channels:history` | List public channels and read their messages. |
| `groups:read`, `groups:history` | List private channels the bot is in and read their messages. |
| `im:read`, `im:history` | List direct message conversations and read them. |
| `mpim:read`, `mpim:history` | List group direct messages and read them. |
| `app_mentions:read` | Receive messages that mention the app. |
| `metadata.message:read` | Read message metadata. |
| `chat:write` | Post messages as the bot. |
| `reactions:read`, `reactions:write` | Read and add emoji reactions. |
| `files:read`, `files:write` | Read files shared in conversations and upload files. |
| `users:read` | Read workspace member profiles. |
| `users:read.email` | Read member email addresses. |
| `team:read` | Read workspace metadata. |
### Jira
[Section titled “Jira”](#jira)
| Scope | What it permits |
| ------------------------------------------------------------------- | --------------------------------------------------------------------------------------------------------- |
| `read:jira-work` | Read issues, comments, worklogs, and attachments. |
| `write:jira-work` | Create and edit issues, comments, and worklogs. |
| `read:jira-user` | Read user profiles and search for users. |
| `read:project:jira` | Read project metadata. |
| `read:issue-type-scheme:jira` | Read issue-type schemes. |
| `read:sprint:jira-software` | Read sprints. |
| `read:board-scope:jira-software`, `write:board-scope:jira-software` | Read and modify boards. |
| `manage:jira-project` | Administer projects, versions, and components. |
| `manage:jira-configuration` | Administer site-level Jira configuration. |
| `manage:jira-webhook` | Register and delete webhooks. The Jira auto-trigger † uses this to start a session when an issue changes. |
| `manage:jira-data-provider` | Register a data provider on the site. |
| `offline_access` | Keep the connection working after the access token expires. |
### Confluence
[Section titled “Confluence”](#confluence)
Confluence requests both the current granular scopes and Atlassian’s older classic scopes.
| Scope | What it permits |
| ---------------------------------------- | ----------------------------------------------------------- |
| `read:content:confluence` | Read content across the site. |
| `read:content-details:confluence` | Read detailed content information. |
| `read:content.metadata:confluence` | Read content metadata. |
| `read:page:confluence` | Read pages. |
| `read:blogpost:confluence` | Read blog posts. |
| `read:folder:confluence` | Read folders. |
| `read:custom-content:confluence` | Read custom content. |
| `read:attachment:confluence` | Read attachments. |
| `readonly:content.attachment:confluence` | Read content attachments. |
| `read:comment:confluence` | Read comments. |
| `read:template:confluence` | Read templates. |
| `read:label:confluence` | Read labels. |
| `read:space:confluence` | Read spaces. |
| `read:space-details:confluence` | Read space details. |
| `read:hierarchical-content:confluence` | Read hierarchical content, such as page trees. |
| `search:confluence` | Search content across the site. |
| `write:content:confluence` | Create and update content. |
| `write:page:confluence` | Create and update pages. |
| `write:blogpost:confluence` | Create and update blog posts. |
| `write:custom-content:confluence` | Create and update custom content. |
| `write:comment:confluence` | Create and update comments. |
| `write:label:confluence` | Add and remove labels. |
| `write:attachment:confluence` | Upload and update attachments. |
| `delete:attachment:confluence` | Delete attachments. |
| `read:audit-log:confluence` | Read the audit log. |
| `write:audit-log:confluence` | Write to the audit log. |
| `read:confluence-content.all` | Read all content (classic scope). |
| `read:confluence-content.summary` | Read content summaries (classic scope). |
| `read:confluence-space.summary` | Read space summaries (classic scope). |
| `write:confluence-content` | Create and update content (classic scope). |
| `offline_access` | Keep the connection working after the access token expires. |
### Notion
[Section titled “Notion”](#notion)
| Scope | What it permits |
| ---------------- | --------------------------------------------- |
| `read:user` | Read the connected account’s Notion profile. |
| `read:content` | Read pages and databases the account can see. |
| `write:content` | Create pages and blocks. |
| `update:content` | Update existing pages and blocks. |
### Linear
[Section titled “Linear”](#linear)
| Scope | What it permits |
| ----------------- | ------------------------------------------- |
| `read` | Read issues, comments, projects, and teams. |
| `write` | Create and update Linear resources. |
| `issues:create` | Create issues. |
| `comments:create` | Create comments. |
### Google Drive
[Section titled “Google Drive”](#google-drive)
| Scope | What it permits |
| ------------------------------------------------ | --------------------------------------------------------------- |
| `https://www.googleapis.com/auth/drive` | Full read and write access to the files in the account’s Drive. |
| `https://www.googleapis.com/auth/userinfo.email` | Read the account’s email address. |
## Access token and API key scopes
[Section titled “Access token and API key scopes”](#access-token-and-api-key-scopes)
These integrations connect with a token you create in the provider. You control the scopes and role when you create the token.
### GitLab
[Section titled “GitLab”](#gitlab)
Create a group, project, or personal access token with both of these scopes. EkLine validates that both are present and rejects a token that is missing either.
| Scope | What it permits |
| ----------------- | --------------------------------------------------------------------------------------------------------------------------------------------------------------------- |
| `api` | Full read and write API access — repositories, merge requests, and issues — within the token’s role. Docs Agent uses this to read content and to open merge requests. |
| `read_repository` | Read repository files over HTTPS. |
A group access token requires the Owner role to create. The token’s role also bounds what it can do: choose the Developer role or higher so the agent can open merge requests in your documentation projects.
### PostHog
[Section titled “PostHog”](#posthog)
PostHog uses a personal API key rather than OAuth, so there is no EkLine-defined scope list. You create the key in PostHog, choose its scopes there, and paste the key and your region into EkLine. The key is only as broad as you make it, so grant it the minimum PostHog scopes the agent needs to read insights, run HogQL queries, and read feature flags.
### Pylon
[Section titled “Pylon”](#pylon)
Pylon uses an API token that an administrator generates in Pylon. The token carries the permissions of the Pylon account that created it. The agent reads, updates, and creates help center articles within those permissions.
### Atlassian Teamwork Graph
[Section titled “Atlassian Teamwork Graph”](#atlassian-teamwork-graph)
Teamwork Graph uses an Atlassian API token, ideally on a service account. Grant the account read and search access to only the Confluence spaces the agent should search. The connection is read-only — it searches and reads, and never writes back.
## Webhooks
[Section titled “Webhooks”](#webhooks)
GitHub and GitLab send events to EkLine over webhooks so the agent can react to pull requests, merge requests, and comments:
* **GitHub** verifies each delivery with a signed secret before EkLine processes it.
* **GitLab** verifies each delivery against a per-project secret token that EkLine generates and stores encrypted.
## Requesting access and revoking access
[Section titled “Requesting access and revoking access”](#requesting-access-and-revoking-access)
* **Requesting access.** Docs Agent is available on all plans on request. Contact to enable Docs Agent, and to turn on any integration marked † above.
* **Revoking access.** Remove an OAuth connection from the provider or from **Settings > Organization > Integrations** in EkLine. Revoke an access token or API key in the provider to cut off a token-based integration, or uninstall the GitHub App from your GitHub organization settings.
## Related pages
[Section titled “Related pages”](#related-pages)
* [Connect GitHub to EkLine Docs Agent](/agent/github-app-setup) — Install the GitHub App and select repositories.
* [Connect GitLab to EkLine Docs Agent](/agent/gitlab-setup) — Add a scoped access token and configure the webhook.
* [Connect Atlassian Teamwork Graph](/agent/teamwork-graph-setup) — Add an Atlassian API token for whole-site Confluence search.
* [Docs Agent integrations](/agent/integrations) — Reference content from each connected source in your prompts.
* [Manage a Confluence or Pylon knowledge base](/agent/manage-knowledge-base) — Let the agent update pages and publish changes back.
# Create documentation with Docs Agent
> Generate new documentation from your codebase, video uploads, screenshots, or external sources.
Use create mode when you need documentation that doesn’t exist yet. The agent can generate content from your code, uploaded videos, or content pulled from integrations.
## From your codebase
[Section titled “From your codebase”](#from-your-codebase)
The agent analyzes your repository structure, source files, package configuration, and existing documentation to generate new content.
### README files
[Section titled “README files”](#readme-files)
Generate a comprehensive README when starting a new project or updating an outdated one.
```plaintext
Generate a README for this repository. Include:
- Project overview and key features
- Installation with npm and yarn
- Quick start example
- Configuration options
- Contributing guidelines
```
**Tips:**
* Mention specific sections you need.
* Reference example code: `"Include examples similar to /examples"`
* Specify the audience: `"Write for developers familiar with React"`
### API reference
[Section titled “API reference”](#api-reference)
Document endpoints, functions, or modules from your source code.
```plaintext
Document the authentication endpoints in src/api/auth.ts.
Include request parameters, response schema, example
requests, and error codes.
```
The agent extracts and documents:
* Endpoint URLs and HTTP methods
* Request parameters with types and descriptions
* Response schema with field descriptions
* Example request and response bodies
* Error responses and status codes
### How-to guides
[Section titled “How-to guides”](#how-to-guides)
Create task-oriented guides for common workflows.
```plaintext
Create a how-to guide for setting up local development.
Cover environment setup, database configuration, and
running the test suite.
```
### Getting started guides
[Section titled “Getting started guides”](#getting-started-guides)
Help new users or contributors get up and running.
```plaintext
Write a getting started guide for new contributors.
Include repo setup, coding standards, and how to
submit a pull request.
```
## From video uploads
[Section titled “From video uploads”](#from-video-uploads)
Upload product demos, tutorials, or walkthroughs to generate documentation. The agent transcribes the video and creates structured content from what it sees and hears.
Supported formats
**Video formats:** MP4, WebM, MOV, AVI, MPEG, OGG **Maximum size:** 500 MB
### How it works
[Section titled “How it works”](#how-it-works)
1. Click the attachment icon in the chat panel.
2. Select your video file.
3. Wait for processing. Transcription may take a few minutes.
4. Describe what documentation you need.
### Example prompts
[Section titled “Example prompts”](#example-prompts)
* Tutorial from demo
```plaintext
Create a step-by-step tutorial from this product demo.
Include descriptions of each screen and action shown.
```
* Feature overview
```plaintext
Write a feature overview document based on this
walkthrough video. Focus on the key capabilities
demonstrated.
```
* Release notes
```plaintext
Generate release notes from this demo of new features.
Summarize each feature shown for end users.
```
## From screenshots and images
[Section titled “From screenshots and images”](#from-screenshots-and-images)
Upload screenshots, diagrams, or other images and the agent inserts them directly into your documentation. The agent sees the image content and places it in the appropriate location within your repository.
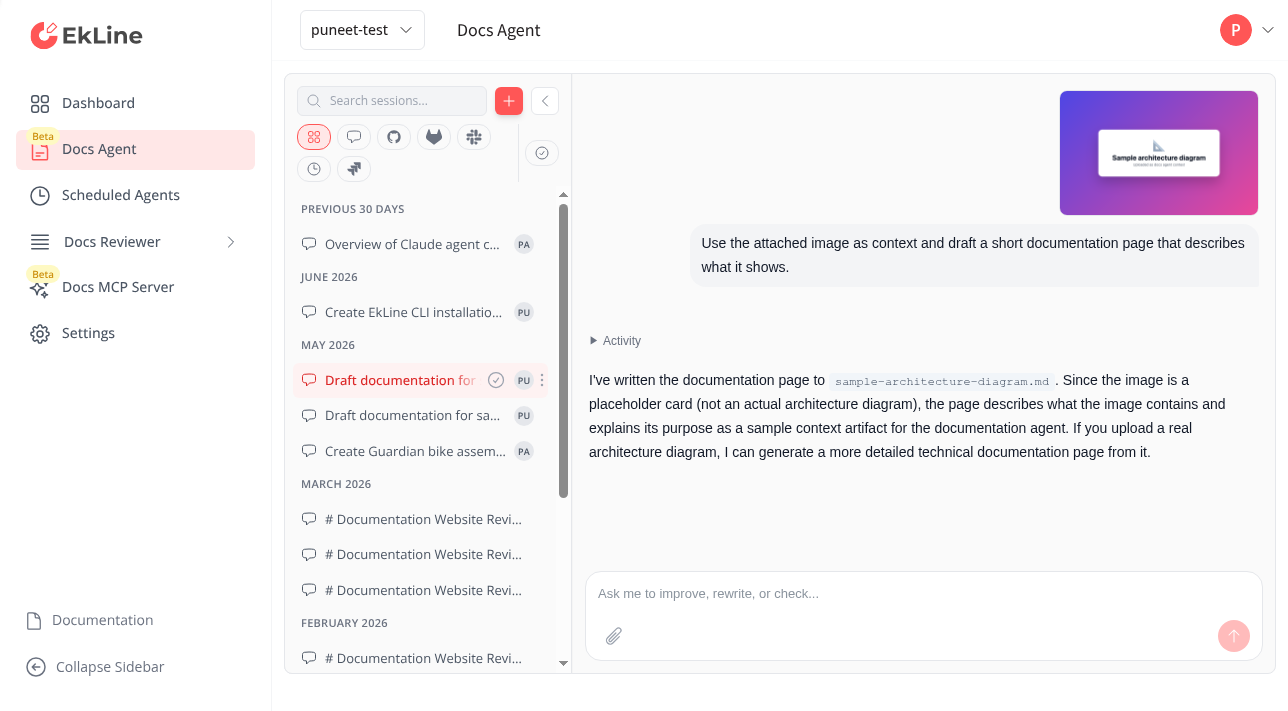
Supported formats
**Image formats:** JPEG, PNG, GIF, WebP **Maximum size:** 50 MB
### How it works
[Section titled “How it works”](#how-it-works-1)
1. Click the attachment icon in the chat panel.
2. Select your image file.
3. Describe where and how you want the image placed.
4. The agent downloads the image into your repository and adds a markdown reference.
The agent can see image content, so it understands what the screenshot shows and can write appropriate alt text and captions.
### Example prompts
[Section titled “Example prompts”](#example-prompts-1)
* Insert screenshot
```plaintext
Insert this screenshot into the getting started guide
after the installation section. Add a caption describing
what the user should see.
```
* Add diagram
```plaintext
Add this architecture diagram to the overview page.
Place it after the "How it works" section.
```
* Multiple images
```plaintext
Add these screenshots to the deployment guide. Place
each one next to the step it illustrates.
```
Tip
Image drafts preview in the editor panel — select the file to see it, and click the preview to open it larger. Other binary files appear as placeholders, so check the markdown references in the surrounding document to confirm placement.
## From external sources
[Section titled “From external sources”](#from-external-sources)
Pull content from connected integrations to create documentation. See [Integrations](/agent/integrations) to connect your tools.
### From Slack threads
[Section titled “From Slack threads”](#from-slack-threads)
Turn support conversations and internal discussions into structured documentation.
```plaintext
Create a troubleshooting guide based on this Slack thread:
https://workspace.slack.com/archives/C01234/p1234567890
```
The agent extracts the conversation, identifies the problem and solution, and formats it as documentation. For the full Slack bot workflow, see [Turn a Slack support thread into a troubleshooting doc](/agent/slack-thread-to-troubleshooting-doc/).
### From Notion pages
[Section titled “From Notion pages”](#from-notion-pages)
Transform product specs, design documents, or meeting notes into user-facing docs.
```plaintext
Create API documentation based on the spec in this Notion page:
https://notion.so/your-workspace/api-spec-page
```
### From Confluence pages
[Section titled “From Confluence pages”](#from-confluence-pages)
Pull technical specifications or internal knowledge into your docs.
```plaintext
Create a deployment guide based on the runbook in this
Confluence page: https://your-org.atlassian.net/wiki/...
```
### Release notes from tickets
[Section titled “Release notes from tickets”](#release-notes-from-tickets)
Generate changelogs from completed Linear or Jira tickets.
```plaintext
Generate release notes for v2.1 based on Linear tickets
ENG-100 through ENG-110. Organize by Features,
Improvements, and Bug Fixes. Write for end users.
```
The agent reads each ticket’s title, description, and comments to create user-facing summaries.
## Tips for better output
[Section titled “Tips for better output”](#tips-for-better-output)
Write better prompts
* **Be specific about sections** — List exactly what you want included.
* **Reference existing docs** — `"Match the style of docs/quickstart.md"`.
* **Specify the audience** — `"Write for developers new to Kubernetes"`.
* **Mention your stack** — `"This is a Django project using PostgreSQL"`.
* **Set the tone** — `"Keep it concise and focus on practical examples"`.
# Create documentation from a demo video
> Upload a product demo or walkthrough video and use Docs Agent to turn it into a review-ready guide in a pull request.
Request access
Docs Agent is available to all plans, but we grant access on request. Contact to request access.
This tutorial shows you how to turn a product demo video into written documentation. You upload a walkthrough, Docs Agent transcribes it and reads what happens on screen, and you guide the agent to produce a structured guide that matches your existing docs.
By the end, you have a step-by-step guide drafted from your video and opened as a pull request, ready for review.
## Before you begin
[Section titled “Before you begin”](#before-you-begin)
You need:
* An EkLine account with Docs Agent enabled.
* A repository [connected to EkLine](/agent/github-app-setup/) where the documentation lives.
* A demo or walkthrough video that shows the feature you want to document.
Your video must meet these limits:
| Requirement | Value |
| ------------ | ------------------------- |
| Formats | MP4, WebM, MOV, AVI, MPEG |
| Maximum size | 500 MB |
New to EkLine? [Connect GitHub to EkLine](/agent/github-app-setup/) first, then return here.
## Step 1: Prepare your demo video
[Section titled “Step 1: Prepare your demo video”](#step-1-prepare-your-demo-video)
A clear video produces a clear draft. Before you upload, check the following:
* **Narrate the important actions.** The agent transcribes the audio, so spoken explanations become part of the source material.
* **Move at a steady pace.** Pause briefly on each screen so the actions are easy to follow.
* **Trim dead air.** Cut long silences or unrelated tangents to keep the transcription focused.
* **Confirm the format and size.** Export as MP4, WebM, MOV, AVI, or MPEG, and keep the file under 500 MB.
A three-to-ten-minute screen recording with narration works well for a single feature.
## Step 2: Open a session
[Section titled “Step 2: Open a session”](#step-2-open-a-session)
1. Log in to your [EkLine dashboard](https://ekline.io/dashboard).
2. Click **Docs Agent** in the left navigation.
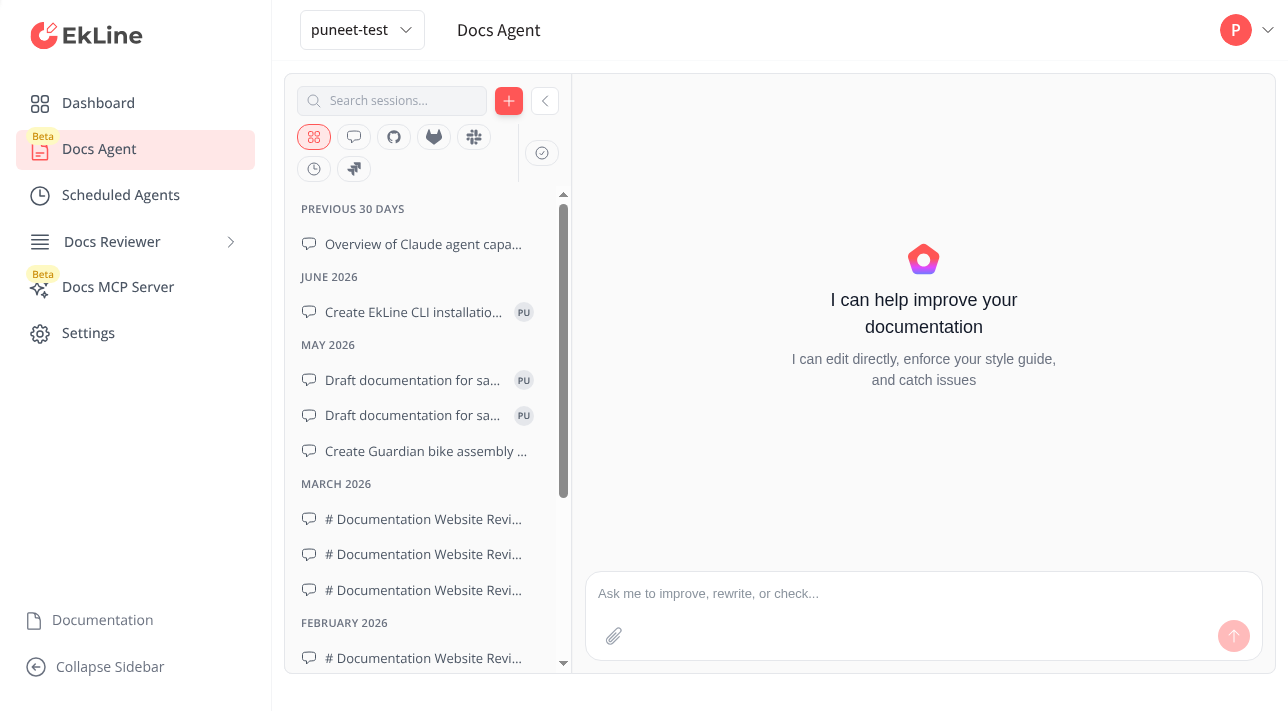
## Step 3: Upload your video
[Section titled “Step 3: Upload your video”](#step-3-upload-your-video)
1. Click the attachment icon in the chat panel.
2. Select your video file.
3. Wait for processing. Transcription runs before the agent can use the video, and it may take a few minutes for a longer recording.
The video appears as an attachment in the chat panel once processing finishes.
Tip
You can attach up to 20 files to a single message. To illustrate the guide with a moment from the recording, ask the agent to [capture that frame as a screenshot](/agent/screenshots-from-video/) instead of taking one yourself.
## Step 4: Describe the documentation you want
[Section titled “Step 4: Describe the documentation you want”](#step-4-describe-the-documentation-you-want)
Tell the agent what to build from the video. Naming the document type and audience keeps the output focused.
* Step-by-step tutorial
```plaintext
Create a step-by-step tutorial from this product demo.
Describe each screen and action shown, and write it for a
new user trying the feature for the first time.
```
* Feature overview
```plaintext
Write a feature overview based on this walkthrough video.
Focus on the key capabilities demonstrated and who they
help.
```
* Release notes
```plaintext
Generate release notes from this demo of new features.
Summarize each feature shown for end users.
```
To match your existing docs, point the agent at a similar page:
```plaintext
Create a step-by-step tutorial from this demo video. Match the
structure and tone of docs/tutorials/getting-started.md.
```
The agent analyzes the transcription and the on-screen content, then drafts the guide in the editor panel.
## Step 5: Review the draft
[Section titled “Step 5: Review the draft”](#step-5-review-the-draft)
Read the draft in the editor panel and check it against the video:
* The steps follow the same order as the demo.
* Screen names, button labels, and menu paths match what the video shows.
* The guide covers every action you demonstrated, with nothing invented.
Refine anything that is off by replying in the chat. For example:
```plaintext
Add a verification step after the install section that tells the
reader what a successful setup looks like.
```
The agent updates the draft in place. Repeat until the guide reads the way you want.
## Step 6: Publish as a pull request
[Section titled “Step 6: Publish as a pull request”](#step-6-publish-as-a-pull-request)
1. Enable **View All Changes** to see a diff of what the agent created.
2. Click **Raise PR** to open a pull request with the new guide.
3. The agent prefills a prompt in the chat. Press **Enter** to send it, or edit the prompt first to add instructions.
The agent opens the pull request and replies in the chat with a link where you continue the review on GitHub.
## Verify
[Section titled “Verify”](#verify)
Confirm the tutorial worked end to end:
* [ ] The uploaded video appears as an attachment in the chat panel.
* [ ] The editor panel shows a drafted guide that follows the demo.
* [ ] A pull request is open on your connected repository with the new file.
## Troubleshooting
[Section titled “Troubleshooting”](#troubleshooting)
| Issue | Solution |
| ----------------------------------------- | ----------------------------------------------------------------------------------------------------------------- |
| Upload is rejected | Check that the file is under 500 MB and in a supported format (MP4, WebM, MOV, AVI, MPEG). |
| Processing takes a long time | Transcription scales with video length. Wait a few minutes for longer recordings before sending your prompt. |
| The draft misses steps shown in the video | Narrate the missing actions in the recording, or describe them in a chat reply so the agent adds them. |
| Screen labels in the draft are wrong | Reply in the chat with the correct label and ask the agent to fix it. Attaching a screenshot of the screen helps. |
## Summary
[Section titled “Summary”](#summary)
You uploaded a demo video, guided Docs Agent to turn it into a structured guide, reviewed the draft against the recording, and opened a pull request. Your walkthrough is now written documentation your team can review and merge.
## Next steps
[Section titled “Next steps”](#next-steps)
* [Create documentation](/agent/create/) — Generate docs from your codebase, screenshots, and external sources.
* [Update and review documentation](/agent/update-review/) — Keep the guide in sync as the feature changes.
* [Generate an API reference](/agent/generate-api-reference/) — Turn source code into reference documentation.
# Customize Docs Agent for your organization
> Add custom instructions so Docs Agent writes documentation that follows your team's conventions, terminology, and style.
Docs Agent learns your documentation style from your existing docs, but some conventions can’t be inferred from your code or files alone — your preferred spelling, the purpose of each repository, which versions you support, or the terms your team standardizes on. Custom instructions let you give the agent this context once and have it apply the context to every session your organization runs.
Use this guide to add custom instructions and confirm the agent follows them.
## Before you begin
[Section titled “Before you begin”](#before-you-begin)
You need:
* An EkLine account with Docs Agent enabled
* At least one repository [connected to EkLine](/agent/github-app-setup/)
Any member of your organization can edit custom instructions.
## Add custom instructions
[Section titled “Add custom instructions”](#add-custom-instructions)
1. Log in to your [EkLine dashboard](https://ekline.io/dashboard).
2. Go to **Settings > Organization > Docs Agent**.
3. Find the **Custom instructions** section.
4. In the **Custom Instructions** field, enter the guidance you want the agent to follow. You can enter up to 5,000 characters.
5. Click **Refresh Docs Agent Instructions**. EkLine saves your instructions and regenerates the agent configuration. A progress indicator shows each stage, and a success message confirms when the update is complete.
The agent applies your instructions to every new session for your organization, whether you start it in the editor or trigger it from a [GitHub pull request](/agent/github-integration/), [GitLab merge request](/agent/gitlab-integration/), or [Slack](/agent/slack-bot/).
Note
Custom instructions apply to sessions started after you refresh. Refresh again whenever you change them so the agent picks up the update.
## What to include
[Section titled “What to include”](#what-to-include)
Write custom instructions the way you would brief a new technical writer joining your team. Focus on context the agent can’t get from reading your code:
* **Style preferences** — Spelling, capitalization, and voice. For example, `"Use American English spelling and sentence case for headings."`
* **Terminology** — Terms to prefer or avoid. For example, `"Refer to the product as EkLine, never Ekline or ekline."`
* **Repository context** — What each repository is for. For example, `"The api-gateway repo handles authentication and rate limiting; the web repo is the customer dashboard."`
* **Documentation structure** — How your docs are organized. For example, `"Place how-to guides in docs/guides and reference material in docs/reference."`
* **Versions and audience** — Which versions to document and who reads the docs. For example, `"Document v2 of the API only. Write for backend developers familiar with REST."`
Tip
Point the agent at a file in your repository for details that change often: `"Follow the writing conventions in docs/STYLE_GUIDE.md."` The agent reads the file during each session, so you don’t have to duplicate its contents here.
### Example custom instructions
[Section titled “Example custom instructions”](#example-custom-instructions)
* Style and terminology
```plaintext
Use American English spelling and sentence case for headings.
Refer to the product as EkLine. Use "sign in" as a verb and
"sign-in" as an adjective. Write in the second person and
active voice.
```
* Repository context
```plaintext
The api-gateway repository handles authentication and rate
limiting. The web repository is the customer dashboard. When
documenting endpoints, link to the matching guide in the docs
repository under docs/guides.
```
* Structure and audience
```plaintext
Follow the Diataxis framework: tutorials, how-to guides,
reference, and explanation each live in their own folder.
Write for developers new to Kubernetes. Document v2 of the
API only.
```
## Verify the agent follows your instructions
[Section titled “Verify the agent follows your instructions”](#verify-the-agent-follows-your-instructions)
1. Open the editor and start a new session.
2. Ask the agent to create or update a document — for example, `"Generate a README for this repository."`
3. Review the output for the conventions you specified. Check spelling, heading case, terminology, and structure against your instructions.
If the output doesn’t reflect an instruction, make it more specific and refresh again. Short, concrete directions work better than long, general ones.
## How custom instructions relate to style learning
[Section titled “How custom instructions relate to style learning”](#how-custom-instructions-relate-to-style-learning)
Custom instructions work alongside the agent’s automatic style learning. The agent still analyzes your existing documentation for heading structure, code example conventions, terminology, and file organization. Custom instructions add the context the agent can’t infer from your docs — and take precedence when your existing docs are inconsistent.
For more on how the agent learns your style, see [How does the agent know my documentation style?](/agent/reference/#how-does-the-agent-know-my-documentation-style) in the reference.
Custom instructions shape *how* the agent writes across every session. To package a multi-step workflow your team repeats and run it with a command, [author a skill](/agent/custom-skills).
## Troubleshooting
[Section titled “Troubleshooting”](#troubleshooting)
### The Docs Agent settings page isn’t available
[Section titled “The Docs Agent settings page isn’t available”](#the-docs-agent-settings-page-isnt-available)
Docs Agent access is granted on request. If you don’t see **Settings > Organization > Docs Agent**, email **** with your organization name to request access.
### The refresh fails or shows an error
[Section titled “The refresh fails or shows an error”](#the-refresh-fails-or-shows-an-error)
The refresh clones your connected repositories to regenerate the agent configuration. If it fails:
* Verify that at least one repository is [connected to EkLine](/agent/github-app-setup/).
* Check that your instructions are within the 5,000-character limit.
* Try refreshing again. If the error persists, contact **** with the error message shown.
### The agent ignores an instruction
[Section titled “The agent ignores an instruction”](#the-agent-ignores-an-instruction)
* Make the instruction more specific and concrete.
* Point to a file in your repository instead of describing a long convention inline.
* Confirm you clicked **Refresh Docs Agent Instructions** after your most recent edit — changes apply only to sessions started after a refresh.
## Next steps
[Section titled “Next steps”](#next-steps)
* [Package a workflow as a skill](/agent/custom-skills) — Turn a procedure your team repeats into a command anyone can run.
* [Create documentation](/agent/create/) — Generate READMEs, API references, and guides that follow your instructions.
* [Update and review](/agent/update-review/) — Keep docs in sync with code changes.
* [Docs Agent reference](/agent/reference/) — Supported file types, limits, and FAQ.
# Package a workflow as a skill
> Author a Docs Agent skill so your team can run a repeatable documentation workflow with a slash command.
[Custom instructions](/agent/custom-instructions) tell Docs Agent *how* to write across every session. A skill goes one step further: it packages a **workflow your team repeats**. This might be your release-notes procedure, your API-reference checklist, or the steps you follow to turn a support thread into a troubleshooting doc. Anyone can run it in a session by typing a slash command.
Each skill has three parts: a **name**, a description of **when to use it**, and the **instructions** the agent follows. You author it once for your organization, and EkLine copies it into every new Docs Agent session. You run it on demand by typing its command, and the agent also reaches for it on its own when a task matches the skill’s description.
Use this guide to create a skill, run it, and manage the skills your organization has.
## Before you begin
[Section titled “Before you begin”](#before-you-begin)
You need:
* An EkLine account with Docs Agent enabled
* At least one repository [connected to EkLine](/agent/github-app-setup)
Any member of your organization can create and edit skills.
## Create a skill
[Section titled “Create a skill”](#create-a-skill)
1. Log in to your [EkLine dashboard](https://ekline.io/dashboard).
2. Go to **Settings > Organization > Docs Agent**.
3. Find the **Skills** section and click **Add skill**.
4. In the **Name** field, enter a short name for the workflow, such as `Release notes checklist`. As you type, the editor shows the slash command you use to run the skill — for example, `/custom-release-notes-checklist`. You can enter up to 100 characters.
5. In the **When to use it** field, describe the situations the skill applies to, such as `Use when preparing release notes for a new product version.` The agent reads this to decide when to reach for the skill on its own, so be specific. You can enter up to 1,000 characters.
6. In the **Instructions** field, write the steps the agent should follow, in order. You can enter up to 50,000 characters.
7. Click **Save skill**. EkLine adds the skill to your list, where its command appears next to its name.
The skill applies to every new session your organization starts after you save it. You can start a session in the editor or trigger the skill from a [GitHub pull request](/agent/github-integration), [GitLab merge request](/agent/gitlab-integration), or [Slack](/agent/slack-bot).
Note
Skills apply to sessions started after you save. A session already running doesn’t pick up a skill you create or change while it’s open — start a new session to use the latest version.
### How the command is named
[Section titled “How the command is named”](#how-the-command-is-named)
The agent runs your skill when you type its slash command. EkLine builds the command from the skill’s name: it lowercases the name, replaces spaces and punctuation with hyphens, and adds a `custom-` prefix. `Release notes checklist` becomes `/custom-release-notes-checklist`.
The `custom-` prefix keeps your skills separate from the agent’s built-in commands, so a skill you name after an existing command still runs. Because the command follows the name, renaming a skill changes its command — tell your team when you rename one they use.
Note
Two skills can’t share a command. If you name a skill so that it reduces to a command another skill already uses — `Release Notes Checklist` and `release-notes checklist!` both become `/custom-release-notes-checklist` — EkLine rejects the second one. Give it a distinct name.
## Write effective instructions
[Section titled “Write effective instructions”](#write-effective-instructions)
Write instructions the way you’d hand a runbook to a teammate doing the task for the first time. The agent has your repositories, your [custom instructions](/agent/custom-instructions), and its connected integrations available while it works — your skill supplies the procedure to follow.
* **Number the steps.** Order the work so the agent moves from gathering sources to drafting to review.
* **Name your sources.** Point the agent at the files, integrations, or pages each step draws on.
* **State the output.** Describe the document to produce, where it belongs, and the format it follows.
* **Set the guardrails.** Call out what to include, what to leave out, and when to stop and ask.
- Release notes
```plaintext
Draft release notes for the version the user names.
1. Read the merged pull requests since the last release tag.
2. Group the changes into Added, Changed, Fixed, and Removed.
3. Write one user-facing sentence per change in our house style.
4. Open the release notes page and add the new version at the top.
5. Leave internal refactors and dependency bumps out.
```
- API reference check
```plaintext
Check that our API reference matches the code.
1. Read the endpoint definitions in the api-gateway repository.
2. Compare each one against its entry in docs/reference/api.
3. Flag endpoints that are missing, renamed, or have changed
parameters.
4. Draft the updates and list every change you made.
```
## Run a skill
[Section titled “Run a skill”](#run-a-skill)
1. Open the editor and start a new session.
2. Type the skill’s command — for example, `/custom-release-notes-checklist` — and add any detail the workflow needs, such as the version to document.
3. The agent follows your instructions and reports what it did.
You don’t have to type the command every time. The agent reads each skill’s **When to use it** description and can choose a skill when your request matches. Ask for release notes in plain language, and the agent applies your release-notes skill.
## Manage your skills
[Section titled “Manage your skills”](#manage-your-skills)
The **Skills** section lists every skill your organization has. For each one, you can:
* **Edit** — Click the edit icon to change the name, description, or instructions, then click **Save skill**.
* **Enable or disable** — Use the toggle to turn a skill on or off. A disabled skill stays in your list but doesn’t reach new sessions, so its command doesn’t run. Turn a skill off while you’re revising it, or to retire it without losing the instructions.
* **Delete** — Click the delete icon to remove a skill. It disappears from your next session.
## How skills relate to custom instructions
[Section titled “How skills relate to custom instructions”](#how-skills-relate-to-custom-instructions)
Skills and [custom instructions](/agent/custom-instructions) solve different problems, and most organizations use both:
* **Custom instructions** shape *how* the agent writes — spelling, terminology, repository context — and apply to every session automatically.
* **Skills** package *a workflow you repeat* — a named procedure you run on demand with a command, or that the agent runs when the task matches.
Put a convention that should hold across all writing in custom instructions. Put a multi-step task you run again and again into a skill.
## Troubleshooting
[Section titled “Troubleshooting”](#troubleshooting)
### The Docs Agent settings page isn’t available
[Section titled “The Docs Agent settings page isn’t available”](#the-docs-agent-settings-page-isnt-available)
You can request Docs Agent access. If you don’t see **Settings > Organization > Docs Agent**, email **** with your organization name to request access.
### The agent doesn’t run the skill
[Section titled “The agent doesn’t run the skill”](#the-agent-doesnt-run-the-skill)
* Confirm the skill is enabled. A disabled skill doesn’t reach new sessions.
* Start a new session. Skills apply only to sessions started after you save.
* Check the command. Type it exactly as it appears next to the skill’s name, including the `custom-` prefix.
### The agent runs the wrong skill, or none, from a plain-language request
[Section titled “The agent runs the wrong skill, or none, from a plain-language request”](#the-agent-runs-the-wrong-skill-or-none-from-a-plain-language-request)
The agent chooses a skill by matching your request against each skill’s **When to use it** description. Make the description more specific about when the skill applies, or type the command directly to run the skill you want.
## Next steps
[Section titled “Next steps”](#next-steps)
* [Customize Docs Agent for your organization](/agent/custom-instructions) — Add custom instructions that apply to every session.
* [Scheduled agents](/agent/scheduled-agents) — Run documentation tasks on a recurring schedule.
* [Docs Agent reference](/agent/reference) — Supported file types, limits, and FAQ.
# Docs Agent Discord bot
> Start documentation drafts from Discord by mentioning EkLine in a server thread and reading the reply in the same thread.
Request access
Docs Agent is available to all plans, but we grant access on request. Contact **** to request access.
Create documentation without leaving Discord. Mention the EkLine bot in any channel or thread on a connected server, and Docs Agent replies in the same thread with a draft you can review and edit in EkLine.
## Prerequisites
[Section titled “Prerequisites”](#prerequisites)
Before you begin, you need:
* An EkLine organization account.
* Discord server administrator access to authorize the app.
* Docs Agent access enabled for your organization.
## Connect your Discord server
[Section titled “Connect your Discord server”](#connect-your-discord-server)
1. Go to **Settings > Organization > Integrations** in your EkLine dashboard.
2. Find **Discord** in the integrations list.
3. Click **Connect**.
4. Authorize EkLine to access your Discord server in the authorization popup.
5. Select the server to connect, then complete the authorization flow.
6. Verify the integration shows as **Connected**.
Connecting a server maps it to your EkLine organization, so mentions from that server run under your organization’s Docs Agent access. Once connected, anyone in the server can mention the EkLine bot to start a draft.
## Create documentation from Discord
[Section titled “Create documentation from Discord”](#create-documentation-from-discord)
1. In any channel or thread on the connected server, mention the EkLine bot followed by your request.
```plaintext
@EkLine create a troubleshooting guide based on this discussion
```
2. Read the acknowledgment. The bot confirms it picked up your request, then works on the draft. Docs Agent posts the finished answer once, rather than streaming its progress step by step.
3. Read Docs Agent’s reply in the same thread. Long answers arrive as more than one message because Discord limits the length of a single message.
Mention the bot in servers, not direct messages
The bot answers mentions inside a connected server. It does not respond to direct messages, because a direct message carries no server to resolve to your organization.
## Review and edit in EkLine
[Section titled “Review and edit in EkLine”](#review-and-edit-in-ekline)
Each Discord mention starts a Docs Agent session. The session appears in your session list in the EkLine app, tagged with the **Discord** source, so you can open it to review the draft, refine it, and open a pull request. To find it, filter the session list by source. See [Find your sessions](/agent/find-sessions).
## Context the bot captures
[Section titled “Context the bot captures”](#context-the-bot-captures)
The bot reads the conversation around your mention to produce accurate documentation:
| Context type | What the bot captures |
| --------------- | ------------------------------------------------------------------------------------------------- |
| Thread messages | Up to the last 20 messages in the thread, oldest first, so the agent reads the exchange in order. |
| Your request | The text of your mention, with the bot mention removed. |
Get better results
Mention the bot in threads with relevant discussion. The more context in the thread, the more accurate the generated documentation.
## Write effective prompts
[Section titled “Write effective prompts”](#write-effective-prompts)
The quality of your prompt determines the quality of the output.
| Instead of… | Try… |
| ---------------- | ------------------------------------------------------------------------- |
| “help with docs” | “Create a troubleshooting guide for the API timeout issue discussed here” |
| “document this” | “Write a how-to guide for the workaround Sarah described” |
| “make docs” | “Update the authentication docs based on the new flow we agreed on” |
**Include specific details:**
* Reference the type of documentation you need: tutorial, how-to guide, reference, troubleshooting.
* Name specific topics or features from the conversation.
* Mention existing documentation to update if applicable.
* Point to URLs or ticket IDs for more context.
## Troubleshooting
[Section titled “Troubleshooting”](#troubleshooting)
| Issue | Solution |
| ------------------------------------------------------------------------ | ------------------------------------------------------------------------------------------------------------------------------- |
| Bot does not respond in a direct message | Mention the bot in a channel or thread on a connected server. The bot does not answer direct messages. |
| “This server isn’t connected to EkLine” | Ask a server administrator to connect the server in **Settings > Organization > Integrations**. |
| “This server is connected, but its EkLine organization has no API token” | Someone with EkLine access needs to set up an API token for the organization. Contact **** if you need help. |
| “I couldn’t reach EkLine just now” | The lookup could not reach EkLine. Wait a moment and mention the bot again. |
| Reply arrives as several messages | Discord limits the length of a single message, so Docs Agent splits long answers across messages. Read them in order. |
| Draft does not match expectations | Give more specific instructions in your mention. Include the documentation type and key topics to cover. |
## Next steps
[Section titled “Next steps”](#next-steps)
* [Docs Agent Slack bot](/agent/slack-bot): Create documentation drafts from Slack channels and threads.
* [Find your sessions](/agent/find-sessions): Open, filter, and manage every Docs Agent session, including sessions started from Discord.
* [Create documentation](/agent/create): Generate READMEs, API references, and guides from your codebase.
* [Integrations](/agent/integrations): Connect Notion, Linear, Jira, and other tools.
# Crop, redact, and annotate documentation images
> Use Docs Agent to make a raw screenshot publishable: crop it to the element it shows, cover personal information, and add highlights, arrows, and callouts.
Request access
Docs Agent is available to all plans, but we grant access on request. Contact to request access.
A raw screenshot is rarely publishable. It shows the whole browser window when the reader needs one panel. It carries a real customer’s name and email in the corner, and nothing in it points at the control the surrounding paragraph describes.
Docs Agent makes those three edits for you. Ask it to crop an image to what the page is about, cover information that must not reach public documentation, or mark up the part of the interface your prose refers to. This guide covers each edit on its own, then how to combine them in a single pass.
## Before you begin
[Section titled “Before you begin”](#before-you-begin)
You need:
* An EkLine account with Docs Agent enabled.
* A repository [connected to EkLine](/agent/github-app-setup) that holds both your documentation pages and their image files.
* At least one image the agent can reach as a file. That means an image already committed to your connected repository, one the agent captured itself from a [sandbox](/agent/sandbox), or a frame it [extracted from a video](/agent/screenshots-from-video).
Which images the agent can edit
The agent edits image files it can open in the session. These include images from your connected repository, a sandbox capture, a video frame, or a Confluence page it retrieved while [managing a knowledge base](/agent/manage-knowledge-base). An image you attach to a chat message is different: the agent can see it and describe it, but it has no file to edit. To retouch a screenshot you have on your machine, commit it to your documentation repository first.
The agent edits PNG and JPEG files. It leaves vector images such as SVG untouched.
## Crop an image to what it shows
[Section titled “Crop an image to what it shows”](#crop-an-image-to-what-it-shows)
An uncropped capture makes the reader hunt. Cropping to the element the image depicts is the single edit that improves most screenshots.
1. Open the Docs Agent editor and start a new session.
2. Name the image and what it should show:
```text
Crop the screenshot in our billing guide so it shows only
the Payment method panel, not the whole page.
```
3. Open the edited image from the file list to review it. It renders in the editor pane, and you can click it to open it full size.
4. Click **Raise PR** to open a pull request with the cropped image. The button prefills a chat message — send it, and the agent opens the pull request.
The agent matches the padding, width, and light or dark theme of the images already beside it on the page, so a recropped image doesn’t stand out from its neighbors. It cuts what doesn’t illustrate the point — unrelated sidebars, panels, and toolbars — while keeping the page header or navigation item a reader needs to orient.
## Hide personal information
[Section titled “Hide personal information”](#hide-personal-information)
Screenshots taken against a real account carry real data: names, email addresses, phone numbers, billing details, API tokens, and faces. Published to public documentation, that data is out of your control.
1. Tell the agent which image and what to hide:
```text
The dashboard screenshot in our getting-started guide shows a
real customer's name, email, and account ID. Hide those before
we publish it.
```
2. Choose whether the fields should look empty or hold plausible sample data. Sample data reads better where a populated field is part of what the image teaches; an empty field is fine for a placeholder-style input:
```text
Replace them with sample data rather than leaving the fields empty.
```
3. Review each covered region in the result. Confirm nothing readable remains — including partial text at the edge of a box, and the same value repeated elsewhere in the image, such as an email that also appears in a header.
Covering is not blurring
The agent covers information with a solid, opaque fill rather than blurring or pixelating it. Blurred and pixelated text can be recovered, so it is not a safe way to remove information from an image you publish. A blur is acceptable only on a real person’s face, where no text is at risk — and even there the agent prefers a solid placeholder.
If the agent cannot fully cover a region — text that runs under a graphic, for example — it still delivers the image. It flags the problem in its summary and in the pull request. Read that warning before you merge.
## Add a highlight, arrow, or numbered callout
[Section titled “Add a highlight, arrow, or numbered callout”](#add-a-highlight-arrow-or-numbered-callout)
Annotations connect your prose to the pixels. Use them when a step refers to one control on a crowded screen.
1. Describe what to mark and how:
```text
In the settings screenshot, outline the Save button and add an
arrow pointing at the Advanced options toggle.
```
2. For an interface with several parts, ask for numbered markers and refer to those numbers in your text:
```text
Add numbered markers to the editor screenshot: 1 on the file
tree, 2 on the chat panel, 3 on the preview pane.
```
3. Review the placement. The agent matches the shape and accent color of annotations on the sibling images beside it, so a new image looks like it belongs.
The agent puts markers on the image and leaves explanations to your prose. Text baked into an image is invisible to site search, unreadable by screen readers, and untranslatable. A numbered marker that your paragraph explains serves readers better than a caption drawn on the screenshot.
Annotations are repeatable. Asking for the same highlight twice doesn’t stack two outlines on top of each other.
## Combine edits in one pass
[Section titled “Combine edits in one pass”](#combine-edits-in-one-pass)
Most images need more than one edit. Ask for all of them together and the agent applies them in the order that produces a safe result: cover information first, annotate second, crop last. Cropping first can leave real data in an edge the crop keeps, and annotating before covering can leave a marker pointing at a field the agent then hides.
```text
Take the account settings screenshot in our onboarding guide:
hide the customer's name and email, highlight the Notifications
toggle, and crop it to the settings panel.
```
## What the agent changes and what it leaves alone
[Section titled “What the agent changes and what it leaves alone”](#what-the-agent-changes-and-what-it-leaves-alone)
| The agent | Detail |
| ------------------------------------------------ | ----------------------------------------------------------------------------------------------------------------------------------------------------------------------------------------------------------------- |
| Writes to the image’s existing path | The edited image replaces the file your page already references, so no link needs updating |
| Leaves your repository untouched until you merge | The change arrives as a pull request you review, like any other documentation change |
| Matches its neighbors | Padding, width, theme, annotation shape, and accent color follow the sibling images beside it |
| Asks when a value might be real | In a session, if it can’t tell whether a name or number is genuine or sample data, it asks you. An unattended run covers the value instead of asking |
| Leaves prose alone | It edits pixels only. For documentation that describes the interface incorrectly in text, use [Update and review](/agent/update-review) |
| Skips vector images | SVG diagrams and logos stay untouched |
| Follows your call in a session | Whether an image needs cropping, covering, or annotating is yours to decide — a capture from a demo account often needs none of it. A scheduled run given no instruction defaults to making the image publishable |
## Verify the result
[Section titled “Verify the result”](#verify-the-result)
Before you merge the pull request:
* [ ] Every covered region is fully opaque, with no readable text at its edges.
* [ ] No value you asked to hide survives elsewhere in the same image.
* [ ] The cropped image still shows enough context for a reader to locate the element in the live product.
* [ ] Annotations point at the controls your prose names, and the numbering matches your steps.
* [ ] The image sits comfortably beside the others on the page in width and theme.
## Troubleshooting
[Section titled “Troubleshooting”](#troubleshooting)
| Issue | Solution |
| -------------------------------------------------------------------- | --------------------------------------------------------------------------------------------------------------------------------------------------------------------- |
| The agent says it can’t find the image | Give it the path or the page that references the image. An image you attached to a chat message isn’t a file the agent can edit — commit it to your repository first. |
| Nothing happened to an SVG | Cropping and covering are raster operations. Export the diagram to PNG, or edit the SVG source directly. |
| The edit covered too much or too little | Describe the region by what it contains rather than by position: “the panel with the Save button”, not “the top right”. |
| Text is still faintly visible | Ask the agent to extend the covered area past every edge of the text. Report any region it says it couldn’t fully cover. |
| The new image looks different from the others on the page | Name the image you want it to match: “make it the same width and theme as the other screenshots in this guide”. |
| The screenshot you captured shows test data you don’t want published | Point the [sandbox](/agent/sandbox) at an account with presentable data and recapture, rather than covering every field afterward. |
## Next steps
[Section titled “Next steps”](#next-steps)
* [Keep documentation screenshots up to date](/agent/refresh-doc-screenshots) — Recapture stale images automatically, on demand and on a schedule.
* [Browse authenticated pages with a sandbox](/agent/sandbox) — Give the agent the sign-in variables it needs to capture pages behind a login.
* [Capture screenshots from a video](/agent/screenshots-from-video) — Turn a moment in a recording into a documentation image.
* [Manage a knowledge base](/agent/manage-knowledge-base) — Add and replace images on Confluence pages.
# Find a past session
> Search your Docs Agent history by keyword or paste a link to find and resume any session.
Every prompt you send Docs Agent runs in a session. Search lets you find any session across your organization’s whole history — including work you never turned into a pull request — and pick up where you left off.
You can find a session two ways:
* **Search by keyword** — match on what was said in the conversation.
* **Paste a link** — jump from a pull request, merge request, or ticket to the session behind it.
## Open search
[Section titled “Open search”](#open-search)
1. Open the editor. The **Sessions** section in the left navigation lists your sessions.
2. Press `⌘K` (`Ctrl+K` on Windows and Linux) to open search, or click the **Search sessions** field in the **Sessions** section.
3. Type your query. Results open in a focused view centered on the page.
The **Sessions** list stays as it is while you search — results appear in the focused view, not by filtering the list underneath. To close the view, press **Escape**, click outside it, or select a result. Your query stays in the search field so you can refine it.
## Search by keyword
[Section titled “Search by keyword”](#search-by-keyword)
Type at least three characters to search. Docs Agent matches your query against:
* The session title
* The title of the documentation pull request the session produced
* The conversation — both your messages and the agent’s replies
Results are ranked best match first. Each result shows the session title and a snippet of the matching text, with the matched words highlighted. An attribution label tells you where the match came from:
| Label | Meaning |
| ----------------- | ------------------------------------------- |
| **you asked** | The match is in one of your messages. |
| **agent replied** | The match is in one of the agent’s replies. |
Select a result to open that session in the editor.
Tip
Search tolerates small typos and matches partial phrases, so you don’t need to remember the exact wording. Search a phrase you recall from the conversation to narrow a large history.
## Find a session from a link
[Section titled “Find a session from a link”](#find-a-session-from-a-link)
Paste a URL into the search field to find the session it relates to. Docs Agent resolves these links:
| Paste this | Finds |
| -------------------------- | ---------------------------------------------------------------------------- |
| A GitHub pull request URL | The session triggered by that pull request, or the session that produced it |
| A GitLab merge request URL | The session triggered by that merge request, or the session that produced it |
| A Jira ticket URL | The session linked to that ticket |
| An EkLine session URL | That session directly |
Link search matches exactly, so a single paste takes you to the related session or sessions. Docs Agent shows the matches and lets you choose one — it never opens a session on your behalf.
You can paste a messy URL. A link that points at a pull request’s **Files** tab or a specific review comment still resolves. Self-managed hosts such as GitHub Enterprise and self-hosted GitLab work the same as github.com and gitlab.com.
## Understand your results
[Section titled “Understand your results”](#understand-your-results)
The header of the search view reports how many sessions matched, for example `12 of 340 sessions · best match first`. This count reflects everything that matched, not just the sessions already loaded in the **Sessions** list.
* **No matches** — when nothing matches, the view says so and names your query, so an empty result is never confused with a search that didn’t run.
* **Older sessions not searched** — for a large history, keyword search covers the most recent sessions and shows a notice when older ones fall outside that range. Add more distinctive words to your query to surface the session you want.
## Next steps
[Section titled “Next steps”](#next-steps)
* [Getting started with Docs Agent](/agent/getting-started) — Create your first document in the editor.
* [Update and review](/agent/update-review) — Resume a session to keep docs in sync with code changes.
# Generate an API reference from your codebase
> Use Docs Agent to turn your source code into a complete, accurate API reference with parameters, response schemas, and examples.
Request access
Docs Agent is available to all plans, but we grant access on request. Contact to request access.
This guide shows you how to generate an API reference directly from your source code. Docs Agent reads your function signatures, types, and comments, then produces reference documentation with parameters, response schemas, example requests, and error codes — no manual transcription from code to docs.
By the end, you have a review-ready API reference in a pull request.
## Before you begin
[Section titled “Before you begin”](#before-you-begin)
You need:
* An EkLine account with Docs Agent enabled.
* A repository [connected to EkLine](/agent/github-app-setup/) that contains the API source code you want to document.
* The path to the file or directory that defines your API — for example, `src/api/auth.ts` or `src/routes/`.
New to EkLine? [Connect GitHub to EkLine](/agent/github-app-setup/) first, then return here.
## Step 1: Open a session
[Section titled “Step 1: Open a session”](#step-1-open-a-session)
1. Log in to your [EkLine dashboard](https://ekline.io/dashboard).
2. Click **Docs Agent** in the left navigation.
## Step 2: Point the agent at your API source
[Section titled “Step 2: Point the agent at your API source”](#step-2-point-the-agent-at-your-api-source)
Reference the exact file or directory that defines your endpoints. Naming the source keeps the agent focused and improves accuracy.
* Single file
```plaintext
Document the endpoints in src/api/auth.ts. Include request
parameters, response schema, example requests, and error
codes.
```
* Directory
```plaintext
Generate an API reference for every route in src/routes/.
Group the endpoints by resource, and for each one include
the HTTP method, parameters, response schema, and error
responses.
```
* Specific endpoints
```plaintext
Document the POST /users and GET /users/:id endpoints in
src/api/users.ts. Include request and response examples
with realistic values.
```
For each endpoint, the agent extracts:
* Endpoint URLs and HTTP methods
* Request parameters with types and descriptions
* Response schema with field descriptions
* Example request and response bodies
* Error responses and status codes
## Step 3: Review the generated reference
[Section titled “Step 3: Review the generated reference”](#step-3-review-the-generated-reference)
The agent writes the reference to the editor panel as it works. Read through the output and confirm it matches your code:
* Endpoint paths and methods are correct.
* Every parameter your code accepts appears in the reference.
* Response fields match what your code returns.
## Step 4: Refine with follow-up prompts
[Section titled “Step 4: Refine with follow-up prompts”](#step-4-refine-with-follow-up-prompts)
Add detail or fix gaps by continuing the conversation. The agent keeps the context from your first prompt, so you can build on the reference incrementally.
* Add examples
```plaintext
Add a curl example and a JavaScript fetch example to each
endpoint.
```
* Document errors
```plaintext
Add an error table to each endpoint listing the status code,
error message, and cause.
```
* Match your style
```plaintext
Match the structure and tone of docs/api/payments.md.
```
Tip
Point the agent at an existing reference page with `"Match the structure of docs/api/payments.md"` so new endpoints follow the same layout as the rest of your API docs.
## Step 5: Raise a pull request
[Section titled “Step 5: Raise a pull request”](#step-5-raise-a-pull-request)
1. Enable **View All Changes** in the toolbar to see a diff of the generated reference.
2. Make any final edits directly in the editor panel.
3. Click **Raise PR**. The agent prefills a prompt in the chat — press **Enter** to send it, or edit the prompt first to add instructions.
The agent opens the pull request and replies in the chat with a link to continue the review on GitHub.
## Verify the reference is accurate
[Section titled “Verify the reference is accurate”](#verify-the-reference-is-accurate)
Before you merge, confirm the reference reflects your code:
* **Signatures match.** Every parameter name, type, and required or optional flag matches the source.
* **Examples run.** Copy an example request and run it against your API. The response matches the documented schema.
* **Errors are complete.** Each documented status code corresponds to an error your code actually returns.
* **Nothing is missing.** Every endpoint in the referenced file or directory appears in the output.
## Troubleshooting
[Section titled “Troubleshooting”](#troubleshooting)
| Problem | Cause | Fix |
| ----------------------------------------- | ------------------------------------------------------------------------ | --------------------------------------------------------------------------------------------------------------- |
| The agent misses endpoints | The prompt was too broad, or endpoints span several files | Name each file explicitly, or reference the parent directory: `"Document every route in src/routes/"` |
| Parameter descriptions are vague | Your source code lacks comments or type annotations for those parameters | Add doc comments or types in the source, then regenerate — or supply the descriptions in a follow-up prompt |
| Example values look generic | The agent had no sample data to draw from | Ask for realistic values: `"Use realistic example values based on the types in the code"` |
| The reference mixes in conceptual content | The prompt asked for explanation alongside reference | Keep the prompt reference-focused, and generate concepts separately with [Create documentation](/agent/create/) |
## Next steps
[Section titled “Next steps”](#next-steps)
* [Update and review](/agent/update-review/) — Keep the reference in sync when your API changes.
* [Create documentation](/agent/create/) — Generate READMEs, guides, and more from the same codebase.
* [Set up automated style checks](/reviewer/quickstart/) — Catch style and terminology issues on every pull request with Docs Reviewer.
# Getting started with Docs Agent
> Create your first document with Docs Agent in under 5 minutes.
Request access
Docs Agent is available to all plans, but we grant access on request. Contact to request access.
## Before you begin
[Section titled “Before you begin”](#before-you-begin)
You need:
* An EkLine account with Docs Agent enabled
* At least one repository [connected to EkLine](/agent/github-app-setup/)
New to EkLine? [Connect GitHub to EkLine](/agent/github-app-setup/) to install the GitHub App and choose which repositories the agent can access.
Don’t have access? Email **** with your organization name.
## Open the editor
[Section titled “Open the editor”](#open-the-editor)
1. Log in to your [EkLine dashboard](https://ekline.io/dashboard).
2. Click **Docs Agent** in the left navigation.

The editor interface has three main areas:
| Area | Location | Purpose |
| ---------------- | -------- | -------------------------------------- |
| **Editor panel** | Left | View and edit generated documentation |
| **Chat panel** | Right | Interact with the AI agent |
| **Toolbar** | Top | View changes, switch files, create PRs |
The **Sessions** section in the left navigation lists your recent work. To return to an earlier session, [search your history or paste a link](/agent/find-sessions).
## Create your first document
[Section titled “Create your first document”](#create-your-first-document)
Generate a README for your repository:
1. In the chat panel, type:
```plaintext
Generate a README for this repository. Include installation
instructions, usage examples, and contributing guidelines.
```
2. Wait while the agent analyzes your repository structure and code.
3. Review the generated content in the editor panel.
4. Enable **View All Changes** to see a diff of what the agent created.
5. Click **Raise PR** to open a pull request with the new documentation. The agent prefills a prompt in the chat — press **Enter** to send it, or edit the prompt first to add instructions.
The agent creates the pull request and responds in the chat with a link where you can continue the review process on GitHub.
## Control the agent while it works
[Section titled “Control the agent while it works”](#control-the-agent-while-it-works)
The chat input button changes color to reflect what the agent is doing:
| State | Icon | Action |
| --------- | -------- | ------------------------------------------------------------ |
| **Send** | Arrow up | Send a new message (agent is idle) |
| **Stop** | Stop | Cancel the current turn (agent is working, text field empty) |
| **Queue** | Plus | Queue a follow-up that sends after the current turn finishes |
Click the **Stop** button to cancel a turn mid-flight. Any partial work stays in the editor for you to review. To queue a follow-up, type your message while the agent works and press **Enter**. Queued messages appear with a clock icon and are delivered together when the turn completes. Click a queued message to edit it, or click the **X** icon to cancel it.
## Watch the agent browse
[Section titled “Watch the agent browse”](#watch-the-agent-browse)
Some tasks lead the agent to open a browser — for example, to capture a screenshot of your product or to read a page you asked it to document. When the agent starts browsing, a panel opens in the bottom-right corner of the editor and mirrors the browser in real time, so you can watch each page it visits. The panel header shows **Live browser** while the agent is browsing.
The live view is read-only: you see what the agent sees, but you can’t click or type inside it. Use the panel to:
* **Reposition it** — Drag the panel by its header to move it out of your way.
* **Resize it** — Drag the left edge to make the panel wider or narrower.
* **Collapse it** — Click the collapse icon in the header to hide the view while keeping the panel open, then click again to expand it.
* **Close it** — Click the **X** icon to dismiss the panel.
When the agent finishes browsing, the panel header changes to **Recording**. The live view switches to a replay of the session, so you can review what the agent did even if you weren’t watching at the time.
To let the agent reach pages behind a login, [set up a sandbox](/agent/sandbox/) with your site URL and sign-in credentials.
## Write better prompts
[Section titled “Write better prompts”](#write-better-prompts)
The more context you give, the better the output.
| Instead of… | Try… |
| -------------------- | ------------------------------------------------------------------------------------------- |
| “Write docs” | “Create a getting started guide for Python developers” |
| “Update the README” | “Add a Docker installation section to the README” |
| “Help with API docs” | “Document the POST /users endpoint in src/api/users.ts with request and response examples” |
| “Make release notes” | “Generate release notes for tickets ENG-100 through ENG-105, grouped by Features and Fixes” |
Write better prompts
* Reference specific files: `"Look at src/api/auth.ts"`.
* Mention your framework: `"This is a Next.js project"`.
* Specify the audience: `"Write for developers new to GraphQL"`.
* Point to style examples: `"Match the tone of docs/quickstart.md"`.
## Next steps
[Section titled “Next steps”](#next-steps)
* [Find a past session](/agent/find-sessions) — Search your history or paste a link to resume earlier work.
* [Create documentation](/agent/create/) — Generate READMEs, API refs, and guides.
* [Update and review](/agent/update-review/) — Keep docs in sync with code changes.
* [Integrations](/agent/integrations/) — Pull content from Slack, Notion, Linear, and more.
* [Set up automated style checks](/reviewer/quickstart/) — Enforce style guides and catch quality issues on every pull request with Docs Reviewer.
# Connect GitHub to EkLine Docs Agent
> Install the EkLine GitHub App and configure which repositories and documentation paths to monitor.
Connect your GitHub organization to EkLine so Docs Agent can monitor your repositories, review pull requests, and generate documentation automatically.
## Prerequisites
[Section titled “Prerequisites”](#prerequisites)
* An EkLine account with an organization. [Sign up](https://ekline.io) if you haven’t already.
* Admin access to the GitHub organization you want to connect.
## Install the GitHub App
[Section titled “Install the GitHub App”](#install-the-github-app)
The **GitHub Integration** settings page is where you start the installation. On your first connection, it shows the **Install the GitHub App** button.
1. **Open GitHub integration settings.**
Go to your [EkLine Dashboard](https://ekline.io/dashboard) and navigate to **Settings → Organization → GitHub Integration**.
2. **Start the installation.**
Click the **Install on another GitHub organization** button. This redirects you to GitHub to authorize the EkLine app.
Note
If this is your first GitHub connection, the button reads **Install the GitHub App**.
3. **Select your GitHub account.**
On the GitHub authorization page, select the user account you want to use to authorize EkLine.
4. **Select the target organization.**
Choose the GitHub organization where you want to install the EkLine app.
5. **Choose repository access.**
GitHub shows two options:
* **All repositories** — Grants EkLine access to every repository in the organization.
* **Only select repositories** — Lets you pick specific repositories.
Select **Only select repositories** and search for the repositories you want EkLine to monitor. You can always change this later in your GitHub organization settings.
Tip
Start with a few key documentation repositories. You can add more repositories at any time from the EkLine settings page.
6. **Complete the GitHub installation.**
Click the **Install** button. GitHub redirects you back to EkLine to complete the connection.
## Connect the organization in EkLine
[Section titled “Connect the organization in EkLine”](#connect-the-organization-in-ekline)
1. **Select your organization.**
On the **GitHub App Setup** page, use the **Select an organization** dropdown to choose the GitHub organization you installed the app on.
2. **Finish the connection.**
Click the **Connect GitHub** button. EkLine links your GitHub organization and loads the available repositories.
## Configure repositories
[Section titled “Configure repositories”](#configure-repositories)
After connecting, the GitHub integration settings page shows two sections for adding repositories:
| Section | Purpose |
| ------------------------------ | -------------------------------------------------------------------------------------------------------------------------------------- |
| **Documentation Repositories** | Repositories containing your documentation files. Supports path configuration for targeting specific directories or files. |
| **Code Repositories** | Source code repositories that EkLine reviews for documentation impact and uses for context when generating or reviewing documentation. |
Repository selection gates automatic PR review
EkLine runs [automatic PR review](/agent/automatic-pr-review) only on repositories you add here — under **Documentation Repositories** or **Code Repositories**. Pull requests from repositories the GitHub App can access but that you have not selected are skipped.
### Add documentation repositories
[Section titled “Add documentation repositories”](#add-documentation-repositories)
1. **Search and select a repository.**
Use the search field under **Documentation Repositories** to find and select a repository.
2. **Add documentation paths.**
Click the **Add Path** button next to the repository. Enter the file or directory path you want EkLine to monitor (for example, `docs/`, `README.md`, or `content/`).
Click **Save** to confirm. The path appears as a tag that you can remove later.
Tip
You can add multiple paths per repository. Use comma-separated values to add several paths at once.
3. **Enable monitoring.**
Toggle the **Enable monitoring** switch to let EkLine automatically monitor the repository for documentation changes.
4. **Save your configuration.**
Click **Save**. A success notification confirms that the GitHub integration has been updated.
### Add code repositories
[Section titled “Add code repositories”](#add-code-repositories)
Use the search field under **Code Repositories** to select source code repositories. These give EkLine context for documentation generation and review, and — like Documentation Repositories — they are eligible for [automatic PR review](/agent/automatic-pr-review). They do not require path configuration.
## Verify the connection
[Section titled “Verify the connection”](#verify-the-connection)
After completing the setup, confirm everything is working:
* The **GitHub App installations** section shows your connected organization.
* Your selected repositories appear under **Documentation Repositories** or **Code Repositories**.
* Documentation paths are displayed as tags next to their repositories.
* The **Enable monitoring** toggle is active for repositories you want to track.
## Next steps
[Section titled “Next steps”](#next-steps)
* [Use the GitHub PR bot](/agent/github-integration/) to generate documentation from pull request comments.
* [Set up automatic PR review](/agent/automatic-pr-review) so EkLine detects when PRs need documentation updates.
* [Set up the GitHub Action](/reviewer/quickstart/github-action/) to run automated style checks on every pull request.
***
## Stuck?
[Section titled “Stuck?”](#stuck)
Reply to your welcome email or contact . We read every message.
# Generate documentation from GitHub pull requests
> Trigger Docs Agent from GitHub pull requests by mentioning @ekline-ai in PR comments or code review threads to generate documentation.
Request access
Docs Agent is available to all plans, but we grant access on request. Contact to request access.
Start documentation sessions without leaving GitHub. Mention `@ekline-ai` in any pull request comment or review thread, and the bot generates a documentation draft linked to the PR context.
## How it works
[Section titled “How it works”](#how-it-works)
When you mention `@ekline-ai` in a PR comment, the bot:
1. Reacts with a :eyes: emoji to acknowledge your request.
2. Posts a reply with a link to the EkLine editor where it creates the draft.
3. Generates documentation based on your prompt and the PR context.
4. Updates the reply with a link to the docs pull request when ready.
The bot works with any type of PR comment. When you mention `@ekline-ai` on a review comment attached to specific code lines, the agent also receives the file path and diff context for those lines.
## Prerequisites
[Section titled “Prerequisites”](#prerequisites)
Before you begin, you need:
* An EkLine organization account.
* The [EkLine GitHub App](/agent/github-app-setup/) installed on your organization.
* Docs Agent access enabled for your organization.
## Trigger the bot from a PR comment
[Section titled “Trigger the bot from a PR comment”](#trigger-the-bot-from-a-pr-comment)
1. Open a pull request on a repository where the EkLine GitHub App is installed.
2. Write a comment on the PR that mentions `@ekline-ai` followed by your documentation request.
```text
@ekline-ai Create a migration guide for the database schema changes in this PR.
```
3. The bot reacts with :eyes: to confirm it received your request.
4. A reply appears with a link to the EkLine editor session where the documentation is being drafted.
5. Review and edit the draft in the EkLine editor.
6. When the agent finishes, it opens a docs pull request on your configured documentation repository. The bot updates its reply with a link to the docs PR.
## Trigger the bot from a code review comment
[Section titled “Trigger the bot from a code review comment”](#trigger-the-bot-from-a-code-review-comment)
For more targeted documentation, mention the bot on specific lines in a code review.
1. Start a review on the pull request, or view the **Files changed** tab.
2. Select the line or lines you want to reference, and add a review comment that mentions `@ekline-ai`.
```text
@ekline-ai Document this new API endpoint, including the request and response schema.
```
3. The bot reacts with :eyes: and replies in the review thread.
4. The agent receives the file path and diff hunk for the lines you commented on, along with your prompt.
5. Review the generated draft in the EkLine editor and the resulting docs PR.
Use line comments for precision
Review comments on specific code lines provide the file path and diff context to the agent. Use these when your request relates to a particular code change, such as a new endpoint, configuration option, or function.
## What the bot posts
[Section titled “What the bot posts”](#what-the-bot-posts)
The bot communicates progress through comments on the pull request:
| Stage | What the bot posts |
| ---------------- | ------------------------------------------------------------------------------- |
| Request received | :eyes: reaction on your comment |
| Session started | Reply with a link to the EkLine editor |
| Docs PR created | Updated reply with a link to the new documentation pull request |
| Docs PR updated | Updated reply noting that the bot updated the existing docs PR with new changes |
| Error | Reply with an error message describing what went wrong |
If you mention the bot again on the same PR, it resumes the existing session rather than starting a new one.
## Write effective prompts
[Section titled “Write effective prompts”](#write-effective-prompts)
The quality of your prompt determines the quality of the output. The bot strips the `@ekline-ai` mention and passes the rest of your comment as the prompt.
| Instead of… | Try… |
| ---------------- | ---------------------------------------------------------------------------- |
| “document this” | “Create an API reference for the new `/users` endpoint added in this PR” |
| “update docs” | “Update the authentication guide to cover the OAuth flow changes in this PR” |
| “help with docs” | “Write a migration guide for the breaking changes to the config schema” |
**Include specific details:**
* Name the type of documentation you need: API reference, migration guide, tutorial, how-to.
* Reference specific files or changes in the PR.
* Mention existing documentation to update if applicable.
* Give any audience context, such as whether it’s for developer docs or an end-user guide.
## Follow-up comments
[Section titled “Follow-up comments”](#follow-up-comments)
After the bot creates a docs PR, mention `@ekline-ai` again to continue the conversation. You can comment on either the source pull request or the generated docs PR — the bot resumes the existing session and keeps the context of the documentation it already produced.
The bot reads each follow-up comment and decides whether you are asking a question or requesting a change:
* **Questions and clarifications** — When you ask something like “Where did you get this URL?” or “Why did you change this section?”, the bot replies to your comment with an answer. It does not edit files, create commits, or push changes to the pull request.
* **Change requests** — When you ask for a documentation change, the bot edits the docs and updates the linked docs PR with new commits. If no docs PR exists yet, the bot opens one.
This lets you ask about the agent’s reasoning without triggering an edit. To change the documentation, describe the change you want.
## Troubleshooting
[Section titled “Troubleshooting”](#troubleshooting)
| Issue | Solution |
| -------------------------------- | ------------------------------------------------------------------------------------------------------------------------------------------------ |
| Bot does not respond | Verify that the EkLine GitHub App is installed on the repository. Check that the GitHub PR integration is enabled for your organization. |
| Bot reacts but does not reply | The agent may be processing your request. Wait up to a minute. If no reply appears, try again or contact . |
| “Error” reply from the bot | Read the error message for details. Common causes: session conflicts, service unavailability. Try again or contact support. |
| Docs PR not created | The agent creates a PR when it generates file drafts. If your prompt is ambiguous, the agent may not produce files. Give a more specific prompt. |
| Bot responds to the wrong person | The bot responds to any mention of `@ekline-ai` in the PR. Each mention triggers or resumes a session. |
## Next steps
[Section titled “Next steps”](#next-steps)
* [Create documentation](/agent/create) — Generate documentation from your codebase, videos, and external sources.
* [Slack bot](/agent/slack-bot) — Create documentation drafts directly from Slack.
* [Integrations](/agent/integrations) — Connect Notion, Linear, Jira, and other tools for richer context.
# Generate documentation from GitLab merge requests
> Trigger Docs Agent from GitLab merge requests by mentioning @ekline-ai in a merge request comment to generate documentation from the change.
Request access
Docs Agent is available to all plans, but we grant access on request. Contact to request access.
Start documentation sessions without leaving GitLab. Mention `@ekline-ai` in a merge request comment followed by your request, and Docs Agent generates a documentation draft using the merge request as context.
## Prerequisites
[Section titled “Prerequisites”](#prerequisites)
Before you begin, you need:
* An EkLine organization account with Docs Agent access.
* GitLab connected to EkLine, with a token, your code and documentation projects selected, and the webhook configured. See [Connect GitLab](/agent/gitlab-setup/).
* The webhook on your GitLab project sending **Comments** and **Merge request events** to EkLine. Docs Agent reads merge request comments through these events.
## How it works
[Section titled “How it works”](#how-it-works)
When you mention `@ekline-ai` in a merge request comment, Docs Agent:
1. Adds a :eyes: reaction to your comment to confirm it received the request.
2. Replies with a link to the EkLine editor where it drafts the documentation.
3. Generates documentation based on your prompt and the merge request context.
4. Opens a documentation merge request on your configured documentation project and updates its reply with the link.
Docs Agent posts its replies as standard notes rather than resolvable threads, so its status updates never block a “all threads resolved” merge check.
## Trigger Docs Agent from a merge request comment
[Section titled “Trigger Docs Agent from a merge request comment”](#trigger-docs-agent-from-a-merge-request-comment)
1. **Open a merge request** on a GitLab project you connected to EkLine.
2. **Add a comment that mentions `@ekline-ai`** followed by your documentation request.
```text
@ekline-ai Create a migration guide for the database schema changes in this merge request.
```
3. **Wait for the :eyes: reaction.** Docs Agent adds it to your comment to confirm the request.
4. **Open the editor from the reply.** Docs Agent replies with a link to the EkLine editor session where it drafts the documentation. Review and edit the draft there.
5. **Review the documentation merge request.** When Docs Agent finishes, it opens a merge request on your configured documentation project and updates its reply with the link.
Tip
The documentation merge request appears on your PR dashboard in EkLine alongside GitHub pull requests, with its reviewers and status.
## Write effective prompts
[Section titled “Write effective prompts”](#write-effective-prompts)
The quality of your prompt determines the quality of the output. Docs Agent strips the `@ekline-ai` mention and passes the rest of your comment as the prompt.
| Instead of… | Try… |
| ---------------- | --------------------------------------------------------------------------------------- |
| “document this” | “Create an API reference for the new `/users` endpoint added in this merge request” |
| “update docs” | “Update the authentication guide to cover the OAuth flow changes in this merge request” |
| “help with docs” | “Write a migration guide for the breaking changes to the config schema” |
Include specific details:
* Name the type of documentation you need: API reference, migration guide, tutorial, how-to.
* Reference specific files or changes in the merge request.
* Mention existing documentation to update if applicable.
* Give any audience context, such as whether it’s for developer docs or an end-user guide.
## Follow-up comments
[Section titled “Follow-up comments”](#follow-up-comments)
After Docs Agent creates a documentation merge request, mention `@ekline-ai` again to continue the conversation. You can comment on either the source merge request or the generated documentation merge request — Docs Agent resumes the existing session and keeps the context of the documentation it already produced.
Docs Agent reads each follow-up comment and decides whether you are asking a question or requesting a change:
* **Questions and clarifications** — When you ask something like “Where did you get this URL?” or “Why did you change this section?”, Docs Agent replies with an answer. It does not edit files or push commits.
* **Change requests** — When you ask for a documentation change, Docs Agent edits the docs and updates the linked documentation merge request with new commits. If no documentation merge request exists yet, it opens one.
## Reference GitLab content in your prompt
[Section titled “Reference GitLab content in your prompt”](#reference-gitlab-content-in-your-prompt)
Docs Agent recognizes GitLab merge request and issue links in your prompt and pulls their details from your connected projects. Reference another merge request or an issue to give Docs Agent more context:
```text
@ekline-ai Document this endpoint and cross-check the request format against issue #215.
```
For the full list of what Docs Agent can reference, see [Docs Agent integrations](/agent/integrations/).
## Troubleshooting
[Section titled “Troubleshooting”](#troubleshooting)
| Issue | Solution |
| --------------------------------------- | --------------------------------------------------------------------------------------------------------------------------------------------------------------------------------------------------------------------------------------------- |
| Docs Agent does not respond | Confirm GitLab is connected and the project is selected in your integration settings. Check that the webhook sends **Comments** and **Merge request events**, and that the webhook status is healthy in GitLab under **Settings > Webhooks**. |
| Reaction appears but no reply | Docs Agent may still be processing. Wait up to a minute. If no reply appears, mention `@ekline-ai` again or contact . |
| “Error” reply | Read the error message for details. Confirm the GitLab token status shows **Token is set** and has not expired, then try again. |
| No documentation merge request created | Docs Agent opens a merge request when it produces file drafts. If your prompt is ambiguous, it may not produce files. Give a more specific prompt. |
| Docs Agent responds to the wrong person | Docs Agent responds to any comment that mentions `@ekline-ai`. Each mention triggers or resumes a session. |
## Next steps
[Section titled “Next steps”](#next-steps)
* [Connect GitLab](/agent/gitlab-setup/) — Add a token, select projects, and configure the webhook.
* [GitHub PR bot](/agent/github-integration/) — Trigger Docs Agent from GitHub pull requests.
* [Create documentation](/agent/create/) — Generate documentation from your codebase, videos, and external sources.
* [Integrations](/agent/integrations/) — Connect Slack, Notion, Jira, and other tools for richer context.
***
## Stuck?
[Section titled “Stuck?”](#stuck)
Reply to your welcome email or contact . We read every message.
# Connect GitLab to EkLine Docs Agent
> Add a GitLab access token to connect your projects so Docs Agent can reference merge requests, issues, and repository files.
Connect GitLab to EkLine so Docs Agent can reference your merge requests, issues, and repository files when it generates and updates documentation.
GitLab connects with a GitLab access token. You add the token once at the organization level, and every member of your EkLine organization can then reference GitLab content in their Docs Agent sessions.
## Prerequisites
[Section titled “Prerequisites”](#prerequisites)
* An EkLine account with an organization. [Sign up](https://ekline.io) if you haven’t already.
* A GitLab account with access to the projects you want EkLine to reference.
* Permission in GitLab to create an access token with the required scopes.
## Generate a GitLab group access token
[Section titled “Generate a GitLab group access token”](#generate-a-gitlab-group-access-token)
A group access token covers every project in the group with a single token, so it’s the recommended option when your organization has multiple projects. EkLine also accepts personal and project access tokens if you prefer to scope access differently. For full details, see the [GitLab group access tokens reference](https://docs.gitlab.com/user/group/settings/group_access_tokens/).
1. **Open the group’s access tokens page in GitLab.**
Go to the group you want EkLine to access, then navigate to **Settings > Access tokens**.
Note
You need the Owner role on the group to create a group access token.
2. **Add a new token.**
Click **Add new token** and enter a recognizable name, such as `EkLine Integration`.
3. **Set an expiration date.**
Set the expiration as needed. EkLine tracks the expiration date and shows you when the token is close to expiring.
4. **Select a role.**
Select the **Developer** role or higher. The role determines what the token can read across the group’s projects.
5. **Select the required scopes.**
Select both the `api` and `read_repository` scopes. The connection fails without both.
6. **Create and copy the token.**
Click **Create group access token** and copy the generated token. The token starts with `glpat-`.
Caution
GitLab shows the token value only once. Copy it before you leave the page.
## Connect GitLab in EkLine
[Section titled “Connect GitLab in EkLine”](#connect-gitlab-in-ekline)
The **GitLab Integration** settings page holds your token. Before you add a token, the status reads **Token is not set**.
1. **Open GitLab integration settings.**
Go to your [EkLine Dashboard](https://ekline.io/dashboard) and navigate to **Settings > Organization > GitLab Integration**.
2. **Add your token.**
Click the **Update Token** button. Paste your GitLab token into the **GitLab Token** field.
3. **Save the token.**
Save your changes. EkLine validates the token, confirms the scopes, and stores it encrypted. When the connection succeeds, the status changes to **Token is set**.
Note
If you see the error “Invalid GitLab token”, confirm that the token starts with `glpat-` and has both the `api` and `read_repository` scopes.
## Select code repositories
[Section titled “Select code repositories”](#select-code-repositories)
After you connect a token, EkLine loads the GitLab projects the token can access.
1. **Find the Code Repositories section.**
The **Code Repositories** section lists the GitLab projects available to the token.
2. **Select your projects.**
Select the GitLab projects you want to use with Docs Agent.
3. **Save your selection.**
Save your changes to make the selected projects available in Docs Agent sessions.
## Select documentation repositories
[Section titled “Select documentation repositories”](#select-documentation-repositories)
Choose which GitLab projects hold your documentation. Docs Agent clones these projects into its workspace and opens merge requests against them when it drafts or updates docs.
1. **Find the Documentation Repositories section.**
The **Documentation Repositories** section lists the same GitLab projects available to the token.
2. **Select your docs projects.**
Select the GitLab projects where Docs Agent should propose documentation changes.
3. **Save your selection.**
Save your changes to let Docs Agent open merge requests against the selected projects.
Note
When Docs Agent proposes a change, it opens a merge request in the selected documentation project. Those merge requests appear on your PR dashboard alongside GitHub pull requests, with their reviewers and status.
## Configure the GitLab webhook
[Section titled “Configure the GitLab webhook”](#configure-the-gitlab-webhook)
A webhook lets GitLab notify EkLine about events in your project, such as new merge requests and comments. After you add a token, EkLine shows the **Webhook Configuration** section with the values you need.
1. **Copy the webhook details from EkLine.**
In the **Webhook Configuration** section on the GitLab integration settings page, copy the **Webhook URL** and the **Secret Token**.
2. **Open the webhooks page in GitLab.**
In your GitLab project, navigate to **Settings > Webhooks** and click **Add new webhook**.
3. **Enter the webhook URL and secret.**
Paste the EkLine webhook URL into the **URL** field, then paste the secret into the **Secret token** field.
4. **Select the triggers.**
Enable these triggers: **Push events**, **Comments**, **Emoji events**, and **Merge request events**.
5. **Save the webhook.**
Click **Add webhook**. GitLab now sends events to EkLine for that project.
Tip
Add the webhook to each GitLab project you want EkLine to monitor.
## Verify the connection
[Section titled “Verify the connection”](#verify-the-connection)
Confirm that the integration is ready:
* The token status shows **Token is set**.
* Your selected projects appear under **Code Repositories**.
* The **Webhook URL** and **Secret Token** appear in the **Webhook Configuration** section.
* A team member can reference a GitLab merge request or issue in a Docs Agent session and the agent fetches the content.
## Use GitLab content in Docs Agent
[Section titled “Use GitLab content in Docs Agent”](#use-gitlab-content-in-docs-agent)
After you connect GitLab, reference GitLab content directly in your prompts. The agent recognizes GitLab URLs and IDs automatically and pulls the details from your connected projects.
```text
Create a changelog entry based on this GitLab merge request:
https://gitlab.com/your-org/platform/-/merge_requests/42
```
```text
Update the authentication docs based on the changes in
GitLab issue #215.
```
```text
Document the new API endpoints by referencing the files
changed in merge request !87.
```
The agent accesses content using the permissions of the account that created the token. You can only pull content that account has permission to view.
Organization-level access
GitLab connects at the organization level. Once a team member adds a token, any organization member can use the integration through Docs Agent.
## Next steps
[Section titled “Next steps”](#next-steps)
* [Generate documentation from GitLab merge requests](/agent/gitlab-integration) — trigger Docs Agent by mentioning `@ekline-ai` in a merge request comment.
* [Docs Agent integrations](/agent/integrations) — see every source you can reference, including Slack, Notion, Jira, and Confluence.
* [Create documentation](/agent/create) — generate a draft from your connected sources.
* [Update and review](/agent/update-review) — refine and review documentation with the agent.
***
## Stuck?
[Section titled “Stuck?”](#stuck)
Reply to your welcome email or contact . We read every message.
# Docs Agent integrations
> Pull content from Slack, Notion, Linear, Jira, Confluence, GitLab, Google Drive, and PostHog into your documentation.
Reference external content directly in your prompts. Instead of copying and pasting, mention a Slack thread, Notion page, or ticket ID, and the agent pulls the content automatically.
## Available integrations
[Section titled “Available integrations”](#available-integrations)
| Integration | What you can reference |
| ---------------- | --------------------------------------------------- |
| **GitHub** | Pull request context, code diffs, and file changes |
| **GitLab** | Merge requests, issues, and repository files |
| **Slack** | Messages and threads |
| **Notion** | Pages and databases |
| **Linear** | Issues, descriptions, and comments |
| **Jira** | Issues, descriptions, and comments |
| **Confluence** | Pages and spaces |
| **Google Drive** | Files, folders, and documents |
| **PostHog** | Product analytics, feature flags, and HogQL queries |
## Connect an integration
[Section titled “Connect an integration”](#connect-an-integration)
1. Go to **Settings > Organization > Integrations** in your EkLine dashboard.
2. Find the integration you want to connect.
3. Click **Connect** and complete the authorization using an OAuth 2.0 popup or token entry, depending on the integration.
4. The integration is now available in all Docs Agent sessions.
Each team member connects their own account. The agent can only access content you have permission to view.
## GitHub
[Section titled “GitHub”](#github)
Trigger Docs Agent directly from pull request comments. Mention `@ekline-ai` on any PR comment or code review thread, and the bot creates a documentation draft linked to the PR context.
You can connect multiple GitHub organizations to a single EkLine organization. Repositories from all connected organizations appear in a combined list on the integrations page. To add another GitHub organization, click **Install on another GitHub organization** in the GitHub App installations section under **Settings > Organization > GitHub Integration**.
**Use cases:**
* Generate a migration guide from the changes in a PR.
* Document a new API endpoint by commenting on the specific code lines.
* Update existing docs based on a feature PR.
Create docs without leaving GitHub
Use the [GitHub PR bot](/agent/github-integration/) to mention `@ekline-ai` in any pull request. The bot reacts, creates a draft in EkLine, and opens a docs PR when ready.
Organization-level access
GitHub connects at the organization level. Any EkLine organization member can install the GitHub App on additional GitHub organizations. If a connected GitHub organization becomes inaccessible — for example, if someone uninstalls the app from that organization — a warning appears on the integrations page.
## GitLab
[Section titled “GitLab”](#gitlab)
Pull merge requests, issues, and repository files from GitLab into your documentation workflow. Reference GitLab content directly in your prompts to generate or update documentation from your GitLab projects.
**Use cases:**
* Generate a migration guide from changes in a merge request.
* Update documentation based on a completed issue.
* Create technical specs by referencing repository files and merge request discussions.
**Examples:**
```text
Create a changelog entry based on this GitLab merge request:
https://gitlab.com/your-org/platform/-/merge_requests/42
```
```text
Update the authentication docs based on the changes in
GitLab issue #215.
```
```text
Document the new API endpoints by referencing the files
changed in merge request !87.
```
The agent recognizes GitLab URLs automatically — paste a merge request or issue link and the agent fetches the details directly from your connected GitLab instance.
Organization-level access
GitLab connects at the organization level. Once a team member authorizes the connection, any organization member can use it through Docs Agent. The agent accesses content using the permissions of the account that authorized the connection.
## Slack
[Section titled “Slack”](#slack)
Turn support conversations, incident threads, and team discussions into structured documentation.
**Use cases:**
* Convert a support answer into a how-to guide.
* Document troubleshooting steps from an incident channel.
* Create FAQ entries from common customer questions.
**Example:**
```text
Create a troubleshooting guide based on this Slack thread:
https://workspace.slack.com/archives/C01234/p1234567890
```
The agent extracts the conversation, identifies the problem, and structures it into documentation format. For a step-by-step walkthrough, see [Turn a Slack support thread into a troubleshooting doc](/agent/slack-thread-to-troubleshooting-doc/).
Create docs without leaving Slack
Use the [Slack bot](/agent/slack-bot) to @mention `@EkLine` directly in any channel or thread. The bot captures the conversation context and creates a draft you can review in EkLine.
## Notion
[Section titled “Notion”](#notion)
Pull product specs, design documents, and meeting notes into your documentation workflow.
**Use cases:**
* Transform product specs into technical documentation.
* Create user guides from design documents.
* Generate API docs from specification pages.
**Example:**
```text
Create API documentation based on the spec in this Notion page:
https://notion.so/your-workspace/api-spec-page-id
```
## Linear
[Section titled “Linear”](#linear)
Reference completed work to update documentation or generate release notes.
**Use cases:**
* Update docs when a feature ships.
* Generate release notes from a milestone.
* Create changelog entries from issue descriptions.
**Examples:**
```text
Update the authentication docs based on Linear ticket ENG-1234.
```
```text
Generate release notes for all issues in the v2.0 milestone.
```
The agent reads the issue title, description, and comments to understand what changed.
## Jira
[Section titled “Jira”](#jira)
Reference Jira issues the same way you reference Linear tickets.
**Use cases:**
* Update documentation based on completed stories.
* Generate release notes from a sprint or version.
* Create technical specs from epic descriptions.
**Example:**
```text
Update the deployment guide based on Jira ticket PROJ-5678.
Include the new configuration options mentioned in the ticket.
```
## Confluence
[Section titled “Confluence”](#confluence)
Pull existing documentation, runbooks, and internal knowledge into new docs.
**Use cases:**
* Migrate internal docs to your public documentation.
* Create user guides from technical runbooks.
* Reference architecture decisions in new documentation.
**Example:**
```text
Create a public deployment guide based on the internal runbook:
https://your-org.atlassian.net/wiki/spaces/ENG/pages/123456
```
Manage an internal knowledge base
To have Docs Agent maintain an internal Confluence or Pylon knowledge base — updating pages and publishing changes back to the source — see [Manage a Confluence or Pylon knowledge base](/agent/manage-knowledge-base/).
## Google Drive
[Section titled “Google Drive”](#google-drive)
Connect Google Drive to give Docs Agent direct access to files and folders in your Drive. Unlike other integrations where you paste a URL, Google Drive lets the agent search, read, create, and organize files on your behalf.
**What the agent can do:**
| Action | Description |
| ------------------------ | ------------------------------------------- |
| Search files and folders | Find content by name or keyword |
| Read files | Download and read file contents |
| Create files | Create new documents or text files in Drive |
| Create folders | Organize content into folders |
| Upload files | Upload generated documentation to Drive |
| Move and rename | Reorganize files between folders |
| Delete files | Remove files from Drive |
**Use cases:**
* Pull a PRD from Drive and transform it into technical documentation.
* Save generated documentation directly to a shared Drive folder.
* Search Drive for existing specs before creating new docs.
* Organize generated files into team folders.
**Examples:**
```text
Create a feature overview based on the PRD in my Google Drive
called "Authentication Redesign Spec".
```
```text
Save the generated API reference to the "Engineering Docs"
folder in Google Drive.
```
```text
Search Google Drive for any existing documentation about
the payments API and update it with the latest changes.
```
Organization-level access
Google Drive connects at the organization level. Once a team member authorizes the connection, any organization member can use it through Docs Agent. The agent accesses files using the permissions of the account that authorized the connection.
## PostHog
[Section titled “PostHog”](#posthog)
Connect PostHog to give Docs Agent access to your product analytics, feature flags, and HogQL queries. The agent can pull insights from PostHog during documentation sessions to ground your content in real usage data.
**What the agent can do:**
| Action | Description |
| ------------------ | ----------------------------------------------- |
| Query insights | Read saved insights and analytics dashboards |
| Run HogQL queries | Execute HogQL queries against your PostHog data |
| Read feature flags | List and inspect feature flag configurations |
**Use cases:**
* Reference adoption metrics when writing release notes or feature documentation.
* Include feature flag details when documenting rollout procedures.
* Pull usage data to support decisions in architecture or migration guides.
**Examples:**
```text
Summarize the adoption metrics for the new onboarding flow
using the PostHog insights dashboard.
```
```text
Document the current feature flag configuration for
the "new-checkout" rollout, including rollout percentage
and targeting rules.
```
```text
Create a usage report based on the HogQL query for
weekly active users over the last 90 days.
```
### Connect PostHog
[Section titled “Connect PostHog”](#connect-posthog)
1. Go to **Settings > Organization > Integrations** in your EkLine dashboard.
2. Click **Connect** on the PostHog card.
3. Enter your PostHog personal API key. You can generate one from **PostHog > Settings > Personal API Keys**.
4. Select your PostHog region (US, EU, or enter a custom hostname for self-hosted instances).
5. Click **Connect** to activate the integration.
The personal API key starts with `phx_`.
Supported regions
PostHog offers four cloud regions — **US (Public)**, **US (Private)**, **EU (Public)**, and **EU (Private)**. If you run a self-hosted PostHog instance, select **Custom** and enter your hostname.
Organization-level access
PostHog connects at the organization level. Once a team member connects PostHog, any organization member can use it through Docs Agent. The agent accesses data using the permissions of the personal API key that the connecting team member provided.
## Combine multiple sources
[Section titled “Combine multiple sources”](#combine-multiple-sources)
Reference multiple integrations in a single prompt to create comprehensive documentation.
```text
Update the authentication docs based on:
- Linear ticket ENG-1234 (the feature implementation)
- This Slack thread where we discussed edge cases:
https://workspace.slack.com/archives/C01234/p1234567890
- The original spec in Notion:
https://notion.so/your-workspace/auth-spec
```
For a full walkthrough — assigning a role to each source, resolving conflicts, and shipping the result — see [Combine multiple sources into one document](/agent/combine-sources/).
## Tips
[Section titled “Tips”](#tips)
Best practices
* **Reference exact URLs or IDs** — Paste a URL from a connected integration, and the agent automatically recognizes the service and fetches the content.
* **Verify access** — You can only pull content you have permission to view.
* **Add context** — Tell the agent what kind of documentation you need from the source.
* **Combine thoughtfully** — Multiple sources work best when they relate to the same topic.
# Manage a Confluence or Pylon knowledge base
> Use Docs Agent to keep a Confluence or Pylon knowledge base accurate — update pages across a space, improve articles, and publish changes back.
Request access
Knowledge base management is available on request. Contact with your organization name to enable it for Confluence or Pylon.
Docs Agent helps internal teams keep a knowledge base accurate and up to date. Connect an internal Confluence space — for example, an engineering or support team’s knowledge base — or a Pylon knowledge base used by your support team. The agent updates individual pages, maintains an entire space, and improves articles from sources like support tickets, then publishes the changes straight back to the source with no copying between tools.
This guide starts with a single page, then shows how the same workflow scales to the whole knowledge base. By the end, your edits are live in Confluence or Pylon.
Managing a knowledge base vs. referencing one
This guide covers a two-way workflow: the agent reads a page **and writes your changes back**. To pull content from a page into new documentation without editing it in place, see [Integrations](/agent/integrations/) instead.
## Before you begin
[Section titled “Before you begin”](#before-you-begin)
You need:
* An EkLine account with Docs Agent and knowledge base management enabled.
* A connected Confluence or Pylon knowledge base with at least one space or knowledge base marked as managed (see [Connect your knowledge base](#connect-your-knowledge-base)).
* Permission to edit the page or article you want to update.
## Connect your knowledge base
[Section titled “Connect your knowledge base”](#connect-your-knowledge-base)
An organization administrator connects the knowledge base once. The agent can then read from and write to the spaces or knowledge bases you select.
* Confluence
1. Connect Confluence under **Settings > Organization > Integrations**.
2. Go to **Settings > Organization > KB Management**.
3. Enable **Manage Confluence**.
4. Select each Confluence space you want the agent to manage.
Your changes save automatically. A **Saving…** indicator appears while each change saves, then changes to **Saved**.
The agent can now read and update pages in the selected spaces, including [managing images](#manage-images-in-a-confluence-page) on them.
Reconnect for image support
If you connected Confluence before image management was available, reconnect it under **Settings > Organization > Integrations**. Managing images requires a stored Confluence connection ID, which reconnecting adds. Until you reconnect, the agent can still edit text, but it can’t add or remove images, and publishing a page that references an image fails.
* Pylon
1. Go to **Settings > Organization > KB Management**.
2. Enable **Manage Pylon**.
3. Paste your **Pylon API token** and click **Connect**.
4. Select each Pylon knowledge base you want the agent to manage.
5. Set a **Default author**. New articles the agent creates are attributed to this Pylon user.
Your changes save automatically. A **Saving…** indicator appears while each change saves, then changes to **Saved**.
The agent can now read, update, and create articles in the selected knowledge bases.
Access follows your permissions
The agent can only read and update content the connected account has permission to change. Only the spaces and knowledge bases you mark as managed are available to the agent.
## Step 1: Open the editor
[Section titled “Step 1: Open the editor”](#step-1-open-the-editor)
1. Log in to your [EkLine dashboard](https://ekline.io/dashboard).
2. Click **Docs Agent** in the left navigation.
## Step 2: Retrieve the page
[Section titled “Step 2: Retrieve the page”](#step-2-retrieve-the-page)
Ask the agent to fetch the page you want to update. The agent loads it into the editor panel as Markdown you can edit.
* Confluence
Paste the page URL:
```plaintext
Retrieve this Confluence page and fix the outdated CLI flags
in the installation section:
https://your-org.atlassian.net/wiki/spaces/ENG/pages/123456
```
* Pylon
Name the article, or list the knowledge base first:
```plaintext
List the articles in our Pylon knowledge base, then retrieve
the "Resetting your password" article so I can update it.
```
The agent reads the live page and writes it into the editor panel, keeping the formatting the source needs for a clean round-trip.
## Step 3: Review the retrieved content
[Section titled “Step 3: Review the retrieved content”](#step-3-review-the-retrieved-content)
Read through the page in the editor and confirm it matches what you expect to see in the knowledge base. Editing a page you retrieved keeps your changes scoped to that page.
## Step 4: Edit with follow-up prompts
[Section titled “Step 4: Edit with follow-up prompts”](#step-4-edit-with-follow-up-prompts)
Refine the page by continuing the conversation. The agent keeps the context from your first prompt, so you can build on the content incrementally. You can also edit directly in the editor panel.
* Update a section
```plaintext
Rewrite the "Requirements" section to list the new minimum
version, and add a note about the deprecated config option.
```
* Improve clarity
```plaintext
Tighten the troubleshooting steps into a numbered list and
remove the duplicated paragraph about cache clearing.
```
* Add from a source
```plaintext
Add a new FAQ entry based on this Slack thread:
https://workspace.slack.com/archives/C01234/p1234567890
```
## Step 5: Publish your changes
[Section titled “Step 5: Publish your changes”](#step-5-publish-your-changes)
When the page is ready, publish it back to the source.
1. Enable **View All Changes** in the toolbar to review a diff of your edits.
2. Make any final adjustments in the editor panel.
3. Click **Update KB** to publish. The tooltip reads **Publish your knowledge base edits**.
The **Update KB** button replaces **Raise PR** when you work on a knowledge base, because there is no pull request to open — your approval publishes the edits to the source instead.
Caution
Publishing overwrites the live page immediately. Your edited content replaces Confluence pages, and Pylon articles update in place. Review the diff before you publish. For Pylon, publishing does not change whether an article is listed as published or unpublished.
## Verify the update
[Section titled “Verify the update”](#verify-the-update)
Confirm the change reached the source:
* **Open the live page.** The Confluence page or Pylon article shows your edits.
* **Check the structure.** Headings, tables, and links render the way they did before, with your changes applied.
* **Confirm the diff matched.** What you reviewed under **View All Changes** is what appears on the live page.
## Manage images in a Confluence page
[Section titled “Manage images in a Confluence page”](#manage-images-in-a-confluence-page)
On a Confluence page, the agent works with images as well as text. It can add a new image, replace an existing one, or remove an image. It displays each image inline in the editor as you work, so you see the page the way it renders in Confluence.
The agent adds any image it can produce or find during a session. For example, ask it to [capture a screenshot from a video](/agent/screenshots-from-video) or from [browsing an authenticated page](/agent/sandbox), then place that screenshot on the page:
```plaintext
Retrieve this Confluence page, then browse to our dashboard, take a
screenshot of the Settings panel, and add it under the "Settings" heading:
https://your-org.atlassian.net/wiki/spaces/ENG/pages/123456
```
To swap or clean up existing images, describe the change:
* Replace an image
```plaintext
Replace the outdated dashboard screenshot with a fresh capture
of the current dashboard.
```
* Remove an image
```plaintext
Remove the second screenshot in the "Overview" section — it no
longer matches the UI.
```
Images change on the live page only when you publish. When you click **Update KB**, the agent uploads the images you added as attachments before it updates the page, and deletes the attachments for any images you removed. If you close the editor or start a different task without publishing, the Confluence page and its attachments stay untouched.
Confluence only
Image management applies to Confluence pages. Publishing a Pylon article updates its text.
## Maintain the whole knowledge base
[Section titled “Maintain the whole knowledge base”](#maintain-the-whole-knowledge-base)
The same workflow scales beyond a single page. Point the agent at a managed space or knowledge base, and it can review many pages at once, apply consistent updates, and create new articles — publishing each change back with **Update KB**.
* Audit a space
```plaintext
Review the Engineering space for pages that still reference the
old deployment command. Update each one to the new command and
summarize what you changed.
```
* Improve from support tickets
```plaintext
Our support team keeps answering the same question about SSO
setup. Draft a new help center article that covers it, based on
this thread: https://workspace.slack.com/archives/C01234/p1234567890
```
* Keep articles current
```plaintext
Compare the "Billing FAQ" article against the latest pricing
page and update any answers that are out of date.
```
Review each change under **View All Changes** before you publish. For new Pylon articles, the agent uses the default author you set in **KB Management**.
Pull in more context
Combine knowledge base management with [Integrations](/agent/integrations/) to improve articles from real usage — reference Slack support threads, Jira or Linear tickets, or product analytics in the same prompt.
## Troubleshooting
[Section titled “Troubleshooting”](#troubleshooting)
| Problem | Cause | Fix |
| -------------------------------------------------------- | --------------------------------------------------------------------------------------------- | ---------------------------------------------------------------------------------------------------------------- |
| The space or knowledge base isn’t available to the agent | It isn’t marked as managed, or the integration isn’t connected | Enable it under **Settings > Organization > KB Management** and confirm you selected the space or knowledge base |
| The agent can’t retrieve a page | The connected account lacks permission, or the URL is wrong | Verify you can open the page yourself, then paste the exact page URL |
| The **Update KB** button is disabled | There are no changes to publish | Make an edit first — the button enables once the page differs from the retrieved version |
| A new Pylon article can’t be created | No default author is set | Set a **Default author** under **Settings > Organization > KB Management** |
| Publishing a Confluence page with an image fails | Confluence was connected before image management was available, so no connection ID is stored | Reconnect Confluence under **Settings > Organization > Integrations**, then publish again |
## Next steps
[Section titled “Next steps”](#next-steps)
* [Update and review](/agent/update-review/) — Keep documentation in sync with code changes.
* [Integrations](/agent/integrations/) — Reference Slack, Notion, Linear, and more in your prompts.
* [Customize for your organization](/agent/custom-instructions/) — Match your knowledge base’s tone and structure with custom instructions.
# Prevent documentation drift
> Set up automatic drift detection and a weekly scheduled review so your documentation stays in sync as code changes.
Request access
Docs Agent is available to all plans, but we grant access on request. Contact to request access.
Documentation falls behind code the moment a PR merges without a corresponding docs update. This is documentation drift — and it compounds until users file support tickets or teammates spend time figuring out what the code actually does today.
This guide sets up two safeguards that work together to catch drift automatically:
| Safeguard | When it runs | What it does |
| ------------------------- | -------------------- | ------------------------------------------------------------------------------------- |
| **Automatic PR review** | When a PR opens | Analyzes the diff and triggers a docs update when EkLine detects documentation impact |
| **Scheduled drift audit** | On a cadence you set | Reviews recent code activity and fixes the highest-priority undocumented change |
Together, they catch drift at the source (when a PR opens) and sweep for anything that slipped through (on a schedule).
## Before you begin
[Section titled “Before you begin”](#before-you-begin)
You need:
* An EkLine account with Docs Agent enabled.
* The [EkLine GitHub App connected](/agent/github-app-setup/) to at least one repository.
* At least one documentation path configured for your repository in **Settings → Organization → GitHub Integration**.
## Step 1: Verify automatic PR review is enabled
[Section titled “Step 1: Verify automatic PR review is enabled”](#step-1-verify-automatic-pr-review-is-enabled)
Automatic PR review is on by default. Confirm it is active for your repositories before continuing.
1. Go to your [EkLine Dashboard](https://ekline.io/dashboard).
2. Navigate to **Settings → Organization → GitHub Integration**.
3. Locate your documentation repository under **Documentation Repositories** and confirm the **Enable monitoring** toggle is on.
4. If the toggle is off, switch it on. EkLine saves the change immediately.
EkLine analyzes every non-draft pull request opened against a monitored repository and posts a comment when it detects documentation impact.
Tip
If this is a new installation of the GitHub App, toggle monitoring on for any repository you want to watch. Existing open PRs are not re-analyzed — the detection runs the next time a PR becomes ready for review.
## Step 2: See it detect a real change
[Section titled “Step 2: See it detect a real change”](#step-2-see-it-detect-a-real-change)
The fastest way to confirm automatic PR review works is to open a pull request that changes code with documentation impact.
1. Open a pull request against a monitored repository. Use a change that has a clear documentation impact — for example, adding a new API endpoint, renaming a configuration option, or removing a deprecated feature.
2. Make sure the PR is **ready for review** and not a draft.
3. Wait about 30 seconds. EkLine reads the diff, title, and description, then compares the changes against your existing documentation.
4. Check the PR comments. EkLine posts one of the following:
| Result | What it means |
| -------------------- | ------------------------------------------------------------------------------------------------------------ |
| No comment | Low confidence — the change likely does not affect documentation |
| Suggestion comment | Medium confidence — EkLine recommends a docs update and includes `@ekline-ai` so you can trigger it manually |
| Auto-trigger comment | High confidence — EkLine has already started a documentation session and links to a docs PR when ready |
If EkLine posts a comment, automatic drift detection is working.
Note
EkLine assesses each pull request once when it transitions to ready for review. Commits pushed after that point do not re-trigger the analysis. To re-assess, mention `@ekline-ai` manually in a new PR comment.
## Step 3: Set up a weekly scheduled drift audit
[Section titled “Step 3: Set up a weekly scheduled drift audit”](#step-3-set-up-a-weekly-scheduled-drift-audit)
The automatic PR review catches impact as PRs open. The scheduled drift audit catches changes that merged before EkLine was connected, or changes that fell below the automatic trigger threshold.
1. Click **Scheduled Agents** in the left navigation.
2. Click **New Agent**.
3. In the template picker, search for and select **Docs Drift Review**.
EkLine auto-fills the name and prompt:
```text
Audit the last 30 days of GitHub activity for customer-facing
changes that lack documentation, then fix the highest-priority gap.
```
4. Review the prompt. The default works for most teams. You can adjust the lookback window — for example, change `last 30 days` to `last 7 days` for a tighter weekly cadence — but leave the rest of the prompt as written.
5. Set the schedule to **Weekly** and pick a day and time. Monday morning is a common choice — it sweeps everything that shipped the previous week before your team starts new work.
6. Enable **Raise a pull request** so each run opens a PR with the documentation fix.
7. Optionally, enable **Send a Slack notification** and enter your docs channel name (for example, `docs-team`) to receive a run summary in Slack each week.
8. Click **Create Agent**.
The agent appears in your list and runs at the next scheduled time.
## Verify the setup
[Section titled “Verify the setup”](#verify-the-setup)
Confirm both safeguards are active:
* [ ] **Enable monitoring** is active for your documentation repository in **Settings → Organization → GitHub Integration**.
* [ ] A **Docs Drift Review** scheduled agent appears in **Scheduled Agents** with status **Enabled**.
To see the scheduled agent’s output before the first scheduled run, check back after the scheduled time. Click the chevron next to the agent to expand its run history, then click the run timestamp to open the full Docs Agent session.
## Troubleshooting
[Section titled “Troubleshooting”](#troubleshooting)
| Issue | Solution |
| ------------------------------------------ | -------------------------------------------------------------------------------------------------------------------------------------------------------------------------- |
| EkLine never comments on PRs | Verify the GitHub App is installed on the repository and **Enable monitoring** is on. The agent skips draft PRs — convert them to ready for review. |
| Auto-trigger fired but no docs PR appeared | The agent may still be processing. Wait up to a minute, then check the PR comments for a link to the EkLine session. |
| Scheduled agent shows a failed run | Click the run timestamp in run history to open the full session. Common causes: the repository is no longer accessible, or there were no code changes in the audit window. |
| Docs PR from drift review is off-target | Comment on the docs PR and mention `@ekline-ai` with feedback. The agent resumes the session and pushes corrections. |
## Next steps
[Section titled “Next steps”](#next-steps)
* [Automatic PR review](/agent/automatic-pr-review/) — Understand the confidence tiers and what each detection level means.
* [Scheduled agents](/agent/scheduled-agents/) — Explore the full template library for recurring documentation tasks.
* [GitHub PR bot](/agent/github-integration/) — Trigger documentation sessions manually from any PR comment.
* [Create documentation](/agent/create/) — Generate READMEs, API references, and guides from your codebase.
# Docs Agent reference: file types, limits, and FAQ
> Supported file types, limits, troubleshooting, and frequently asked questions.
## Supported file types
[Section titled “Supported file types”](#supported-file-types)
Upload files to give the agent more context. Click the attachment icon in the chat panel and select your files.
### Documents
[Section titled “Documents”](#documents)
| Category | Formats | Max size |
| ---------------------- | --------------------------------------------------------------------------------------------------- | -------- |
| Text and markup | `.txt`, `.md`, `.markdown`, `.csv`, `.rst`, `.html`, `.htm`, `.adoc`, `.asciidoc`, `.tex`, `.latex` | 50 MB |
| Data and configuration | `.json`, `.yaml`, `.yml`, `.toml`, `.log`, `.sql`, `.ini`, `.config` | 50 MB |
| Office | `.doc`, `.docx`, `.xls`, `.xlsx`, `.ppt`, `.pptx`, `.rtf` | 50 MB |
| PDF | `.pdf` | 50 MB |
| Images | `.jpg`, `.jpeg`, `.png`, `.gif`, `.webp`, `.tiff`, `.tif`, `.bmp` | 50 MB |
### Code files
[Section titled “Code files”](#code-files)
| Language | Formats | Max size |
| ----------------------- | ---------------------------------------------------------------------------------------------- | -------- |
| Python | `.py`, `.ipynb` | 50 MB |
| JavaScript / TypeScript | `.js`, `.jsx`, `.ts`, `.tsx`, `.css` | 50 MB |
| JVM | `.java`, `.kt`, `.kts`, `.scala` | 50 MB |
| C family | `.c`, `.cpp`, `.cxx`, `.h`, `.hpp`, `.cs` | 50 MB |
| Systems and scripting | `.rs`, `.go`, `.rb`, `.php`, `.swift`, `.dart`, `.lua`, `.pl`, `.pm`, `.t`, `.m`, `.r`, `.rmd` | 50 MB |
| Shell | `.sh`, `.bash`, `.zsh` | 50 MB |
### Video
[Section titled “Video”](#video)
| Formats | Max size |
| -------------------------------------------------------- | -------- |
| `.mp4`, `.webm`, `.mov`, `.avi`, `.mpeg`, `.mpg`, `.ogg` | 500 MB |
### Processing notes
[Section titled “Processing notes”](#processing-notes)
* **Text-based PDFs** — The agent extracts text instantly.
* **Scanned PDFs** — The agent processes these with optical character recognition (OCR), which may take longer.
* **Images** — The agent sees the image content directly. You can use images as visual context or [insert them into your documentation](/agent/create/#from-screenshots-and-images) as files.
* **Code, data, and configuration files** — Content is extracted as plain text. Files larger than 500,000 characters are truncated with a marker indicating where the content was cut.
* **Video** — The agent transcribes and summarizes the content; processing time varies with length.
### Binary files in the editor
[Section titled “Binary files in the editor”](#binary-files-in-the-editor)
When the agent inserts an image into your repository, select the file in the editor panel to preview it, and click the preview to open it larger. Other binary files appear as placeholders instead, but the agent adds the correct markdown reference in the surrounding document either way. Binary files commit when you [create a pull request](/agent/update-review/#create-a-pull-request).
## Session history
[Section titled “Session history”](#session-history)
Each conversation with Docs Agent is a session, whether you start it in the editor, from a [GitHub pull request comment](/agent/github-integration/), or from a [Slack @mention](/agent/slack-bot). EkLine keeps your sessions so you can return to them later instead of starting over.
Sessions stay resumable for 90 days from your last activity. Each time you interact with a session, the 90-day window restarts, so active conversations stay available as long as you keep using them.
Resuming a session keeps its full context. The agent remembers earlier messages, uploaded files, and the documentation it generated. How you resume depends on where the session runs:
* **Editor** — Reopen the session from the **Sessions** section in the left navigation and continue the conversation.
* **GitHub** — Mention `@ekline-ai` again on the same pull request. The agent resumes the existing session instead of starting a new one.
* **Slack** — Reply in the same thread with a follow-up `@EkLine` mention. The bot continues the same session.
After 90 days of inactivity, a session expires. When you try to resume an expired session, EkLine tells you the session is no longer available, and you can start a new session to continue your work.
## Limits
[Section titled “Limits”](#limits)
Upload limits
| Limit | Value |
| ------------------ | --------------------------- |
| Document file size | 50 MB per file |
| Video file size | 500 MB per file |
| Extracted text | 500,000 characters per file |
| Files per message | 20 |
| Session history | 90 days from last activity |
## Troubleshooting
[Section titled “Troubleshooting”](#troubleshooting)
### Docs Agent doesn’t appear in the navigation
[Section titled “Docs Agent doesn’t appear in the navigation”](#docs-agent-doesnt-appear-in-the-navigation)
Docs Agent access is granted on request. Email **** with your organization name to request access.
### The agent doesn’t understand the repository structure
[Section titled “The agent doesn’t understand the repository structure”](#the-agent-doesnt-understand-the-repository-structure)
Be more specific in your prompt:
* Reference file paths: `"Look at src/api/auth.ts"`
* Mention the framework: `"This is a Next.js project using App Router"`
* Describe the architecture: `"API routes are in src/pages/api, components in src/components"`
You can also add this kind of context permanently through [custom instructions](#can-i-give-the-agent-context-about-my-organization).
### Generated content doesn’t match the documentation style
[Section titled “Generated content doesn’t match the documentation style”](#generated-content-doesnt-match-the-documentation-style)
The agent learns from your existing docs. If styles are inconsistent, results may vary.
Try:
* Reference a specific doc as an example: `"Match the style of docs/getting-started.md"`
* Be explicit about formatting: `"Use numbered steps, not bullet points"`
* Specify tone: `"Technical but approachable, similar to Stripe's docs"`
### Integration content isn’t loading
[Section titled “Integration content isn’t loading”](#integration-content-isnt-loading)
Verify that:
1. The integration is connected in **Settings > Organization > Integrations**.
2. You have access to the Slack channel, Notion page, or ticket.
3. The URL or reference ID is correct.
### Pull request creation fails
[Section titled “Pull request creation fails”](#pull-request-creation-fails)
Verify that:
* Your repository is connected to EkLine.
* You have write access to the repository.
* The branch you’re targeting exists.
* The PR title is at least 5 characters.
If the issue persists, contact ****.
### Video processing is slow or fails
[Section titled “Video processing is slow or fails”](#video-processing-is-slow-or-fails)
Video processing time depends on length. For a 10-minute video, expect 2 to 3 minutes of processing.
If processing fails:
* Verify that the file format is supported.
* Check that the file is under 500 MB.
* Try re-uploading the file.
## FAQ
[Section titled “FAQ”](#faq)
### What repositories can Docs Agent access?
[Section titled “What repositories can Docs Agent access?”](#what-repositories-can-docs-agent-access)
Repositories connected to your EkLine organization. Manage repository access in **Settings > Organization > GitHub Integration**.
### Does the agent modify files directly?
[Section titled “Does the agent modify files directly?”](#does-the-agent-modify-files-directly)
In the editor, no. The agent generates content that you review, edit, and then publish through a pull request.
When triggered from a [GitHub PR comment](/agent/github-integration/) or a [Slack @mention](/agent/slack-bot#automatic-pull-requests), the agent automatically opens a docs PR on your configured documentation repository. You still review and merge the PR before changes reach your main branch.
### Can I use Docs Agent for private repositories?
[Section titled “Can I use Docs Agent for private repositories?”](#can-i-use-docs-agent-for-private-repositories)
Yes. The agent respects your repository permissions and only accesses repositories you’ve connected and authorized.
### Can I give the agent context about my organization?
[Section titled “Can I give the agent context about my organization?”](#can-i-give-the-agent-context-about-my-organization)
Yes. Go to **Settings > Organization > Docs Agent** and add custom instructions. Use these to give the agent context it can’t infer from your code alone — for example, the purpose of each repository, how your documentation is organized, which versions to support, or company-specific conventions. The agent applies these instructions to every session for your organization. Click **Refresh Docs Agent Instructions** to apply changes. Any organization member can edit custom instructions up to 5,000 characters.
### Can I package a workflow my team repeats?
[Section titled “Can I package a workflow my team repeats?”](#can-i-package-a-workflow-my-team-repeats)
Yes. On the same **Settings > Organization > Docs Agent** page, add a skill — a named workflow with a description of when to use it and the instructions to follow. EkLine copies your skills into every new session, where you run one by typing its slash command (`/custom-`) or let the agent reach for it when your request matches its description. See [Package a workflow as a skill](/agent/custom-skills).
### How does the agent know my documentation style?
[Section titled “How does the agent know my documentation style?”](#how-does-the-agent-know-my-documentation-style)
The agent analyzes your existing documentation to understand patterns:
* Heading structure and hierarchy.
* Code example conventions.
* Terminology and voice.
* File organization and naming.
For best results, keep a consistent style in your existing docs. You can also use [custom instructions](#can-i-give-the-agent-context-about-my-organization) to specify preferences the agent can’t pick up from the codebase.
### What happens to uploaded files?
[Section titled “What happens to uploaded files?”](#what-happens-to-uploaded-files)
EkLine extracts content from uploaded files to inform the agent’s response. EkLine stores files securely and associates them with your session. EkLine does not share them with other users or organizations.
### Can I stop the agent or send messages while it works?
[Section titled “Can I stop the agent or send messages while it works?”](#can-i-stop-the-agent-or-send-messages-while-it-works)
Yes. The chat input button has three states: **Send**, **Stop**, and **Queue**. When the agent is working, click the Stop button to cancel the current turn, or type a follow-up and click the Queue button to send it after the current turn completes. See [Control the agent while it works](/agent/getting-started/#control-the-agent-while-it-works) for details.
### Can I use Docs Agent without creating a pull request?
[Section titled “Can I use Docs Agent without creating a pull request?”](#can-i-use-docs-agent-without-creating-a-pull-request)
Yes. You can copy content directly from the editor or download the generated files. The PR workflow is optional.
### How does Docs Agent select reviewers for pull requests?
[Section titled “How does Docs Agent select reviewers for pull requests?”](#how-does-docs-agent-select-reviewers-for-pull-requests)
The agent uses two sources to assign reviewers:
* **Default reviewers** — usernames your organization administrator configures in **Settings > Organization > Docs Agent**. The agent adds these reviewers to every PR it opens.
* **Auto-assign reviewer** — enabled by default, the agent identifies who triggered the session and adds them as a reviewer. For example, if someone requests documentation from Slack, the agent looks up their GitHub username. If the session started from a source PR, the PR author is added.
Bot accounts are automatically excluded. If the agent cannot find a reviewer, the PR is still created without one.
### How long can I resume a Docs Agent session?
[Section titled “How long can I resume a Docs Agent session?”](#how-long-can-i-resume-a-docs-agent-session)
Sessions stay resumable for 90 days from your last activity. Each interaction restarts the 90-day window, so active conversations remain available as long as you keep using them. See [Session history](#session-history) for how to resume a session from the editor, GitHub, or Slack.
## Get help
[Section titled “Get help”](#get-help)
For issues not covered here, contact **** with:
* A description of what you’re trying to do.
* The prompt you used.
* Any error messages you received.
* Screenshots if applicable.
# Add reference documents for Docs Agent
> Upload reference documents to your organization knowledge base so Docs Agent uses them as extra context when it writes and updates documentation.
Request access
The organization knowledge base is available on request. Contact with your organization name to enable it.
Docs Agent learns your style from your existing docs, but some context lives outside your code and files: a product brief, a terminology sheet, an architecture overview, or an internal FAQ. Upload these as reference documents and the agent reads them as extra context whenever it generates or updates documentation for your organization.
Use this guide to upload a reference document, confirm the agent uses it, and manage your uploads.
## Before you begin
[Section titled “Before you begin”](#before-you-begin)
You need:
* An EkLine account with Docs Agent enabled
* The organization knowledge base enabled for your organization
Any member of your organization can upload and manage reference documents.
Reference documents vs. a managed knowledge base
This guide covers documents you upload to give the agent context. It is different from [managing a Confluence or Pylon knowledge base](/agent/manage-knowledge-base/), where the agent reads and writes pages in an external tool.
## Upload a reference document
[Section titled “Upload a reference document”](#upload-a-reference-document)
1. Log in to your [EkLine dashboard](https://ekline.io/dashboard).
2. Go to **Settings > Organization > Knowledge Base**.
3. In the **Upload Document** section, drag a file onto the upload area, or click it to select a file. All file types are supported.
4. Wait for the upload to finish. EkLine processes the document and adds it to the **Uploaded Documents** list with a generated title and a one-line summary.
The agent uses your uploaded documents in every session your organization starts after the upload finishes. You can start the session in the editor or trigger it from a [GitHub pull request](/agent/github-integration/), [GitLab merge request](/agent/gitlab-integration/), or [Slack](/agent/slack-bot/).
## What to upload
[Section titled “What to upload”](#what-to-upload)
Upload context the agent can’t get from reading your code or existing docs:
* **Product and feature briefs.** What a feature does and who it’s for.
* **Terminology and glossaries.** Preferred terms, product names, and definitions.
* **Architecture overviews.** How your systems fit together.
* **Internal FAQs and support notes.** Answers your team already gives customers.
Keep each document focused and current. The agent treats every uploaded document as accurate, so remove anything out of date.
Tip
Reference documents give the agent facts to draw on. To set standing rules for how the agent writes, such as spelling, voice, and terminology it must follow, use [custom instructions](/agent/custom-instructions/) instead. The two work together.
## Manage your documents
[Section titled “Manage your documents”](#manage-your-documents)
The **Uploaded Documents** list shows every document available to the agent. From the list, you can:
* **Preview** a document to confirm you uploaded the right file.
* **Delete** a document you no longer want the agent to use.
Caution
Deleting a document is permanent. After you delete it, the agent stops using it in new sessions.
## Verify the agent uses a document
[Section titled “Verify the agent uses a document”](#verify-the-agent-uses-a-document)
1. Open the editor and start a new session.
2. Ask the agent a question that only your uploaded document answers. For example, `"What does our onboarding service do?"`
3. Confirm the answer reflects the content of your document.
If the answer doesn’t reflect your document, confirm the upload finished processing and appears in the **Uploaded Documents** list, then start a new session.
## Troubleshooting
[Section titled “Troubleshooting”](#troubleshooting)
### The Knowledge Base tab isn’t available
[Section titled “The Knowledge Base tab isn’t available”](#the-knowledge-base-tab-isnt-available)
The organization knowledge base is granted on request. If you don’t see **Settings > Organization > Knowledge Base**, email **** with your organization name to request access.
### The upload fails
[Section titled “The upload fails”](#the-upload-fails)
* Try uploading the file again.
* Upload one file at a time.
* If the error persists, contact **** with the filename and the error message shown.
### The agent doesn’t use an uploaded document
[Section titled “The agent doesn’t use an uploaded document”](#the-agent-doesnt-use-an-uploaded-document)
* Confirm the document appears in the **Uploaded Documents** list.
* Start a new session. The agent picks up new documents in sessions started after the upload finishes.
## Next steps
[Section titled “Next steps”](#next-steps)
* [Customize Docs Agent for your organization](/agent/custom-instructions/): Set the conventions the agent follows in every session.
* [Create documentation](/agent/create/): Generate READMEs, API references, and guides.
* [Docs Agent reference](/agent/reference/): Supported file types, limits, and FAQ.
# Keep documentation screenshots up to date
> Set up Docs Agent to recapture stale documentation screenshots from your live product, on demand and on a recurring schedule.
Request access
Docs Agent is available to all plans, but we grant access on request. Contact to request access.
Screenshots go stale quietly. A button gets renamed, a settings panel moves, a field is added — and the image in your guide still shows last quarter’s interface. Readers follow the picture instead of the prose, and your docs teach them the wrong thing.
This guide sets up screenshot maintenance in two stages. First, run a one-off refresh yourself to confirm the agent captures your product correctly. Then, use a recurring agent to keep the images current without anyone needing to remember to check.
## Before you begin
[Section titled “Before you begin”](#before-you-begin)
You need:
* An EkLine account with Docs Agent enabled.
* A repository [connected to EkLine](/agent/github-app-setup/) that holds both your documentation pages and their image files.
* A [sandbox](/agent/sandbox/) for each product URL your screenshots come from. The sandbox gives the agent the address to visit and, for pages behind a login, the sign-in variables it needs.
* Documentation pages that reference their screenshots. The agent finds candidate images by reading how your pages reference them.
Tip
Point the sandbox at a staging environment with representative data rather than production. Recaptured images ship in a pull request to your public docs, so the account you sign in with decides what appears on screen.
## Step 1: Confirm the sandbox reaches your product
[Section titled “Step 1: Confirm the sandbox reaches your product”](#step-1-confirm-the-sandbox-reaches-your-product)
The agent can only recapture a screen it can open. Verify this before you schedule anything.
1. Go to your [EkLine dashboard](https://ekline.io/dashboard) and navigate to **Settings > Organization > Docs Agent**.
2. In the **Sandbox** section, confirm a sandbox appears under **Configured sandboxes** with the URL your screenshots come from. Note its **name** — you need the name, not the URL, in Step 3.
3. If no sandbox matches, [create one](/agent/sandbox/#create-a-sandbox).
## Step 2: Run a refresh on demand
[Section titled “Step 2: Run a refresh on demand”](#step-2-run-a-refresh-on-demand)
Run one refresh yourself before you put it on a schedule. You see what the agent captures, and you find any sign-in or navigation problem while someone is watching.
1. Open the Docs Agent editor and start a new session.
2. Ask the agent to refresh your screenshots against the sandbox by name:
```text
Check the screenshots in our documentation against the
staging-admin sandbox. Recapture any that no longer match
the product, then open a pull request.
```
3. Watch the [Live browser panel](/agent/getting-started/#watch-the-agent-browse) as the agent signs in and navigates. Each page it opens appears in real time.
4. Review what the agent reports. It lists the images it recaptured, the screen each one depicts, and any image it deferred with the reason.
5. Click **Raise PR** to open a pull request with the new images. The button prefills a chat message — send it, and the agent opens the PR.
## Step 3: Schedule a recurring refresh
[Section titled “Step 3: Schedule a recurring refresh”](#step-3-schedule-a-recurring-refresh)
With the sandbox proven, hand the recurring work to a scheduled agent.
1. Click **Scheduled Agents** in the left navigation, then click **New Agent**.
2. In the template picker, search for and select **Doc Screenshot Refresh**.
3. Replace the highlighted `` placeholder with your sandbox name. To cover more than one product URL, enter one sandbox name per line:
```text
staging-admin
staging-marketing
```
The form prevents saving until you replace the placeholder.
4. Set the schedule. Monthly suits most teams — screenshots drift more slowly than prose, and each run changes at most five images. Choose weekly if your interface is under active redesign.
5. Leave **Raise a pull request** enabled so each run delivers its images for review.
6. Optionally enable **Send a Slack notification** and enter a channel name, such as `docs-team`, to get a summary of each run.
7. Click **Create Agent**.
## What the agent changes and what it leaves alone
[Section titled “What the agent changes and what it leaves alone”](#what-the-agent-changes-and-what-it-leaves-alone)
The agent is deliberately conservative. Knowing where the line falls saves you from reviewing a pull request that seems to have missed something.
| The agent | Detail |
| -------------------------------- | ----------------------------------------------------------------------------------------------------------------------------------------------------------------------- |
| Recaptures product screenshots | Images that show your product’s interface, cropped to the element the image depicts |
| Creates missing images | When a page’s prose and alt text call for a screenshot that isn’t there |
| Replaces only structural changes | A renamed label, a moved control, a new field, a reworked layout — a change a reader would act on |
| Skips dynamic content | Row values, timestamps, chart figures, and the signed-in username differ on every visit, so the agent leaves those images alone rather than churning your docs each run |
| Skips non-screenshots | Diagrams, logos, illustrations, and mockups stay untouched |
| Caps each run | At most five images per run, missing images first. It reports anything it defers |
| Changes images, not prose | For documentation that describes the interface incorrectly in text, use the **Doc UI Accuracy Review** template instead |
## Verify the setup
[Section titled “Verify the setup”](#verify-the-setup)
Confirm both stages are in place:
* [ ] A sandbox for each product URL appears under **Configured sandboxes** in **Settings > Organization > Docs Agent**.
* [ ] A **Doc Screenshot Refresh** agent appears in **Scheduled Agents** with status **Enabled** and no `` placeholder left in its prompt.
To see the output before the first scheduled run, click the play icon on the agent row to run it immediately. Then click the chevron to expand its run history and click the run timestamp to open the full session.
## Troubleshooting
[Section titled “Troubleshooting”](#troubleshooting)
| Issue | Solution |
| --------------------------------------------------------- | ----------------------------------------------------------------------------------------------------------------------------------------------------------------------------- |
| The run reports that it couldn’t sign in | The sandbox variables are wrong, or the sign-in form needs a value the sandbox doesn’t have. See [The agent can’t sign in](/agent/sandbox/#the-agent-cant-sign-in). |
| The agent browsed the site but stayed signed out | The page host doesn’t match the sandbox URL. A sandbox for `staging.example.com` doesn’t apply to `app.example.com`. |
| The run finished without a pull request | Nothing needed replacing. When every candidate image differs only in dynamic content, the agent discards the captures rather than opening an empty pull request. |
| A screenshot you expected wasn’t updated | Check the run’s deferred list. Common reasons: the agent couldn’t tell which screen the image shows, the image isn’t a product screenshot, or the run hit its five-image cap. |
| The run reports no target | The sandbox name in the prompt doesn’t match a configured sandbox. Names are fixed at creation — confirm the exact spelling under **Configured sandboxes**. |
| Recaptured images show test data you don’t want published | Point the sandbox at an account with presentable data, then re-run. Review each image in the pull request before merging. |
## Next steps
[Section titled “Next steps”](#next-steps)
* [Browse authenticated pages with a sandbox](/agent/sandbox/) — Configure the sign-in variables the agent uses to reach pages behind a login.
* [Scheduled agents](/agent/scheduled-agents/) — Explore the full template library for recurring documentation tasks.
* [Capture screenshots from a video](/agent/screenshots-from-video/) — Turn a moment in a recording into a documentation image.
* [Crop, redact, and annotate documentation images](/agent/edit-doc-images) — Make a raw capture publishable before it ships.
* [Prevent documentation drift](/agent/prevent-documentation-drift/) — Catch undocumented code changes alongside stale images.
# Generate release notes from completed tickets
> Use Docs Agent to turn completed Linear or Jira tickets into structured, user-facing release notes and open a pull request for review.
Request access
Docs Agent is available to all plans, but we grant access on request. Contact to request access.
Turn a set of completed tickets into a clear, user-facing release note. Docs Agent reads each ticket’s title, description, and comments, then rewrites the work in plain language. It groups the work into sections such as Features and Bug Fixes, then opens a pull request you can review before publishing.
This guide covers the interactive workflow in the editor. To produce release notes automatically on a recurring cadence, see [Automate release notes](#automate-release-notes).
## Before you begin
[Section titled “Before you begin”](#before-you-begin)
You need:
* An EkLine account with Docs Agent enabled.
* At least one repository [connected to EkLine](/agent/github-app-setup/).
* A connected ticket source. Docs Agent generates release notes from **Linear** or **Jira**. Connect one under **Settings > Organization > Integrations** (see [Integrations](/agent/integrations/)).
* The ticket identifiers you want to include, such as `ENG-100` through `ENG-110`, or a milestone or release name the agent can look up.
## Generate a release note
[Section titled “Generate a release note”](#generate-a-release-note)
1. Log in to your [EkLine dashboard](https://ekline.io/dashboard) and click **Docs Agent** in the left navigation.
2. In the chat panel, describe the release. Name the tickets, the output sections, and the audience:
```plaintext
Generate release notes for v2.1 from Linear tickets ENG-100
through ENG-110. Group them under Features, Improvements, and
Bug Fixes. Write for end users, one sentence per item.
```
3. Wait while the agent reads each ticket and drafts the release note in the editor panel.
4. Review the draft. Ask the agent to refine anything that reads inaccurately — for example, `Move the rate-limiting change under Improvements` or `Rewrite the SSO item without internal jargon`.
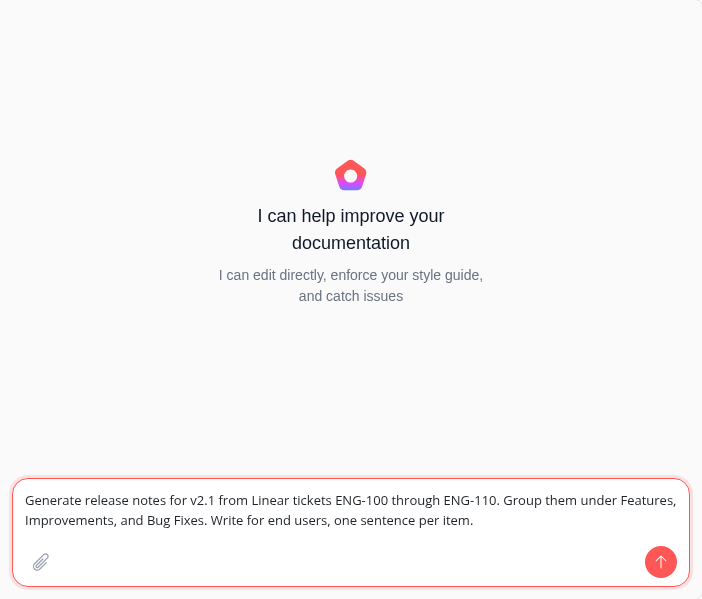
The agent summarizes each ticket from an end-user perspective rather than copying the ticket text, so internal shorthand and implementation detail stay out of the published note.
## Structure the output
[Section titled “Structure the output”](#structure-the-output)
Tell the agent how to group and order entries so the release note matches your existing format.
* Group by type
```plaintext
Generate release notes for the tickets in the "1.4" milestone.
Group them under Features, Improvements, and Bug Fixes. Within
each group, list the most impactful change first.
```
* Match an existing file
```plaintext
Generate release notes for tickets ENG-200 through ENG-215.
Match the heading style and tone of CHANGELOG.md, and add the
new version at the top.
```
* Highlight breaking changes
```plaintext
Generate release notes for the v3.0 release from Jira tickets
in the PLAT project fixVersion 3.0. Call out breaking changes
in a separate section at the top with migration notes.
```
Write better prompts
* **Name the version** — `"Add these under a v2.1 heading"`.
* **Set the audience** — `"Write for end users, not engineers"`.
* **Control length** — `"One sentence per item, no more than 12 words"`.
* **Point to a template** — `"Match the format of the last entry in CHANGELOG.md"`.
* **Exclude internal work** — `"Skip refactors and internal tooling changes"`.
## Verify the release note
[Section titled “Verify the release note”](#verify-the-release-note)
Before you publish, confirm the draft is accurate and complete.
1. Enable **View All Changes** in the toolbar to see a diff of what the agent wrote.
2. Check that every ticket you named appears, and that no internal-only tickets slipped in.
3. Confirm version numbers, dates, and section headings match your convention.
The agent validates links and email addresses in the generated content and regenerates any section it finds a broken link in.
## Raise a pull request
[Section titled “Raise a pull request”](#raise-a-pull-request)
When the draft is ready:
1. Click **Raise PR** in the toolbar. The agent prefills a prompt in the chat panel, such as `Open a pull request`.
2. Edit the prompt if you want to add instructions, then press **Enter**.
3. The agent opens the pull request and replies in the chat with a link so you can finish the review on GitHub.
To add a late-arriving ticket after the PR is open, ask the agent for the change, then click **Update PR** to push it to the same branch.
## Automate release notes
[Section titled “Automate release notes”](#automate-release-notes)
To generate release notes on a schedule instead of on demand, use the **Release Notes Generator** template for [scheduled agents](/agent/scheduled-agents/). It drafts structured release notes from completed tickets and GitHub activity since the last release-notes update, and delivers them as a pull request, a Slack message, or both.
## Troubleshooting
[Section titled “Troubleshooting”](#troubleshooting)
| Problem | Cause | Fix |
| ------------------------------------------ | ------------------------------------------------------------- | ----------------------------------------------------------------------------------------------------------------- |
| The agent can’t find a ticket | The ticket source isn’t connected, or the identifier is wrong | Connect Linear or Jira under **Settings > Organization > Integrations**, then confirm the ticket key and project. |
| Entries read like internal commit messages | The prompt didn’t set an audience | Add `"Write for end users"` and ask the agent to rewrite items in plain language. |
| A ticket is missing from the draft | It fell outside the range or milestone you named | Name the ticket explicitly, or widen the range: `"Also include ENG-118"`. |
| Sections are in the wrong order | The default grouping doesn’t match your format | Specify the sections and their order in the prompt, or point the agent at an existing changelog file to match. |
## Next steps
[Section titled “Next steps”](#next-steps)
* [Create documentation](/agent/create/) — Generate READMEs, API references, and guides from your codebase.
* [Update and review](/agent/update-review/) — Keep documentation in sync with code changes.
* [Scheduled agents](/agent/scheduled-agents/) — Automate release notes and other recurring documentation tasks.
* [Integrations](/agent/integrations/) — Connect Linear, Jira, Slack, and more.
# Rename a feature across all your docs
> Use Docs Agent to rename a feature, change a product term, or update pricing consistently across every page — then ship a single pull request.
Request access
Docs Agent is available to all plans, but we grant access on request. Contact **** to request access.
When you rename a feature, change a product name, or update a price, the old wording lingers in dozens of pages — headings, body text, captions, and example code. Missing a few is how docs end up contradicting the product.
This guide shows you how to make one consistent change across your entire documentation set in a single Docs Agent session. The agent searches the whole repository, updates every occurrence and its variations, shows you the full diff, and opens one pull request for review.
A site-wide rename is more than find-and-replace. Capitalization, plurals, possessives, and link text all shift with the term, and some occurrences — a code identifier, a URL slug, a changelog entry — must stay exactly as they are. The agent handles the difference when you tell it the boundary.
## Before you begin
[Section titled “Before you begin”](#before-you-begin)
You need:
* An EkLine account with Docs Agent enabled. Don’t have access? Email **** with your organization name.
* A documentation repository [connected to EkLine](/agent/github-app-setup/). GitLab works too — [connect GitLab](/agent/gitlab-setup/) instead.
* Permission to open pull requests on that repository.
## Step 1: Describe the change and its scope
[Section titled “Step 1: Describe the change and its scope”](#step-1-describe-the-change-and-its-scope)
Open the editor and tell the agent three things: the old term, the new term, and where the change applies. Name what to leave alone in the same prompt so the agent doesn’t over-reach.
1. Log in to your [EkLine dashboard](https://ekline.io/dashboard) and click **Docs Agent** in the left navigation.
2. In the chat panel, describe the rename and its boundary:
```plaintext
We renamed the "Workspace" feature to "Project" across the product.
Update every mention in the docs/ folder to use "Project" — headings,
body text, captions, and prose in code examples. Leave URL slugs, file
names, and code identifiers like `workspaceId` unchanged.
```
State what not to change
The boundary matters as much as the change. Call out code identifiers, URL slugs, file names, and historical changelog entries you want preserved, so a broad rename doesn’t rewrite an API field or break a permalink.
**Verify:** The agent responds in the chat and begins reading your repository.
## Step 2: Let the agent find every occurrence
[Section titled “Step 2: Let the agent find every occurrence”](#step-2-let-the-agent-find-every-occurrence)
The agent searches your whole connected repository, not only the files you name. It finds occurrences you might miss — a term buried in a troubleshooting page, an image caption, or a comment inside an example.
**Verify:** The agent reports the files it plans to change and drafts the edits in the editor panel on the left.
## Step 3: Cover the variations
[Section titled “Step 3: Cover the variations”](#step-3-cover-the-variations)
A term can appear in multiple forms. Plurals, adjectives, and link text all need to move together, while lookalike words that mean something else must stay. Send a follow-up to catch the variations:
* Plurals and forms
```plaintext
Also update the variations: "Workspaces" to "Projects" and
"workspace-level" to "project-level". Keep the sentence grammar
correct after each change.
```
* Link text
```plaintext
Update the anchor text of any link that reads "Workspace" or
"Workspaces" to match the new term. Leave the link URLs unchanged.
```
* Avoid false matches
```plaintext
Don't change the word "workspace" where it refers to a VS Code
workspace — that's a different concept. Only rename our product feature.
```
The agent updates the same draft rather than starting over, so each follow-up refines the change in place.
## Step 4: Review the full diff
[Section titled “Step 4: Review the full diff”](#step-4-review-the-full-diff)
A site-wide change touches many files, so review it as a whole before you ship.
1. Enable **View All Changes** in the toolbar to see a diff of every modification across all files.
2. Scan for the three failure modes of a bulk rename:
* **Over-eager matches** — A word that matched the pattern but meant something else.
* **Broken links** — Anchor text renamed but a target left stale, or the reverse.
* **Preserved-term drift** — A code identifier, URL, or filename changed when you asked to keep it.
**Verify:** The diff shows the new term throughout your prose, with the identifiers, slugs, and file names you named still intact.
## Step 5: Fix misses with a follow-up
[Section titled “Step 5: Fix misses with a follow-up”](#step-5-fix-misses-with-a-follow-up)
Reviewing a large change almost always surfaces a straggler. Point the agent at it instead of editing by hand:
```plaintext
You missed the term in docs/billing.md, and you changed `workspaceId`
in the API example — revert that identifier back. Everything else
looks right.
```
The agent applies the correction to the current draft. Repeat until the diff is clean.
## Step 6: Open a single pull request
[Section titled “Step 6: Open a single pull request”](#step-6-open-a-single-pull-request)
Ship the whole rename as one reviewable change.
1. Click **Raise PR** in the toolbar.
2. The agent prefills a prompt such as `Open a pull request`. Edit it to add a title or description — for example, `Rename Workspace to Project across the docs` — then press **Enter**.
3. The agent creates the pull request and responds in the chat with a link to it.
**Verify:** The chat shows a link to one pull request that contains every renamed page and nothing unrelated.
Note
If your session spans multiple repositories, the toolbar shows a **PRs** dropdown in place of the **Raise PR** button. Open it and raise a pull request for each repository the rename touched.
## Troubleshooting
[Section titled “Troubleshooting”](#troubleshooting)
| Problem | Cause and fix |
| ------------------------------------------------------------- | ----------------------------------------------------------------------------------------------------------------------------------------------------------------------------------------------------- |
| The agent changed a code identifier or URL you wanted to keep | The boundary wasn’t explicit. Ask it to revert that specific change and name what to preserve — for example, tell it to restore the original identifier and leave all code identifiers untouched. |
| The agent missed a file | Name the file or section directly, and confirm the path is inside a connected repository. |
| Too many changes to review at once | Scope the rename by directory and run it in batches — `"Only update docs/api/ for now"` — then repeat for the next directory. |
| The old term still appears in a screenshot | The agent edits text, not pixels. Recapture or edit the image separately with [Keep screenshots up to date](/agent/refresh-doc-screenshots/) or [Edit documentation images](/agent/edit-doc-images/). |
## Next steps
[Section titled “Next steps”](#next-steps)
* [Customize for your organization](/agent/custom-instructions) — Record the new term in your custom instructions so the agent uses it in every future draft.
* [Manage a knowledge base](/agent/manage-knowledge-base) — Apply the same rename to a connected Confluence or Pylon knowledge base.
* [Update and review documentation](/agent/update-review/) — Keep docs in sync when the code behind a feature changes, not only its name.
* [Combine multiple sources into one document](/agent/combine-sources/) — Pull a ticket, pull request, and spec into a single authoritative page.
# Control which pull requests EkLine reviews
> Set per-repository review rules to scope which pull requests Docs Agent reviews by branch, title, author, label, or changed files.
Request access
Docs Agent is available to all plans, but we grant access on request. Contact to request access.
By default, [automatic PR review](/agent/automatic-pr-review/) assesses every pull request opened into your repository’s default branch. Review rules let you narrow that scope per repository — so EkLine skips the pull requests you don’t want reviewed and spends its attention on the ones that matter.
Use review rules to skip draft pull requests, add release branches, or ignore pull requests by title, author, label, or the files they change.
Note
This guide uses **pull request (PR)** throughout. On GitLab, EkLine shows the same rules for **merge requests (MRs)**, and the labels read “MR” instead of “PR”. The steps are identical.
## Before you begin
[Section titled “Before you begin”](#before-you-begin)
You need:
* An EkLine account with Docs Agent enabled.
* The [EkLine GitHub App connected](/agent/github-app-setup/) — or [GitLab connected](/agent/gitlab-setup/) — to at least one repository.
* **Enable monitoring** turned on for the repository you want to configure. Review rules are only reachable for monitored repositories.
## Open the review rules for a repository
[Section titled “Open the review rules for a repository”](#open-the-review-rules-for-a-repository)
1. Log in to your [EkLine dashboard](https://ekline.io/dashboard).
2. Go to **Settings > Organization > GitHub Integration** (or **GitLab Integration**).
3. Find the repository in the list and confirm the **Enable monitoring** toggle is on.
4. Click the gear icon next to the repository. Its label reads **Configure review rules**.
Tip
The gear icon appears only when **Enable monitoring** is on. If you don’t see it, switch monitoring on first, then reopen the repository row.
The review rules page opens with the repository name at the top and a back link to the integration page. The default rules review every pull request opened into your default branch.
## Choose which pull requests to review
[Section titled “Choose which pull requests to review”](#choose-which-pull-requests-to-review)
The review rules page groups its controls into filters. Each filter narrows the set of pull requests EkLine reviews — a pull request is reviewed only when it passes every filter.
### Skip draft pull requests
[Section titled “Skip draft pull requests”](#skip-draft-pull-requests)
The **Skip draft PRs** toggle is on by default, so EkLine ignores draft pull requests until you mark them ready for review. Turn it off to review drafts as well.
### Branch rules
[Section titled “Branch rules”](#branch-rules)
| Field | What it does |
| ---------------------------------- | -------------------------------------------------------------------------------------------------------------------------------------- |
| **Review PRs into these branches** | EkLine reviews pull requests that target any branch listed here. Your default branch is prepopulated. At least one branch is required. |
| **Skip PRs from these branches** | EkLine skips pull requests whose source (head) branch matches an entry. Leave it empty to review pull requests from any branch. |
Both fields match branch names with regular expressions. Patterns are **unanchored** unless you add `^` and `$`, and matching is **case-sensitive**. The prepopulated default branch is already anchored — for example, `^main$`.
To review release branches as well as your default branch, add a pattern such as `release/.*` to **Review PRs into these branches**. To skip documentation-only branches, add `^docs/` to **Skip PRs from these branches**.
### Pull request filters
[Section titled “Pull request filters”](#pull-request-filters)
| Field | What it does |
| -------------------------------- | ----------------------------------------------------------------------------------------------------------------------------------------------------------------------------- |
| **Skip PRs whose title matches** | Skips pull requests whose title matches a regular expression — for example, `^chore:` to skip chore commits. |
| **Skip PRs from these authors** | Skips pull requests opened by the usernames listed. Match usernames exactly. Bot accounts include the `[bot]` suffix — for example, `dependabot[bot]`. |
| **Filter by label** | Type a label name to require it, so EkLine reviews only pull requests carrying that label. Prefix a label with `!` to skip pull requests that carry it — for example, `!wip`. |
Author matching is case-insensitive. Label matching is case-insensitive on GitHub and case-sensitive on GitLab.
### File filters
[Section titled “File filters”](#file-filters)
The **Skip PRs that only touch these files** field takes glob patterns. EkLine skips a pull request only when *every* changed file matches at least one pattern. A pull request that touches any non-matching file is still reviewed.
For example, `**/*.md` skips pull requests that change only Markdown files, but still reviews a pull request that changes a Markdown file alongside a source file.
Note
Each field holds up to 50 entries. A pattern can be up to 500 characters, and a username or label up to 100 characters.
## Save your rules
[Section titled “Save your rules”](#save-your-rules)
1. Add an entry to any field by typing a value and pressing **Enter** or a comma. Each entry appears as a chip. To remove the last chip, press **Backspace** in an empty field.
2. Click **Save changes**. EkLine validates your patterns and confirms with a **Review rules saved** message.
EkLine reads review rules when it assesses a pull request, so your changes apply to the next pull request opened against the repository.
Tip
To start over, click **Reset all rules to defaults**. This restores the default filters while leaving monitoring on.
## Verify your rules
[Section titled “Verify your rules”](#verify-your-rules)
Confirm the rules take effect on a real pull request:
1. Open a pull request that one of your rules should skip — for example, a draft pull request, or one whose title matches a skip pattern.
2. Wait about 30 seconds, then check the pull request. EkLine posts no automatic review comment, because the pull request was filtered out.
3. Open a pull request that your rules should review — for example, one into a reviewed branch with a documentation-impacting change. EkLine assesses it and comments when it detects documentation impact.
## Troubleshooting
[Section titled “Troubleshooting”](#troubleshooting)
| Issue | Solution |
| ---------------------------------------------------- | ------------------------------------------------------------------------------------------------------------------------------------------------------------------------------------------------------------------- |
| No gear icon next to the repository | Review rules open only for monitored repositories. Turn on **Enable monitoring** for the repository, then reopen the row. |
| Save is blocked with an error on a field | A pattern is invalid or an entry is uncommitted. Fix the highlighted regular expression, or press **Enter** to add a pending entry (or clear it), then save again. |
| Save is blocked asking for a branch | **Review PRs into these branches** requires at least one entry. Add your default branch — for example, `^main$` — before saving. |
| A pull request I expected to skip was still reviewed | Regular expressions are unanchored and case-sensitive. Confirm the pattern matches the exact branch, title, or author. For file filters, remember EkLine skips a pull request only when every changed file matches. |
| A pull request I expected to review was skipped | Check each filter in turn — a skip pattern for the branch, title, author, or label may be catching it. |
## Next steps
[Section titled “Next steps”](#next-steps)
* [Automatic PR review](/agent/automatic-pr-review/) — Understand the confidence tiers that decide what EkLine does after a pull request passes your rules.
* [Prevent documentation drift](/agent/prevent-documentation-drift/) — Pair automatic PR review with a scheduled drift audit.
* [Connect GitHub](/agent/github-app-setup/) — Install the GitHub App and select repositories to monitor.
# Browse authenticated pages with a sandbox
> Set up a sandbox so EkLine Docs Agent can sign in to your product and capture screenshots of pages behind a login.
A sandbox gives Docs Agent a site URL and the sign-in variables it needs to reach pages behind a login. With a sandbox configured, the agent can open your product, sign in, and capture screenshots of authenticated pages to include in your documentation. Without one, the agent can browse only pages that don’t require signing in.
Use this guide to create a sandbox, edit or remove it, and ask the agent to use it in a session. You can watch each page the agent visits in the [Live browser panel](/agent/getting-started/#watch-the-agent-browse).
Note
Variables belong to a sandbox’s host. When the agent browses a page whose host matches a sandbox URL, it uses that sandbox’s variables to sign in before it captures the page.
## Prerequisites
[Section titled “Prerequisites”](#prerequisites)
* An EkLine account with Docs Agent enabled.
* Access to your organization’s Docs Agent settings. You can request Docs Agent access — see [The Sandbox section isn’t available](#the-sandbox-section-isnt-available).
* The URL of the site you want the agent to browse, and a set of sign-in credentials for it.
Tip
Use a dedicated test or staging account with the least access the agent needs, rather than a personal administrator login. This keeps the agent’s reach easy to review and limits what a stored credential can do.
## Create a sandbox
[Section titled “Create a sandbox”](#create-a-sandbox)
1. **Open your Docs Agent settings.**
Go to your [EkLine dashboard](https://ekline.io/dashboard) and navigate to **Settings > Organization > Docs Agent**. Find the **Sandbox** section.
2. **Name the sandbox.**
In **Sandbox name**, enter a unique name such as `admin-staging`. The name identifies the sandbox and can’t be changed later — to rename it, delete and recreate it. Two sandboxes can share a URL with different variables.
3. **Enter the site URL.**
In **Sandbox URL**, enter the full URL, such as `https://staging.example.com`. The agent applies this sandbox’s variables when it browses a page on this host.
4. **Add sign-in variables.**
Each variable is a name and value pair. EkLine starts you with `email` and `password` rows — enter the values the site needs to sign in. Values for variables named with `password`, `secret`, `token`, or `key` are masked as you type. Click **Add variable** to add more, such as an organization slug. Add at least one variable with a value.
5. **Save the sandbox.**
Click **Save sandbox**. The sandbox appears under **Configured sandboxes** with its URL and a badge for each variable name.
Caution
EkLine stores variable values encrypted. Only variable names appear in the **Configured sandboxes** list — values are never shown there.
## Edit a sandbox
[Section titled “Edit a sandbox”](#edit-a-sandbox)
1. **Open the sandbox.**
In **Configured sandboxes**, click the edit icon next to the sandbox. The **Edit** dialog opens with the current URL and variables filled in. The name is fixed.
2. **Change the URL or variables.**
Update the URL, edit values, or add and remove variables as needed.
3. **Update the sandbox.**
Click **Update sandbox**.
To keep a saved value without retyping it — a password, for example — leave that variable’s value blank. EkLine keeps the value already stored. Enter a new value only when you want to replace it.
## Delete a sandbox
[Section titled “Delete a sandbox”](#delete-a-sandbox)
In **Configured sandboxes**, click the delete icon next to the sandbox.
Caution
Deleting a sandbox removes its stored variables and can’t be undone. The agent can no longer sign in to that site until you recreate the sandbox.
## Use a sandbox in a session
[Section titled “Use a sandbox in a session”](#use-a-sandbox-in-a-session)
Ask the agent to browse or screenshot a page on the sandbox’s host. The agent signs in with the sandbox variables, then captures the page. Watch it work in the [Live browser panel](/agent/getting-started/#watch-the-agent-browse).
```text
Sign in to https://staging.example.com and add a screenshot of the
billing settings page to the "Manage billing" guide.
```
## Verify the sandbox
[Section titled “Verify the sandbox”](#verify-the-sandbox)
Confirm the sandbox is ready:
* The sandbox appears under **Configured sandboxes** with the correct URL and a badge for each variable.
* In a session, ask the agent to screenshot a page that requires signing in. In the **Live browser** panel, confirm the agent reaches the page as a signed-in user.
## Troubleshooting
[Section titled “Troubleshooting”](#troubleshooting)
### The Sandbox section isn’t available
[Section titled “The Sandbox section isn’t available”](#the-sandbox-section-isnt-available)
You can request Docs Agent access. If you don’t see **Settings > Organization > Docs Agent**, email **** with your organization name to request access. If the settings page opens but the **Sandbox** section isn’t there, contact ****.
### The agent can’t sign in
[Section titled “The agent can’t sign in”](#the-agent-cant-sign-in)
The credentials are wrong, or the sign-in form needs a value you didn’t add. Edit the sandbox, confirm each value is correct, and add any extra variable the login requires, such as an organization slug.
### The agent browses but doesn’t sign in
[Section titled “The agent browses but doesn’t sign in”](#the-agent-browses-but-doesnt-sign-in)
The page host doesn’t match the sandbox URL. Confirm the host in **Sandbox URL** matches the page you asked the agent to open. A sandbox for `staging.example.com` doesn’t apply to `app.example.com`.
### A saved value seems wrong after editing
[Section titled “A saved value seems wrong after editing”](#a-saved-value-seems-wrong-after-editing)
You left the value blank while editing, which keeps the previous value. Enter the new value explicitly to replace it.
## Next steps
[Section titled “Next steps”](#next-steps)
* [Watch the agent browse](/agent/getting-started/#watch-the-agent-browse) — See each page the agent visits in real time.
* [Create documentation](/agent/create/#from-screenshots-and-images) — Insert screenshots the agent captures into your docs.
* [Keep documentation screenshots up to date](/agent/refresh-doc-screenshots/) — Recapture stale images from your live product on a schedule.
* [Customize Docs Agent for your organization](/agent/custom-instructions/) — Set conventions the agent applies to every session.
***
## Stuck?
[Section titled “Stuck?”](#stuck)
Reply to your welcome email or contact . We read every message.
# EkLine scheduled documentation agents
> Automate recurring documentation tasks (drift audits, tutorial gap analysis, SEO reviews, release notes) with agents that run on a schedule you define.
Documentation drifts out of date the moment code ships. New features go undocumented, tutorials fall behind, and stale README files mislead users. Catching these problems manually is tedious and easy to forget.
Scheduled agents handle this for you. Each agent runs a prompt on a recurring cadence — hourly, daily, weekly, or monthly — and delivers the results as a pull request, a Slack message, or both. You set it up once, and EkLine keeps your docs accurate without ongoing effort.
[Scheduled Agents Demo](https://www.youtube.com/embed/56ygnpePseA?si=NoPSXqX8YkOfwAPf)
## What you can automate
[Section titled “What you can automate”](#what-you-can-automate)
EkLine provides pre-built templates that cover the most common documentation maintenance tasks. Each template is a proven prompt that the agent runs on every scheduled execution. You can also write your own prompt from scratch.
### Quality and accuracy audits
[Section titled “Quality and accuracy audits”](#quality-and-accuracy-audits)
These templates catch problems before your users do.
| Template | What it does |
| ------------------------------------------ | ------------------------------------------------------------------------------------------------------------------------------------------------------------------------------------------------------------------------------------------- |
| **Docs Drift Review** | Audits recent GitHub activity — across a lookback window you set, 30 days by default — for customer-facing changes that lack documentation, then fixes the highest-priority gap. |
| **Code Sample Review** | Verifies that code samples in your docs are accurate and runnable against the APIs and SDKs they demonstrate, then opens a PR fixing accuracy issues. |
| **Doc UI Accuracy Review** | Checks that your docs match the current frontend UI — labels, navigation paths, element placement — and opens a PR fixing UI drift. |
| **Image Alt Audit** | Scans documentation images for missing or low-quality alt text and fixes up to 20 images per run for accessibility compliance. |
| **Doc Screenshot Refresh** | Compares documentation screenshots against your live product interface, then regenerates stale ones and creates missing ones — up to five images per run. See [Keep documentation screenshots up to date](/agent/refresh-doc-screenshots/). |
| **README Review** | Audits your `README.md` against the current codebase and fixes inaccurate installation steps, dependencies, configuration, examples, or API references. |
| **Confluence Knowledge Base Drift Review** | Detects Confluence knowledge-base pages that recent documentation changes made outdated or stale, then drafts corrections for you to review and publish. |
### Content discovery and growth
[Section titled “Content discovery and growth”](#content-discovery-and-growth)
These templates find gaps and create new content.
| Template | What it does |
| ------------------------ | --------------------------------------------------------------------------------------------------------------------------------------------------------------------------------------------------------------------------------------------------------------- |
| **Tutorial Gap Review** | Analyzes your product, audience, and competitor docs to identify the most important missing tutorial or how-to guide, then writes it. |
| **Persona IA Review** | Reviews your docs from representative user personas and fixes the highest-ranked information architecture issue on their journey. |
| **Docs SEO Review** | Audits page titles, descriptions, headings, and internal links against your company marketing keywords, then fixes the highest-impact issue. |
| **FAQ Structured Data** | Adds or fixes FAQPage JSON-LD on FAQ documentation pages so AI assistants, Knowledge Panels, and site search can read your questions and answers, capped at five file changes per run. |
| **JSON-LD Entity Graph** | Adds a linked JSON-LD entity graph across your docs — Organization, WebSite, and your product at site level, plus a TechArticle and breadcrumbs on each page — so answer engines read who publishes what instead of inferring it. Covers every page in one run. |
### Reporting and communication
[Section titled “Reporting and communication”](#reporting-and-communication)
These templates keep your team informed without manual effort.
| Template | What it does |
| -------------------------------- | ------------------------------------------------------------------------------------------------------------------------------------------------------------------------------------------------------------------------------------------------------------ |
| **Release Notes Generator** | Generates structured release notes from completed tickets and GitHub activity since the last release-notes update. |
| **Release Marketing Brief** | Drafts a Slack-ready brief of significant user-facing features that shipped in the last seven days, as raw material for marketing and CS teams. |
| **EkLine Work Report** | Generates a stakeholder-facing report of EkLine docs activity across all repos for the last seven days — what shipped, what is waiting, and who each open PR is waiting on. The system @-mentions reviewers in Slack when it can match them to a Slack user. |
| **Pylon Support Review** | Clusters recent Pylon support tickets by theme into a prioritized report of documentation gaps, delivered wherever you direct or inline in Slack. |
| **Improve Pylon knowledge base** | Reviews recent Pylon tickets for questions the knowledge base should have answered and drafts the missing or corrected help-center articles for your review. |
Tip
Most templates deliver results as both a pull request and a Slack message. The **Release Marketing Brief**, **EkLine Work Report**, **Pylon Support Review**, **Improve Pylon knowledge base**, and **Confluence Knowledge Base Drift Review** are Slack-only by default. They produce summaries or knowledge-base drafts rather than repository changes.
## How it works
[Section titled “How it works”](#how-it-works)
Every scheduled agent follows the same lifecycle:
1. **You configure it** — Pick a template or write a custom prompt, set a schedule, and choose how to receive results.
2. **EkLine runs it** — At each scheduled time, EkLine creates a Docs Agent session and executes your prompt against the connected repository.
3. **You get the results** — Depending on your notification settings, the agent raises a pull request with its changes, posts a summary to Slack, or both.
4. **You review** — Open the pull request to review and merge, or click a run in the history to view the full agent session.
## Before you begin
[Section titled “Before you begin”](#before-you-begin)
You need:
* An EkLine account with Docs Agent enabled.
* At least one repository [connected to EkLine](/agent/github-app-setup/).
## Create your first agent
[Section titled “Create your first agent”](#create-your-first-agent)
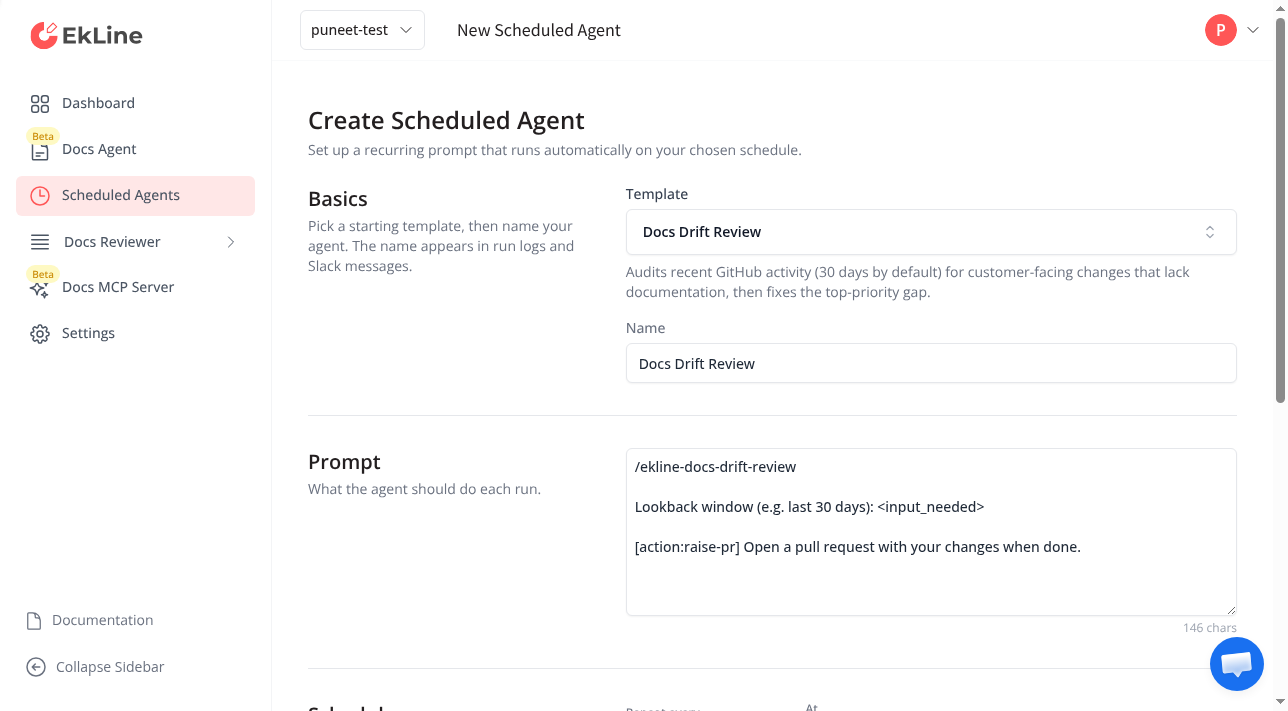
1. Click **Scheduled Agents** in the left navigation, then click **New Agent**.
2. **Pick a template.** The template picker defaults to the first available template and populates the name and prompt for you. Search by name or description to find a template that fits your goal, or select **Custom agent** at the bottom to write your own prompt.
3. **Review the name.** The agent name appears in run logs and Slack messages. When you select a template, EkLine auto-fills the name — edit it to match your team’s naming convention if needed.
4. **Review and customize the prompt.** The prompt defines what the agent does on each run. Templates give a proven starting point that you can edit. If a template includes a highlighted `` placeholder, replace it with your value before saving.
5. **Set the schedule.** Select a frequency — hourly, daily, weekly, or monthly — a repeat interval, such as every 2 weeks, and the time of day. A preview shows the next five run times. All times display in your local timezone.
6. **Configure notifications.** Enable **Raise a pull request** to have the agent open a PR with its changes. Enable **Send a Slack notification** and enter a channel name (for example, `docs-team`) to receive a summary in Slack.
7. Click **Create Agent**.
The agent appears in your list and runs automatically at the next scheduled time.
### Templates that require input
[Section titled “Templates that require input”](#templates-that-require-input)
Several templates ask you to provide a value specific to your organization:
| Template | Required input | Example |
| -------------------------- | --------------------------------------------------------------------------- | -------------------------------------------------- |
| **Docs Drift Review** | Lookback window to audit | `last 30 days` |
| **Docs SEO Review** | Your company marketing website URL | `https://www.example.com` |
| **README Review** | Repository name | `my-org/my-repo` |
| **Doc Screenshot Refresh** | Name of each [sandbox](/agent/sandbox/) to screenshot against, one per line | `staging-admin` |
| **Pylon Support Review** | Lookback window to review, and where to deliver the report | `last 30 days`; `post to Slack channel #docs-team` |
The **Docs Drift Review** and **Pylon Support Review** templates set the lookback window when you schedule them, rather than assuming a fixed period. The form prevents saving until you replace each `` placeholder with a real value.
### Write effective custom prompts
[Section titled “Write effective custom prompts”](#write-effective-custom-prompts)
If you select **Custom agent**, write a prompt that is self-contained and repeatable. The agent runs without human interaction, so include everything it needs.
* Release notes
```text
Generate release notes for all tickets completed since the
last release. Organize by Features, Improvements, and Bug
Fixes. Write for end users.
```
* Doc audit
```text
Review the docs/ directory for outdated content. Flag any
references to deprecated APIs or removed features. Create
a summary of what needs updating.
```
* README sync
```text
Check if the README reflects the current project structure
and dependencies. Update any outdated installation
instructions or configuration examples.
```
Prompt tips
* Be specific about the output format and audience.
* Reference file paths to focus the agent on relevant code.
* Include grouping or sorting instructions for generated content.
* Prompts can be up to 10,000 characters.
## Choose a schedule
[Section titled “Choose a schedule”](#choose-a-schedule)
The schedule picker supports four frequencies, each with a repeat interval. All times display in your local timezone.
| Frequency | Options | Example |
| ----------- | ------------------------------------------------------------------------------- | ----------------------------------------------- |
| **Hourly** | Repeat every 1 to 24 hours | Every 2 hours |
| **Daily** | Repeat every 1 to 30 days, select the time of day | Every other day at 9:00 AM |
| **Weekly** | Repeat every 1 to 12 weeks, select one or more days and the time | Every 2 weeks on Monday and Thursday at 9:00 AM |
| **Monthly** | Repeat every 1 to 12 months, select the day of the month from 1 to 28, and time | Every 3 months on day 1 at 9:00 AM |
Use **Repeat every** to create interval schedules such as bi-weekly or every other day. The preview under the picker shows the next five run times so you can confirm the schedule before saving.
Note
Monthly schedules cap at day 28 to avoid inconsistencies across months with different lengths. Interval schedules, such as every 2 weeks or every other day, keep their rhythm from the date you create the agent. Run times stay fixed to your local clock across daylight saving changes.
## Manage your agents
[Section titled “Manage your agents”](#manage-your-agents)
Each agent row shows its primary controls inline: the enable toggle, the **Run now** play icon, a **More actions** (⋮) menu, and the expand chevron. Secondary actions — **Skip next run**, **Edit**, and **Delete** — live in the **More actions** (⋮) menu.
### Run an agent immediately
[Section titled “Run an agent immediately”](#run-an-agent-immediately)
Click the play icon on the agent row to trigger a run right away — useful for testing a new prompt without waiting for the next scheduled time. The run appears in the agent’s run history, and the system counts the next scheduled run from this one.
### Skip the next run
[Section titled “Skip the next run”](#skip-the-next-run)
Open the **More actions** (⋮) menu on the agent row and select **Skip next run** to skip the next upcoming run. The run after it happens as scheduled. Selecting **Skip next run** again before the skipped time passes also skips the following run.
### Enable or disable an agent
[Section titled “Enable or disable an agent”](#enable-or-disable-an-agent)
Toggle the switch next to any agent to enable or disable it. Disabled agents keep their configuration but stop running until you re-enable them.
### Edit an agent
[Section titled “Edit an agent”](#edit-an-agent)
Open the **More actions** (⋮) menu on the agent row and select **Edit** to update the name, prompt, schedule, or notification settings. If you switch to a different template after editing the prompt, a confirmation dialog asks whether to replace your changes.
### Delete an agent
[Section titled “Delete an agent”](#delete-an-agent)
Open the **More actions** (⋮) menu on the agent row, select **Delete**, and confirm the deletion. Deleting an agent removes it permanently, but links to earlier editor sessions from run history remain accessible.
Caution
Deleting a scheduled agent cannot be undone.
## View run history
[Section titled “View run history”](#view-run-history)
Expand any agent row by clicking the chevron to see its recent runs. Run history displays the five most recent executions, sorted from newest to oldest.
Each run shows:
| Element | Description |
| ------------------ | -------------------------------------------------------------------------------- |
| **Status icon** | Green checkmark for succeeded, red cross for failed, yellow clock for running |
| **Timestamp link** | When the run started — click to open the Docs Agent session with the full output |
Clicking a run link opens the editor where you can review everything the agent did, including the generated content, files changed, and any pull requests raised.
## Next steps
[Section titled “Next steps”](#next-steps)
* [Create documentation](/agent/create) — Generate READMEs, API references, and guides with custom prompts.
* [Update and review](/agent/update-review) — Keep documentation in sync with code changes.
* [Integrations](/agent/integrations) — Pull content from Slack, Notion, Linear, and more.
# Capture screenshots from a video or browsing recording
> Use Docs Agent to turn a moment in an uploaded video or a browsing recording into a documentation screenshot, then insert it into your docs.
Request access
Docs Agent is available to all plans, but we grant access on request. Contact to request access.
Screenshots make a guide easier to follow, but capturing them by hand is slow. You replay a recording, pause at the right moment, crop the frame, and save it somewhere your docs can reach.
Docs Agent does this for you. Point it at a second of a video and it extracts that frame as a PNG, commits it to your repository, and adds the markdown reference in the page you are writing. This guide shows you how, using either a video you upload or the recording the agent captures while it browses.
## Before you begin
[Section titled “Before you begin”](#before-you-begin)
You need:
* An EkLine account with Docs Agent enabled.
* A repository [connected to EkLine](/agent/github-app-setup/) where the documentation lives.
* A source that contains the moment you want to capture, either an uploaded video or a session in which the agent browsed.
An uploaded video must meet these limits:
| Requirement | Value |
| ------------ | ------------------------------ |
| Formats | MP4, WebM, MOV, AVI, MPEG, OGG |
| Maximum size | 500 MB |
## Step 1: Give the agent a source
[Section titled “Step 1: Give the agent a source”](#step-1-give-the-agent-a-source)
Choose the source that matches where your moment lives.
* Uploaded video
1. Log in to your [EkLine dashboard](https://ekline.io/dashboard) and click **Docs Agent** in the left navigation.
2. Click the attachment icon in the chat panel and select your video file.
3. Wait for processing to finish. The agent transcribes the video and reads what happens on screen, which takes a few minutes for a longer recording.
The video appears as an attachment in the chat panel once processing completes.
* Browsing recording
Some tasks lead the agent to open a browser — for example, when you ask it to document a page in your product. The agent records what it visits and keeps the recording with the session, so you can pull a frame from it afterward.
1. Ask the agent to visit the pages you want to illustrate. For example:
```plaintext
Open our pricing page and document the plan tiers.
```
2. Watch the **Live browser** panel in the bottom-right corner of the editor to see the pages it visits.
3. Wait for the agent to finish browsing. The panel header changes to **Recording**, and the recording is available for the rest of the session.
To reach pages behind a sign-in, [set up a sandbox](/agent/sandbox/) first.
## Step 2: Find the moment you want
[Section titled “Step 2: Find the moment you want”](#step-2-find-the-moment-you-want)
The agent already has a timestamped reading of the video, so you can ask it where something appears instead of scrubbing through the recording yourself.
```plaintext
Which second of this video shows the billing settings
page with the plan selector open?
```
The agent answers with a timestamp. Ask follow-up questions if several moments look similar:
```plaintext
Is the success message visible at that point, or does it
appear later?
```
Tip
If you already know the timestamp, skip to the next step and name it directly.
## Step 3: Ask for the frame
[Section titled “Step 3: Ask for the frame”](#step-3-ask-for-the-frame)
Name the second you want and where the image belongs. Telling the agent what the screen shows helps it write useful alt text.
* Insert into a page
```plaintext
Extract the frame at 47 seconds and insert it into
docs/billing/change-plan.md after the "Open billing
settings" step. Write alt text describing the plan
selector.
```
* Several frames
```plaintext
Extract frames at 12, 47, and 90 seconds and place each
one next to the step it illustrates in
docs/billing/change-plan.md.
```
* From a browsing recording
```plaintext
Extract the frame from the browsing recording where the
pricing table is fully visible, and add it to the
overview page with a caption.
```
The agent extracts the frame, saves it as a PNG in your repository, and adds the markdown reference in the page you named.
Frames land on the nearest keyframe
The agent seeks to the timestamp you give and captures the closest available frame, which can be slightly earlier than the exact second. If the captured image is a moment early, ask for a second or two later.
## Step 4: Check the image in the editor
[Section titled “Step 4: Check the image in the editor”](#step-4-check-the-image-in-the-editor)
Select the image file in the editor panel. The draft renders inline, with the filename and a status badge below it. Click the preview to open the image larger.
Check that:
* The frame shows the screen or action you meant to capture.
* The image sits next to the step it illustrates.
* The alt text describes what the screen shows.
If the frame is wrong, reply in the chat with a corrected timestamp:
```plaintext
That frame is too early — the dialog is still opening.
Extract the frame at 50 seconds instead.
```
## Step 5: Publish as a pull request
[Section titled “Step 5: Publish as a pull request”](#step-5-publish-as-a-pull-request)
1. Enable **View All Changes** in the toolbar to see a diff of what the agent created.
2. Click **Raise PR**. The agent prefills a prompt in the chat — press **Enter** to send it, or edit the prompt first to add instructions.
The agent opens the pull request and replies in the chat with a link. Extracted images commit alongside your documentation changes, so the page and its screenshots land in the same pull request.
## Verify
[Section titled “Verify”](#verify)
Confirm the capture worked:
* [ ] The image file appears in the editor panel and previews inline.
* [ ] The page you named has a markdown reference to the new image.
* [ ] The pull request includes both the page and the PNG file.
## Troubleshooting
[Section titled “Troubleshooting”](#troubleshooting)
| Issue | Solution |
| --------------------------------------------------------- | --------------------------------------------------------------------------------------------------------------------------------------------------------------------------------- |
| The agent says it cannot read the video | Check that the file finished processing and is under 500 MB in a supported format. Re-upload it if processing failed. |
| The captured frame is a moment too early | The agent captures the nearest available frame. Ask for a timestamp one or two seconds later. |
| The frame from a browsing recording looks low resolution | A recording captures the browser viewport at the recording’s resolution. For a crisp image, ask the agent to capture the page directly with a [sandbox](/agent/sandbox/) instead. |
| The agent cannot find a recording for the session | Recordings exist only for sessions in which the agent browsed. Ask it to visit the page first, then request the frame. |
| The image reference points at the wrong place in the page | Name the heading or step you want it after, then ask the agent to move it. |
## Next steps
[Section titled “Next steps”](#next-steps)
* [Create documentation from a demo video](/agent/create-docs-from-video/) — Turn a whole walkthrough into a written guide.
* [Browse authenticated pages with a sandbox](/agent/sandbox/) — Let the agent sign in to your product and capture pages directly.
* [Create documentation](/agent/create/) — Generate guides, READMEs, and references from your codebase and other sources.
# Docs Agent Slack bot
> Create documentation drafts directly from Slack by @mentioning EkLine in any channel or thread.
Request access
Docs Agent is available to all plans, but we grant access on request. Contact **** to request access.
Create documentation without leaving Slack. @mention EkLine in any channel or thread, and the bot generates a draft you can review and edit in EkLine.
## Prerequisites
[Section titled “Prerequisites”](#prerequisites)
Before you begin, you need:
* An EkLine organization account.
* Slack workspace administrator access to install the app.
* Docs Agent access enabled for your organization.
## Connect your Slack workspace
[Section titled “Connect your Slack workspace”](#connect-your-slack-workspace)
1. Go to **Settings > Organization > Integrations** in your EkLine dashboard.
2. Find **Slack** in the integrations list.
3. Click **Connect**.
4. Allow EkLine to access your Slack workspace in the OAuth 2.0 popup.
5. Complete the Slack authorization flow.
6. Verify the integration shows as **Connected**.
Once connected, anyone in the Slack workspace can mention `@EkLine` to create documentation drafts.
## Create documentation from Slack
[Section titled “Create documentation from Slack”](#create-documentation-from-slack)
1. In any Slack channel or thread, type `@EkLine` followed by your request.
```plaintext
@EkLine create a troubleshooting guide based on this discussion
```
2. Follow the live progress message. A single message updates in place to show what Docs Agent is doing as it analyzes the conversation and drafts the documentation, which typically takes 10-30 seconds.
3. On the first response in a thread, Docs Agent adds a **View EkLine chat** button. Click it to open the session in EkLine, where you can review and edit the draft.
4. Read Docs Agent’s reply. When the agent finishes, the live progress message disappears and the agent posts its own reply directly in the thread, along with an expandable diff of the proposed changes. Every reply ends with a **See the full chat** link that reopens the whole session, so you can get back to it without scrolling to the first response.
5. Docs Agent automatically creates a pull request with the drafted changes and includes the PR link in its reply.
Reviewing the diff
The proposed changes appear as an expandable, collapsed-by-default attachment in the thread. Expand it to see the full diff without leaving Slack.
## Automatic pull requests
[Section titled “Automatic pull requests”](#automatic-pull-requests)
When you @mention EkLine in Slack, Docs Agent automatically opens a pull request with the drafted changes. This behavior **defaults to enabled** for all organizations.
Docs Agent includes the PR link in its Slack reply so you can review and merge the changes directly from GitHub.
### Disable automatic PRs
[Section titled “Disable automatic PRs”](#disable-automatic-prs)
If you prefer to review drafts in the editor before creating a PR manually:
1. Go to **Settings > Organization > Docs Agent** in your EkLine dashboard.
2. Under **Slack triggers**, turn off the **Automatically raise PRs from Slack requests** toggle.
3. The setting takes effect on the next Slack request. Existing sessions are unaffected.
Opt back in anytime
Turn the toggle back on to resume automatic PR creation from Slack.
## Context the bot captures
[Section titled “Context the bot captures”](#context-the-bot-captures)
The bot gathers context from the conversation to produce accurate documentation:
| Context type | What the bot captures |
| ---------------- | ----------------------------------------------------------------------- |
| Thread messages | All messages in the current thread |
| Channel messages | The last 10 messages before your @mention |
| File attachments | Images (JPEG, PNG, GIF, WebP), PDFs, and videos attached to the message |
| Reactions | Emoji reactions on messages |
Get better results
@mention the bot in threads with relevant discussion. The more context in the thread, the more accurate the generated documentation.
## Write effective prompts
[Section titled “Write effective prompts”](#write-effective-prompts)
The quality of your prompt determines the quality of the output.
| Instead of… | Try… |
| ---------------- | ------------------------------------------------------------------------- |
| “help with docs” | “Create a troubleshooting guide for the API timeout issue discussed here” |
| “document this” | “Write a how-to guide for the workaround Sarah described” |
| “make docs” | “Update the authentication docs based on the new flow we agreed on” |
**Include specific details:**
* Reference the type of documentation you need: tutorial, how-to guide, reference, troubleshooting.
* Name specific topics or features from the conversation.
* Mention existing documentation to update if applicable.
* Point to URLs or ticket IDs for more context.
## Troubleshooting
[Section titled “Troubleshooting”](#troubleshooting)
| Issue | Solution |
| --------------------------------- | ---------------------------------------------------------------------------------------------------------------------------- |
| Bot does not respond | Verify the workspace connection in **Settings > Organization > Integrations**. Check that the bot has access to the channel. |
| “Workspace not connected” error | Ask a workspace administrator to reconnect the integration in EkLine settings. |
| Draft does not match expectations | Give more specific instructions in your mention. Include the documentation type and key topics to cover. |
| Bot takes longer than expected | Complex requests may take longer. The bot notifies you if a request times out. |
| Bot responds but link is broken | Refresh the page and try the link again. If the issue persists, contact ****. |
## Next steps
[Section titled “Next steps”](#next-steps)
* [Turn a Slack support thread into a troubleshooting doc](/agent/slack-thread-to-troubleshooting-doc/) — Convert a resolved support conversation into a published guide.
* [GitHub PR bot](/agent/github-integration/) — Trigger Docs Agent from pull request comments and code reviews.
* [Create documentation](/agent/create) — Generate READMEs, API references, and guides from your codebase.
* [Update and review](/agent/update-review) — Keep documentation in sync with code changes.
* [Integrations](/agent/integrations) — Connect Notion, Linear, Jira, and other tools.
# Turn a Slack support thread into a troubleshooting doc
> Use the Docs Agent Slack bot to convert a resolved support thread into a troubleshooting guide and open a pull request for review.
Request access
Docs Agent is available to all plans, but we grant access on request. Contact **** to request access.
Support threads hold the answers your customers ask for again and again — but that knowledge stays trapped in Slack unless someone writes it down. This guide shows you how to turn a resolved support thread into a published troubleshooting doc without leaving Slack. @mention EkLine in the thread, and Docs Agent reads the conversation, drafts a troubleshooting guide, and opens a pull request you review and merge.
## Before you begin
[Section titled “Before you begin”](#before-you-begin)
You need:
* An EkLine account with Docs Agent enabled.
* The [Docs Agent Slack bot](/agent/slack-bot/) connected to your workspace.
* At least one documentation repository [connected to EkLine](/agent/github-app-setup/).
* A resolved support thread — one where the problem and the fix are both visible in the conversation.
## Convert the thread
[Section titled “Convert the thread”](#convert-the-thread)
1. Open the Slack thread where the team diagnosed and resolved the issue. The clearer the thread states the symptom and the fix, the better the draft.
2. Reply in the thread with an `@EkLine` mention that names the document type, the problem, and where the doc should live:
```plaintext
@EkLine turn this thread into a troubleshooting guide for the API
timeout error. Add it to the docs repo under troubleshooting, and
describe the symptom, the cause, and the fix.
```
The bot reacts with 👀 to confirm it picked up your request, then starts working.
3. Follow the bot’s progress in the thread. Docs Agent reads the thread, identifies the problem and the resolution, and drafts the guide. On the first reply, it adds a **View EkLine chat** button — click it to open the session in the editor, where you can refine the draft. Later replies end with a **See the full chat** link to the same session, so you can reopen it from anywhere in the thread.
4. Review the draft. Docs Agent posts an expandable, collapsed-by-default diff attachment in the thread so you can read the proposed changes without leaving Slack.
Name the repository and path
Your organization can connect more than one documentation repository. Docs Agent decides where the guide belongs, but you get a better result when you name the target repository and folder in your mention — for example, `Add it to the docs repo under troubleshooting/`.
## Write an effective mention
[Section titled “Write an effective mention”](#write-an-effective-mention)
A support thread is chatty, so tell the bot exactly what to produce. A specific mention keeps off-topic messages out of the draft.
| Instead of… | Try… |
| ----------------------- | --------------------------------------------------------------------------------------------- |
| “@EkLine document this” | “@EkLine write a troubleshooting guide for the failed webhook delivery issue in this thread” |
| “@EkLine make a doc” | “@EkLine turn this thread into a troubleshooting entry: symptom, cause, and resolution steps” |
| “@EkLine help” | “@EkLine document the workaround Priya described, and link the related Jira ticket” |
**Include specific details:**
* State the document type: troubleshooting guide, how-to, or FAQ entry.
* Name the error or symptom the thread resolved.
* Point to the repository and folder where the guide belongs.
* Reference ticket or pull request URLs mentioned in the thread for extra context.
Reading linked tickets
Docs Agent reads a Jira ticket or Confluence page linked in the thread only when your organization has connected that integration. See [Integrations](/agent/integrations/) to connect your tools.
## What the bot reads from the thread
[Section titled “What the bot reads from the thread”](#what-the-bot-reads-from-the-thread)
Docs Agent gathers context from the conversation to produce an accurate guide:
| Context type | What the bot captures |
| ---------------- | ----------------------------------------------------------------- |
| Thread messages | Every reply in the thread |
| Channel messages | Messages surrounding the thread for extra context |
| Attachments | Images (JPEG, PNG, GIF, WebP), PDFs, and videos up to 100 MB each |
Docs Agent keeps only the attachments relevant to your request and ignores the rest, so it picks up screenshots of the error while leaving unrelated files out.
## Review and merge
[Section titled “Review and merge”](#review-and-merge)
1. Read the diff in the thread, or click **View EkLine chat** to open the draft in the editor.
2. Ask Docs Agent to refine anything that reads inaccurately. Reply in the thread with a fresh `@EkLine` mention — for example, `@EkLine add a prevention section` or `@EkLine tighten the resolution steps to three bullets`.
3. When the draft changes documentation files, Docs Agent opens a pull request automatically and includes the link in its reply. Open the pull request to finish the review on GitHub.
4. Merge the pull request to publish the troubleshooting guide.
Reviewer assignment
Docs Agent looks up the GitHub username of the person who triggered the session and adds them as a reviewer, alongside any [default reviewers](/agent/reference/#how-does-docs-agent-select-reviewers-for-pull-requests) your organization configures.
## Troubleshooting
[Section titled “Troubleshooting”](#troubleshooting)
| Problem | Cause | Fix |
| ------------------------------------- | -------------------------------------------------------------------------- | ---------------------------------------------------------------------------------------------------------------------------------------------------- |
| The bot doesn’t respond | The bot acts only on `@EkLine` mentions | Reply in the thread with a fresh `@EkLine` mention. Plain replies without a mention are ignored. |
| The bot asks a clarifying question | Your request was ambiguous | Answer with another `@EkLine` mention. If you don’t, Docs Agent proceeds with its best guess after one round. |
| The draft mixes in off-topic messages | The mention was too general | Name the specific error and document type in your mention so the bot filters the conversation. |
| No pull request appears | The turn didn’t change documentation files, or auto-PR is off | Confirm the draft edits docs files. Check the **Automatically raise PRs from Slack requests** toggle under **Settings > Organization > Docs Agent**. |
| An attachment was ignored | The file is over 100 MB, an unsupported type, or unrelated to your request | Re-share the file under 100 MB in a supported format, and reference it in your mention. |
| The guide lands in the wrong place | Docs Agent chose a repository or folder you didn’t intend | Name the target repository and path in your mention, then ask the bot to move the file. |
## Next steps
[Section titled “Next steps”](#next-steps)
* [Docs Agent Slack bot](/agent/slack-bot/) — Connect the bot and learn how mentions, drafts, and diffs work.
* [Create documentation](/agent/create/) — Generate docs from your codebase, videos, and other sources.
* [Update and review](/agent/update-review/) — Keep documentation in sync with code changes.
* [Integrations](/agent/integrations/) — Connect Slack, Notion, Jira, and other tools.
# Connect Atlassian Teamwork Graph to EkLine Docs Agent
> Add an Atlassian API token so Docs Agent can search your entire Confluence site for source material. Use a service account for stable, scoped access.
Connect Atlassian Teamwork Graph so Docs Agent can search your entire Confluence site for source material. Instead of pointing the agent at a single page, you let it find the relevant pages across every space you have access to. It then uses what it finds to draft and update documentation.
This connection is read-only. The agent searches and reads Confluence through it, and never writes back. Publishing edits to Confluence stays in the [knowledge base management](/agent/manage-knowledge-base) workflow.
How this differs from the Confluence integration
The [Confluence integration](/agent/integrations#confluence) pulls a page you name by URL into a prompt. Teamwork Graph lets the agent **discover** pages across your whole site when you don’t already know the URL. Connect both to reference a known page and search for related ones in the same session.
## Prerequisites
[Section titled “Prerequisites”](#prerequisites)
* An EkLine account with Docs Agent, and Teamwork Graph enabled for your organization.
* An Atlassian account with access to the Confluence content you want the agent to search.
* Permission to create an Atlassian API token for that account.
## Use a service account
[Section titled “Use a service account”](#use-a-service-account)
Connect with a dedicated Atlassian service account rather than an individual’s account. A service account is a standard Atlassian account your team creates for automated access.
A service account gives you:
* **Stable ownership.** The connection keeps working when a team member changes roles or leaves. A token tied to a personal account stops working when that account is deactivated.
* **Scoped access.** Grant the service account access to only the spaces the agent should search. The account’s Confluence permissions are the boundary for what the agent can read.
* **Clear auditing.** Activity in Confluence appears under a recognizable account, such as `EkLine AI`, instead of a person’s name.
Apply the same approach to Jira and Confluence
Connect the Jira, Confluence, and Teamwork Graph integrations with the same service account. Using one dedicated account for all three keeps access consistent and easy to review, and avoids tying the agent’s reach to any one person’s permissions.
## Create an Atlassian API token
[Section titled “Create an Atlassian API token”](#create-an-atlassian-api-token)
Create the token from one of two places, depending on the account you connect. A service account token is the recommended option.
### Create a service account API token (recommended)
[Section titled “Create a service account API token (recommended)”](#create-a-service-account-api-token-recommended)
An organization administrator creates the token from the Atlassian admin console. For full details, see the Atlassian guides to [service accounts](https://support.atlassian.com/user-management/docs/understand-service-accounts/) and [API tokens for service accounts](https://support.atlassian.com/user-management/docs/manage-api-tokens-for-service-accounts/).
1. **Open the Atlassian admin console.**
Go to [admin.atlassian.com](https://admin.atlassian.com) and select your organization if you have more than one.
2. **Open your service accounts.**
Select **Directory > Service accounts**. If you don’t have a service account yet, create one for EkLine first, such as `EkLine AI`.
3. **Create credentials.**
Select the service account, then click **Create credentials**. Select **API token**, then click **Next**.
4. **Name the token and set an expiration.**
Enter a recognizable name such as `EkLine Docs Agent`, then set an expiration date. Atlassian allows an expiration between 1 and 365 days.
5. **Select scopes.**
Select every scope with the **Classic** scope type and a **Read**, **Read only**, or **Search** action. These give the agent read and search access to Confluence without granting write access. Click **Next**.
6. **Create and copy the token.**
Review the token, click **Create**, then click **Copy to clipboard** and store the token securely.
Caution
Atlassian shows the token value only once. Copy it before you leave the page.
### Create a personal API token
[Section titled “Create a personal API token”](#create-a-personal-api-token)
Connect with an individual account when you want to test the integration quickly. A personal token stops working when that account is deactivated, so prefer a service account for ongoing use.
1. **Open the API tokens page.**
Sign in as the account the agent uses, then go to [id.atlassian.com/manage-profile/security/api-tokens](https://id.atlassian.com/manage-profile/security/api-tokens). For full details, see the [Atlassian guide to managing API tokens](https://support.atlassian.com/atlassian-account/docs/manage-api-tokens-for-your-atlassian-account/).
2. **Create a token.**
Click **Create API token**, enter a recognizable label such as `EkLine Docs Agent`, and set an expiration date that fits your organization’s rotation policy.
3. **Copy the token.**
Copy the generated token and store it securely. It starts with `ATATT`.
Caution
Atlassian shows the token value only once. Copy it before you leave the page.
## Connect Teamwork Graph in EkLine
[Section titled “Connect Teamwork Graph in EkLine”](#connect-teamwork-graph-in-ekline)
1. **Open your integrations.**
Go to your [EkLine dashboard](https://ekline.io/dashboard) and navigate to **Settings > Organization > Integrations**.
2. **Start the connection.**
Find the **Atlassian Teamwork Graph** card and click **Connect**.
3. **Enter your Atlassian site.**
In the **Atlassian site** field, enter your full site URL, such as `mycompany.atlassian.net`.
4. **Enter the account email.**
In the **Atlassian account email** field, enter the email of the account whose token you created. For a service account, this is the service account’s email.
5. **Enter the API token.**
Paste the token into the **API token** field. EkLine stores the token encrypted and never displays it again.
6. **Connect.**
Click **Connect**. EkLine validates the credentials against Confluence before saving. If validation fails, EkLine shows an error and stores nothing.
## Verify the connection
[Section titled “Verify the connection”](#verify-the-connection)
Confirm the integration is ready:
* The **Atlassian Teamwork Graph** card shows a connected status.
* In a Docs Agent session, ask the agent to find a Confluence page you know exists, and confirm it returns a result:
```text
Search Confluence for our internal runbook on database failover
and summarize the recovery steps.
```
## Use Teamwork Graph in Docs Agent
[Section titled “Use Teamwork Graph in Docs Agent”](#use-teamwork-graph-in-docs-agent)
After you connect, ask the agent to find source material in Confluence as part of a documentation task. The agent searches across the spaces the connected account can access.
```text
Find the Confluence pages that describe our authentication flow,
then draft a public "How authentication works" guide from them.
```
```text
Search Confluence for anything we've written about rate limiting
and list the pages so I can pick which to turn into docs.
```
The agent reads only content the connected account has permission to view. Grant the service account access to a space to make that space searchable; remove access to take it out of scope.
## Troubleshooting
[Section titled “Troubleshooting”](#troubleshooting)
| Problem | Cause | Fix |
| ----------------------------------------------- | ------------------------------------------------------------------- | --------------------------------------------------------------------------------------------------------------------- |
| The connection fails when you click **Connect** | The email or token is wrong, or the token was revoked | Confirm the email matches the account that created the token, then create a fresh token and try again |
| The agent finds no pages | The connected account can’t see the space | Grant the account access to the space in Confluence, then search again |
| The agent can’t find a page you can see | You and the connected account have different Confluence permissions | Give the connected service account access to that space |
| The token stopped working | The token expired or the account was deactivated | Create a new token — on a service account, to avoid the connection breaking when an individual leaves — and reconnect |
## Next steps
[Section titled “Next steps”](#next-steps)
* [Manage a Confluence or Pylon knowledge base](/agent/manage-knowledge-base) — Let the agent update Confluence pages and publish changes back.
* [Docs Agent integrations](/agent/integrations) — Reference Slack, Notion, Jira, Confluence, and more in your prompts.
* [Create documentation](/agent/create) — Generate a draft from your connected sources.
***
## Stuck?
[Section titled “Stuck?”](#stuck)
Reply to your welcome email or contact . We read every message.
# Tutorial: turn recurring support questions into a knowledge base article
> Follow Docs Agent through a support gap: spot a question customers keep asking, draft a help center article from the support thread that resolved it, review it for self-serve completeness, and publish it live to Confluence or Pylon.
This tutorial walks you through closing a support gap end to end. You start from a question customers keep asking and finish with a published help center article that answers it. Along the way, Docs Agent drafts the article from the support thread that already resolved the issue. You review it, match it to your help center’s style, and publish it live to Confluence or Pylon.
By the end, you can:
* Recognize when a repeat ticket is a documentation gap rather than a one-off.
* Draft a self-serve help center article from the support conversation that resolved the question.
* Review the draft the way a customer reads it, so the article deflects the next ticket instead of prompting a follow-up.
* Publish the article straight to your help center and link it back to the customers who ask.
The whole path takes about 20 minutes. The [Getting started](/agent/getting-started) tutorial generates a single README, and [document a release](/agent/tutorial-document-a-release) covers the release ritual. This tutorial covers the support ritual: turning the questions your team answers again and again into documentation that answers them once.
Request access
Docs Agent and knowledge base management are available on request. Contact **** with your organization name to enable them for Confluence or Pylon.
## Before you begin
[Section titled “Before you begin”](#before-you-begin)
You need:
* An EkLine account with Docs Agent and knowledge base management enabled.
* A connected help center with at least one space or knowledge base marked as managed, and permission to publish to it. An administrator connects it once, and Pylon knowledge bases also need a default author. See [Connect your knowledge base](/agent/manage-knowledge-base#connect-your-knowledge-base).
* A recurring question to close: one your team has answered more than once, with a resolved support thread or a ticket that shows the symptom and the fix.
You don’t answer the ticket again during this tutorial. The answer already exists in a thread or a ticket. You turn it into an article your customers find themselves.
## Step 1: Confirm the question is a documentation gap
[Section titled “Step 1: Confirm the question is a documentation gap”](#step-1-confirm-the-question-is-a-documentation-gap)
Not every ticket is worth an article. A question is a documentation gap when customers hit it repeatedly and the answer is stable enough to publish. Before you open a session, pin down three things:
* **The question, in the customer’s words.** Write the one sentence a customer types into search, not the internal shorthand your team uses for it.
* **The evidence.** Find two or more tickets or threads where the question came up, so you know it recurs.
* **The resolution.** Pick the clearest resolved thread. The better it states the symptom and the fix, the closer the first draft lands.
**Verify:** You can state the question in one sentence and point to at least two instances of it, one of them resolved.
## Step 2: Open a session
[Section titled “Step 2: Open a session”](#step-2-open-a-session)
1. Log in to your [EkLine dashboard](https://ekline.io/dashboard).
2. Click **Docs Agent** in the left navigation.
**Verify:** The editor opens with a chat panel on the right, an editor panel on the left, and a toolbar across the top.

## Step 3: Draft the article from the support thread
[Section titled “Step 3: Draft the article from the support thread”](#step-3-draft-the-article-from-the-support-thread)
Hand the agent the resolved thread and tell it to write for customers, not for your team. When you reference the thread, the agent reads the conversation, pulls out the symptom and the fix, and drafts a new help center article rather than a copy of the discussion.
In the chat panel, name the question, the evidence, and where the article belongs:
```plaintext
Customers keep asking how to reset an expired API token, and support
answers it in most weeks. Draft a new help center article that
answers it end to end, based on this resolved thread:
https://workspace.slack.com/archives/C01234/p1234567890
Write for customers who have never seen our dashboard, and add it to
our support knowledge base.
```
Give the agent the customer's context
The support thread assumes everything the customer does not know. Tell the agent who reads the article and what they can see, so the draft explains the steps a teammate skipped in the thread. If more than one thread covers the question, reference the clearest one and mention the others exist.
**Verify:** The agent reads the thread, drafts a new article in the editor panel on the left, and reports what it based the article on.
## Step 4: Review it the way a customer reads it
[Section titled “Step 4: Review it the way a customer reads it”](#step-4-review-it-the-way-a-customer-reads-it)
Never publish the first draft unread. Support content fails when it answers the team’s version of the question instead of the customer’s. Read the draft as if you were the customer who opened the ticket.
1. Ask the agent to check its own draft against the goal:
```plaintext
Review this draft as a customer who has never contacted support.
Does it answer the whole question on its own? Flag any step that
assumes internal knowledge, any point where they would still need
to open a ticket, and anything that no longer matches the product.
```
2. Check three things across the draft:
* **Completeness** - Does the article answer the question end to end, so the customer never needs to ask?
* **Accuracy** - Does each step match how the product behaves today?
* **Scope** - Does it stay on this one question instead of drifting into adjacent topics?
3. Refine anything that reads inaccurately with a follow-up prompt rather than editing by hand. For example: `Add a short section on what to do when the reset email never arrives, since that is the follow-up question in the thread.` The agent keeps the context from your first prompt and updates the same draft.
**Verify:** The checkpoint reports no remaining gaps, or you resolve each one it raises with a follow-up prompt.
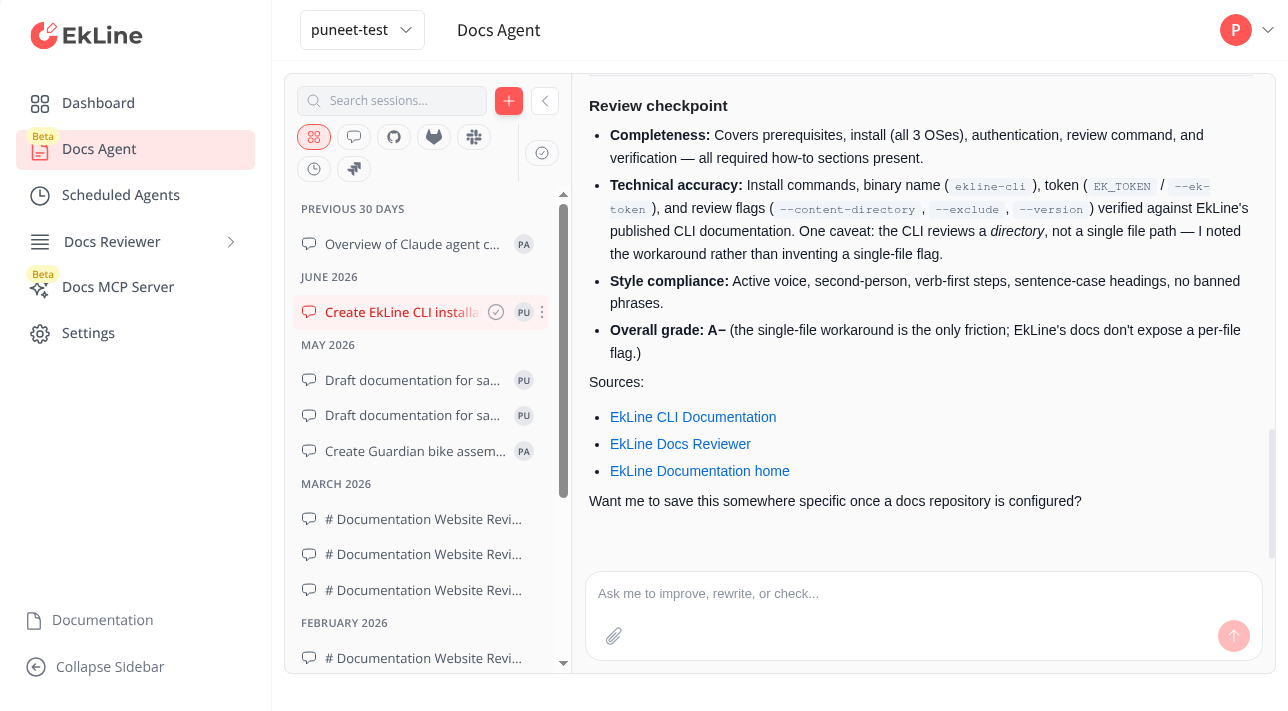
## Step 5: Match your help center’s style
[Section titled “Step 5: Match your help center’s style”](#step-5-match-your-help-centers-style)
A new article should read like the ones already in your help center. Point the agent at an existing article so the draft picks up your structure, headings, and voice.
```plaintext
Match this to the format of our existing "Reset your password"
article: same heading style, a short summary at the top, and numbered
steps. Keep the tone plain and reassuring.
```
To hold that style across every article without repeating yourself, set it once in [custom instructions](/agent/custom-instructions). The agent then applies your help center’s conventions to each draft.
**Verify:** The draft uses the same structure and voice as your existing articles, with the recurring question answered in your house style.
## Step 6: Publish the article to your help center
[Section titled “Step 6: Publish the article to your help center”](#step-6-publish-the-article-to-your-help-center)
When the article reads clearly and matches your style, publish it straight to the source. Working on a knowledge base, the toolbar shows **Update KB** in place of **Raise PR**, because your approval publishes the article rather than opening a pull request.
1. Enable **View All Changes** in the toolbar to review the full article one last time.
2. Click **Update KB** to publish. The tooltip reads **Publish your knowledge base edits**.
Caution
Publishing is immediate. The article goes live in your help center as soon as you click **Update KB**, so review it under **View All Changes** first. New Pylon articles are attributed to the default author set in **KB Management**.
**Verify:** Open your help center. The new article is live, its headings and steps render correctly, and it matches what you reviewed under **View All Changes**.
## Step 7: Close the loop
[Section titled “Step 7: Close the loop”](#step-7-close-the-loop)
An article only reduces tickets once customers reach it. Finish by connecting the article back to the question:
* **Link it in your reply.** The next time the question comes in, answer with a link to the new article instead of retyping the fix.
* **Watch whether the question returns.** If customers still open tickets, reopen the session and sharpen the article with a follow-up prompt, then publish again.
* **Automate the recurring audit.** Once you have a few articles, a [scheduled agent](/agent/scheduled-agents) can review your help center against the latest product behavior on a cadence, so published answers stay current without a manual pass.
**Verify:** You can answer the customer’s question with a single link, and the article resolves it without a follow-up ticket.
## Summary
[Section titled “Summary”](#summary)
You turned a repeat support question into a published, self-serve article. Along the way you:
* Confirmed the question was a documentation gap, not a one-off.
* Drafted a help center article from the thread that resolved it, written for customers.
* Reviewed the draft for self-serve completeness and matched it to your help center’s style.
* Published it live to Confluence or Pylon and linked it back to the customers who ask.
This is the ritual you repeat whenever a question keeps landing in the queue. The clearer the resolved thread you start from, the closer the first draft lands, and the faster each recurring question turns into an answer customers find on their own.
## Next steps
[Section titled “Next steps”](#next-steps)
* [Manage a Confluence or Pylon knowledge base](/agent/manage-knowledge-base) - Update existing articles, maintain a whole space, and manage images.
* [Turn a Slack support thread into a troubleshooting doc](/agent/slack-thread-to-troubleshooting-doc) - Draft from a thread without leaving Slack, for docs that live in a git repository.
* [Customize for your organization](/agent/custom-instructions) - Set your help center’s tone and structure once so every draft matches.
* [Scheduled agents](/agent/scheduled-agents) - Keep published answers current with a recurring audit.
# Tutorial: document a code change end to end
> Follow Docs Agent through a full workflow — connect a repository, document a real code change, review and refine the draft, and ship a pull request.
This tutorial walks you through the workflow at the heart of Docs Agent: keeping documentation in sync when your code changes. You start from an empty session and finish with a merged-ready pull request that updates your docs to match a change your team shipped.
By the end, you can:
* Connect a repository so the agent can read your code and existing docs.
* Ask the agent to update documentation for a specific code change.
* Review the draft, catch problems, and refine it with a follow-up prompt.
* Open a pull request and push a follow-up commit after review feedback.
The whole path takes about 20 minutes. Unlike [Getting started](/agent/getting-started/), which generates a single README, this tutorial follows a realistic change through review and revision — the loop you repeat every time your product evolves.
## Before you begin
[Section titled “Before you begin”](#before-you-begin)
You need:
* An EkLine account with Docs Agent enabled. Don’t have access? Email **** with your organization name.
* A repository that contains both code and Markdown documentation. Any repository with a `docs/` folder or a README works.
* Permission to open pull requests on that repository.
You don’t need to write any code during this tutorial. You describe a change that already happened, and the agent updates the docs to match.
## Step 1: Connect your repository
[Section titled “Step 1: Connect your repository”](#step-1-connect-your-repository)
The agent can only document code it can read, so connect a repository first.
1. Log in to your [EkLine dashboard](https://ekline.io/dashboard).
2. Click **Docs Agent** in the left navigation.
3. If you haven’t connected a repository yet, follow [Connect GitHub to EkLine](/agent/github-app-setup/) to install the GitHub App and choose which repositories the agent can access.
**Verify:** The editor opens with a chat panel on the right and an editor panel on the left.

If you use GitLab instead, follow [Connect GitLab to EkLine](/agent/gitlab-setup/). The rest of this tutorial is the same.
## Step 2: Describe the change to document
[Section titled “Step 2: Describe the change to document”](#step-2-describe-the-change-to-document)
Pick a change your team shipped recently — a new configuration option, a renamed endpoint, or a deprecated flag. For this tutorial, imagine your API added a `timeout` parameter to its authentication call.
In the chat panel, give the agent both the change and where it lives in the code:
```plaintext
We added a `timeout` parameter to the authentication call in
src/api/auth.ts. Update the API reference in docs/ to document
the new parameter, its type, its default, and an example.
```
Point the agent at the source
The more precisely you name the file and the change, the more accurate the draft. Reference the exact path (`src/api/auth.ts`) rather than describing it in general terms.
**Verify:** The agent responds in the chat and begins reading your repository. When it finishes, a draft of the updated documentation appears in the editor panel on the left.
## Step 3: Review the draft
[Section titled “Step 3: Review the draft”](#step-3-review-the-draft)
Never ship the first draft unread. The agent is accurate, but you know your product — check that the change is described correctly before going further.
1. Read the draft in the editor panel.
2. Enable **View All Changes** in the toolbar to see a diff of every modification the agent made.
3. Look for three things:
* **Accuracy** — Does the parameter type and default match your code?
* **Placement** — Did the agent add the parameter to the right section?
* **Unintended edits** — Did it change anything you didn’t ask it to?
**Verify:** The diff shows your documentation with the new `timeout` parameter added, and no unrelated content removed.
## Step 4: Refine with a follow-up
[Section titled “Step 4: Refine with a follow-up”](#step-4-refine-with-a-follow-up)
Reviewing almost always surfaces something to improve. Instead of editing by hand, ask the agent — it keeps the change consistent with the surrounding docs.
Suppose the draft documents the parameter but omits what happens when the timeout is exceeded. Send a follow-up prompt:
```plaintext
Add a note explaining what error the API returns when the
timeout is exceeded, and cross-link it to the error reference.
```
The agent updates the same draft rather than starting over. You can refine as many times as you need — each prompt builds on the current state of the document.
Ask the agent to review its own work
You can also ask for a critique before you ship: `"Review this page for completeness and accuracy against the current code."` The agent returns a checkpoint covering clarity, completeness, accuracy, and consistency.

**Verify:** The draft now includes the timeout error behavior and a link to the error reference.
## Step 5: Open a pull request
[Section titled “Step 5: Open a pull request”](#step-5-open-a-pull-request)
When the draft matches the change and reads well, ship it through your normal review process.
1. Click **Raise PR** in the toolbar.
2. The agent prefills a prompt such as `Open a pull request`. Edit it to add a title or description if you want, then press **Enter**.
3. The agent creates the pull request and responds in the chat with a link to it on GitHub.
**Verify:** The chat shows a link to a new pull request. Open it — the PR contains your documentation changes and nothing else.
## Step 6: Push a follow-up after review
[Section titled “Step 6: Push a follow-up after review”](#step-6-push-a-follow-up-after-review)
Documentation goes through review like any other change. When a reviewer asks for an edit, you don’t need to start a new session — push the fix to the same PR.
1. Back in the editor, ask the agent for the requested change. For example: `"The reviewer wants the example to use an environment variable instead of a hardcoded value. Update it."`
2. Click **Update PR** in the toolbar.
3. The agent prefills a prompt like `Update pull request #42 with my latest changes`. Press **Enter**.
**Verify:** The agent commits to the existing PR branch and confirms in the chat. Refresh the pull request on GitHub — the new commit appears in its history.
## Summary
[Section titled “Summary”](#summary)
You took a code change from an unread repository to a review-ready pull request. Along the way you:
* Connected a repository so the agent could read your code and docs.
* Documented a specific change by pointing the agent at the source file.
* Reviewed the draft for accuracy, placement, and unintended edits.
* Refined the content with follow-up prompts instead of editing by hand.
* Opened a pull request and pushed a follow-up commit after review.
This is the loop you repeat whenever your product changes. The more context you give the agent — file paths, tickets, linked sources — the closer each first draft lands.
## Next steps
[Section titled “Next steps”](#next-steps)
* [Update and review documentation](/agent/update-review/) — More ways to update from tickets, commits, and specific sections.
* [Integrations](/agent/integrations/) — Pull context from Slack, Notion, Linear, Jira, and Confluence into your prompts.
* [Prevent documentation drift](/agent/prevent-documentation-drift/) — Catch out-of-date docs automatically with a scheduled review.
* [Set up automated style checks](/reviewer/quickstart/) — Enforce style guides on every pull request with Docs Reviewer.
# Tutorial: document a release end to end
> Follow Docs Agent through a release: update the docs your shipped tickets affect, draft release notes, check for stale pages, and ship one pull request.
This tutorial walks you through documenting a release from the tickets your team shipped. You start from a completed milestone and finish with a single pull request. It updates the affected docs, adds user-facing release notes, and confirms that nothing went stale. The pull request is ready to merge before you launch.
By the end, you can:
* Update the documentation a set of shipped tickets affects, without hunting for the right pages yourself.
* Generate structured, user-facing release notes from the same tickets.
* Ask the agent to check the updated docs for anything the release left out of date.
* Ship everything in one pull request and push a follow-up after review.
The whole path takes about 20 minutes. The [Getting started](/agent/getting-started) tutorial generates a single README, and [document a code change](/agent/tutorial-document-a-code-change) follows one change. This tutorial covers the recurring release ritual: making sure the docs reflect everything that shipped before it reaches users.
Request access
Docs Agent is available to all plans, but we grant access on request. Contact **** to request access.
## Before you begin
[Section titled “Before you begin”](#before-you-begin)
You need:
* An EkLine account with Docs Agent enabled.
* A repository [connected to EkLine](/agent/github-app-setup) that holds your documentation, and permission to open pull requests on it.
* A connected ticket source. Docs Agent reads releases from **Linear** or **Jira**. Connect one under **Settings > Organization > Integrations**; see [Integrations](/agent/integrations).
* A shipped release to document — a Linear project or milestone, a Jira `fixVersion`, or an explicit range such as `ENG-100` through `ENG-110`.
You don’t write any code during this tutorial. The work already shipped; you bring the documentation up to date to match it.
## Step 1: Open a session
[Section titled “Step 1: Open a session”](#step-1-open-a-session)
1. Log in to your [EkLine dashboard](https://ekline.io/dashboard).
2. Click **Docs Agent** in the left navigation.
**Verify:** The editor opens with a chat panel on the right, an editor panel on the left, and a toolbar across the top.

## Step 2: Update the docs your release affects
[Section titled “Step 2: Update the docs your release affects”](#step-2-update-the-docs-your-release-affects)
Instead of opening each page yourself, hand the release to the agent. When you reference the tickets, the agent reads each one and identifies which documentation the change touches.
In the chat panel, name the release and what changed:
```plaintext
We just shipped the v2.1 release — Linear tickets ENG-100 through
ENG-110. Update the documentation each ticket affects. Focus on
user-facing changes: new features, changed behavior, and anything
we deprecated.
```
Give the agent the shape of the release
Naming what to look for — features, changed behavior, deprecations — helps the agent decide which pages matter. If a ticket only touches internal tooling, tell it to skip that ticket so the release stays focused on what users see.
**Verify:** The agent reads each ticket, reports the pages it plans to change, and writes the updated documentation to the editor panel on the left.
## Step 3: Review the doc updates
[Section titled “Step 3: Review the doc updates”](#step-3-review-the-doc-updates)
Never ship the first draft unread. The agent is accurate, but you know what shipped — confirm each change before going further.
1. Enable **View All Changes** in the toolbar to see a diff of every page the agent touched.
2. Check three things across the changes:
* **Coverage** — Does every user-facing ticket in the release show up somewhere in the docs?
* **Accuracy** — Does each update describe the change the way it actually behaves?
* **Scope** — Did the agent leave unrelated content alone?
3. Refine anything that reads inaccurately with a follow-up prompt rather than editing by hand — for example, `Move the rate-limiting change into the API reference instead of the getting-started guide`. The agent keeps the context from your first prompt and updates the same drafts.
**Verify:** The diff shows the pages your release affected, updated to match what shipped, with no unrelated content removed.
## Step 4: Generate release notes from the same tickets
[Section titled “Step 4: Generate release notes from the same tickets”](#step-4-generate-release-notes-from-the-same-tickets)
The docs now describe the new behavior. Next, produce the user-facing summary that announces it. The agent reads the same tickets and rewrites the work in plain language.
Send a prompt that names the version, the sections, and the audience:
```plaintext
Generate release notes for v2.1 from the same tickets. Group them
under Features, Improvements, and Bug Fixes. Write for end users,
one sentence per item, and add the new version at the top of
CHANGELOG.md.
```
The agent summarizes each ticket from the user’s perspective rather than copying the ticket text, so internal shorthand stays out of the published note.

**Verify:** A new v2.1 entry appears at the top of `CHANGELOG.md` in the editor, grouped into the sections you named, with one plain-language line per shipped ticket.
## Step 5: Check for anything the release left stale
[Section titled “Step 5: Check for anything the release left stale”](#step-5-check-for-anything-the-release-left-stale)
A release often changes behavior that older pages still describe the old way. Before you publish, ask the agent to review its own work against the release.
```plaintext
Review the pages you changed for this release. Flag anything that
still describes the old behavior, any feature we shipped that no
page mentions, and any example that no longer matches the release.
```
The agent returns a checkpoint covering clarity, completeness, accuracy, and consistency. Treat each flagged item as a to-do: ask the agent to fix the ones that matter, the same way you refined the drafts in Step 3.

**Verify:** The checkpoint reports no remaining gaps for the release, or you resolve each one it raises with a follow-up prompt.
## Step 6: Ship one pull request
[Section titled “Step 6: Ship one pull request”](#step-6-ship-one-pull-request)
When the docs and the release notes both match what shipped, ship them together through your normal review process.
1. Click **Raise PR** in the toolbar. If your changes span more than one repository, the toolbar shows a **PRs** dropdown instead — open it and select **Raise PR** on the repository you want.
2. The agent prefills a prompt such as `Open a pull request`. Edit it to add a title or description if you want, then press **Enter**.
3. The agent creates the pull request and replies in the chat with a link to it on GitHub.
**Verify:** The chat shows a link to a new pull request. Open it — the PR has your doc updates and release notes for the release, and nothing else.
## Step 7: Push a follow-up after review
[Section titled “Step 7: Push a follow-up after review”](#step-7-push-a-follow-up-after-review)
A reviewer often spots a late-arriving ticket or a wording change. You don’t need a new session — push the fix to the same pull request.
1. Back in the editor, ask the agent for the change. For example: `A late ticket, ENG-111, also shipped in v2.1. Add it to the release notes under Bug Fixes and update any docs it affects.`
2. Click **Update PR** in the toolbar.
3. The agent prefills a prompt like `Update pull request #42 with my latest changes`. Press **Enter**.
**Verify:** The agent commits to the existing PR branch and confirms in the chat. Refresh the pull request on GitHub — the new commit appears in its history.
## Summary
[Section titled “Summary”](#summary)
You took a shipped release from a list of tickets to a review-ready pull request. Along the way you:
* Updated the documentation each ticket affected, letting the agent find the right pages.
* Generated user-facing release notes from the same tickets.
* Checked the updated docs for anything the release left stale.
* Shipped the doc updates and the release notes in one pull request, then pushed a follow-up after review.
This is the ritual you repeat every release. The more precisely you name the release and what changed, the closer each draft lands — and the less your docs lag behind what your users already have.
## Next steps
[Section titled “Next steps”](#next-steps)
* [Generate release notes from completed tickets](/agent/release-notes) — More ways to structure, group, and template release notes.
* [Update and review documentation](/agent/update-review) — Update from tickets, commits, or specific sections, and get feedback on existing content.
* [Prevent documentation drift](/agent/prevent-documentation-drift) — Catch out-of-date docs automatically with automatic PR review and a scheduled audit.
* [Automate release notes](/agent/scheduled-agents/) — Draft release notes on a recurring cadence with a scheduled agent.
# Update and review documentation
> Keep documentation in sync with code changes and get AI feedback on existing content.
Use update mode when documentation exists but needs changes. Use review mode to get feedback without modifying content.
## Update from tickets
[Section titled “Update from tickets”](#update-from-tickets)
When a feature ships or a bug is fixed, update documentation by referencing the ticket. The agent reads the ticket details and identifies which docs need changes.
**Works with:** Linear, Jira
* Basic update
```plaintext
Update the documentation based on Linear ticket ENG-1234.
```
* With context
```plaintext
ENG-1234 added rate limiting to the API. Update the
API reference with the new rate limit headers and
error responses.
```
* Multiple tickets
```plaintext
Update the authentication docs based on ENG-1234,
ENG-1235, and ENG-1236.
```
Tip
Adding context about what changed helps the agent make more accurate updates.
## Update from code changes
[Section titled “Update from code changes”](#update-from-code-changes)
Point the agent to code changes and it updates relevant documentation.
```plaintext
The login flow changed in the last commit. Update the
authentication guide to reflect the new OAuth
implementation in src/auth/.
```
```plaintext
We deprecated the /api/v1/users endpoint. Update the
API reference to mark it as deprecated and point to
the v2 replacement.
```
## Update specific sections
[Section titled “Update specific sections”](#update-specific-sections)
Target specific parts of a document instead of regenerating everything.
```plaintext
Update only the "Configuration" section in
docs/getting-started.md with the new environment
variables from .env.example.
```
```plaintext
Add a "Troubleshooting" section to the deployment guide
covering the three most common issues from our support
tickets.
```
This is useful when you want precise edits without affecting the rest of the document.
## Review documentation
[Section titled “Review documentation”](#review-documentation)
Get AI feedback on existing documentation without making changes. The agent analyzes your content and provides suggestions.
Tip
For automated style enforcement on every pull request, pair Docs Agent with [Docs Reviewer](/reviewer/quickstart/). The agent generates and updates content — the reviewer catches style violations, inconsistent terminology, and formatting issues before they merge.
### What the agent checks
[Section titled “What the agent checks”](#what-the-agent-checks)
| Aspect | What it looks for |
| ---------------- | ------------------------------------------------------------ |
| **Clarity** | Are instructions easy to follow? Is the language clear? |
| **Completeness** | Are steps missing? Are edge cases covered? |
| **Accuracy** | Does the documentation match the current code? |
| **Consistency** | Does terminology match other docs? Is formatting consistent? |
### Example prompts
[Section titled “Example prompts”](#example-prompts)
```plaintext
Review the getting started guide and suggest improvements
for clarity and completeness.
```
```plaintext
Review the API reference for the authentication endpoints.
Check if the examples still work with the current code.
```
```plaintext
Review docs/deployment.md from the perspective of a
developer who has never deployed this application before.
```
### Applying suggestions
[Section titled “Applying suggestions”](#applying-suggestions)

The agent provides feedback in the chat panel. You can:
1. Apply suggestions you agree with by asking the agent to make the change
2. Edit directly in the editor panel
3. Iterate by asking for more specific feedback
## Verify before publishing
[Section titled “Verify before publishing”](#verify-before-publishing)
### View changes
[Section titled “View changes”](#view-changes)
Enable **View All Changes** in the toolbar to see a diff of all modifications. Review each change before creating a pull request.
Look for:
* Unintended deletions.
* Formatting issues.
* Content that needs adjustment.
### Link validation
[Section titled “Link validation”](#link-validation)
The agent automatically validates links and email addresses in generated content. If it detects broken links, it regenerates the affected sections with corrections.
### Create a pull request
[Section titled “Create a pull request”](#create-a-pull-request)
When satisfied with the changes:
1. Click **Raise PR** in the toolbar.
The agent prefills a prompt in the chat panel — for example, `Open a pull request` or `Open a pull request for my-org/my-repo` when you have changes across multiple repositories.
2. Edit the prompt if you want to add instructions, then press **Enter** to send it.
3. The agent creates the pull request and responds in the chat with a link to the PR.
If your session spans multiple repositories, the toolbar shows a **PRs** dropdown in place of the **Raise PR** button. Open it and select **Raise PR** on the repository you want.
Note
Pull requests include both text and binary files. If the agent inserted images or screenshots during the session, those files commit alongside your documentation changes.
### Update an existing pull request
[Section titled “Update an existing pull request”](#update-an-existing-pull-request)
After a PR is open, you can push more changes to it:
1. Make further edits in the editor or ask the agent for more changes in the chat.
2. Click **Update PR** in the toolbar when new changes are ready.
The agent prefills a prompt like `Update pull request #42 with my latest changes`.
3. Edit the prompt if needed, then press **Enter**.
4. The agent commits and pushes your changes to the existing PR branch.
Tip
When your PR is already up to date, the toolbar shows a **View PR** link that opens the pull request on GitHub in a new tab.
## Next steps
[Section titled “Next steps”](#next-steps)
* [Create documentation](/agent/create) — Generate READMEs, API references, and guides from your codebase.
* [Scheduled agents](/agent/scheduled-agents) — Automate recurring doc tasks like drift audits and freshness checks.
* [Integrations](/agent/integrations) — Connect Slack, Notion, Linear, Jira, and other tools.
* [Set up automated review](/reviewer/quickstart) — Run EkLine Docs Reviewer in your CI/CD pipeline to catch issues before they merge.
# EkLine changelog
> Stay up to date with the latest improvements and new features across EkLine products.
What’s new in EkLine. We publish monthly updates covering new features and improvements across Docs Reviewer and Docs Agent.
***
## September 2026
[Section titled “September 2026”](#september-2026)
### Docs Agent
[Section titled “Docs Agent”](#docs-agent)
**Connect Docs Agent to Discord**: Mention the EkLine bot in a Discord thread to get a Docs Agent reply in that same thread. Connect your Discord server under **Settings > Organization > Integrations**.
**Reach your Docs Agent sessions from anywhere**: Your session list now lives in the app sidebar. You can open a recent session from any page instead of only from the Docs Agent page.
**Filter your Docs Agent sessions**: The sessions list replaces its source chips with a filter menu, so you can switch between quick views, filter by one or more sources, and hide sessions you have finished with. [Find a past session](/agent/find-sessions)
**Continue a Docs Agent session from its Slack messages**: When you reply to a message the bot posted itself, such as a scheduled release brief or a drift review, Docs Agent continues the same session that wrote it instead of starting a new one. [Docs Agent Slack bot](/agent/slack-bot)
**Faster session pages**: Docs Agent session pages open right away instead of waiting for the pull request list to load first.
### Bug fixes
[Section titled “Bug fixes”](#bug-fixes)
* Fixed the Docs Agent editor chat pulling you back to the newest message while a reply was streaming, so you can scroll up to re-read an earlier part of a response without being dragged to the bottom.
* Fixed Docs Agent session recordings not playing back in Chrome.
* Fixed the Docs Agent sessions list going blank when a single session could not be loaded.
***
## August 2026
[Section titled “August 2026”](#august-2026)
### Docs Agent
[Section titled “Docs Agent”](#docs-agent-1)
**Search your Docs Agent sessions** — Press `Cmd/Ctrl+K` in the sessions sidebar to find recent sessions by their conversation content, or paste a pull request, merge request, Jira, or session URL to jump straight to the related sessions.
**Insert a video frame into your documentation** — Docs Agent captures a chosen moment from an uploaded video or a recording of its own browsing as an image, commits it to your repository, and inserts the reference into the page you’re writing. [Capture screenshots from a video](/agent/screenshots-from-video)
**Catch drift in your Confluence knowledge base** — A new scheduled-agent template finds Confluence knowledge-base pages that recent documentation changes left outdated, then drafts corrections for you to review and publish. [Configure scheduled agents](/agent/scheduled-agents)
**Auto-save for Confluence knowledge-base management** — The Confluence knowledge-base management form saves your changes as you make them and shows a Saving/Saved indicator, so there’s no Save button to remember. [Manage a knowledge base](/agent/manage-knowledge-base)
**Manage screenshots in a Confluence knowledge base** — Docs Agent now adds, replaces, and removes screenshots on the Confluence pages it manages, and displays those images inline in the editor as you work. [Manage a knowledge base](/agent/manage-knowledge-base)
**See how many documentation pull requests get merged** — The dashboard’s **Closed** tab is now **Merged** and shows how many of your finished documentation pull requests were merged rather than closed, across all time.
**Open a Docs Agent session from any Slack reply** — Every reply the bot posts in a thread now ends with a **See the full chat** link. You can reach the session from the turn you’re reading instead of scrolling back to the first response. [Docs Agent Slack bot](/agent/slack-bot)
### Bug fixes
[Section titled “Bug fixes”](#bug-fixes-1)
* Fixed the Docs Agent editor chat preventing you from selecting or copying text in agent replies, including while a response was streaming.
* Fixed the dashboard’s total for finished documentation pull requests shrinking over time, which happened because it counted only pull requests opened in the last 90 days.
* Fixed the GitLab integration automatically reviewing merge requests in projects you had not selected for review.
***
## July 2026
[Section titled “July 2026”](#july-2026)
### Docs Agent
[Section titled “Docs Agent”](#docs-agent-2)
**Find any past session by link or content** — Search your whole organization’s session history from the editor sidebar. Paste a GitHub PR, GitLab MR, Jira ticket, or session link to jump to related sessions, or type to search session titles, your messages, and the agent’s replies. [Find a past session](/agent/find-sessions)
**Docs Agent for GitLab documentation repositories** — Docs Agent now works with documentation repositories hosted on GitLab, matching the GitHub flow: it clones your docs repository, opens and updates merge requests from the editor, and tracks them on the dashboard. [Connect GitLab](/agent/gitlab-setup)
**Follow-up messages in Slack threads** — The @EkLine Slack bot now accepts follow-up messages you send while it is still working in a thread, running them in order instead of rejecting them. [Set up the Slack bot](/agent/slack-bot)
**Per-repository review rules for GitLab** — Control which merge requests trigger automatic reviews on a per-repository basis for GitLab, matching the existing GitHub controls. Set target branch filters, ignore patterns, author lists, and file filters in **Settings > Organization > GitLab Integration** (select a repository to configure its review rules).
**Keep documentation screenshots up to date automatically** — Docs Agent recaptures the screenshots in your documentation from your live product on a schedule you set, so images don’t drift out of date. [Keep documentation screenshots up to date](/agent/refresh-doc-screenshots)
**Watch the agent browse in real time** — When Docs Agent browses your site to capture screenshots or verify content, you can now watch its browser live in the editor. You can also replay the session afterward.
**Turn Pylon tickets into help-center articles** — Docs Agent reviews recent Pylon support tickets for questions your knowledge base should answer, then drafts the missing or corrected articles for your review. [Configure scheduled agents](/agent/scheduled-agents)
**Flexible schedules for scheduled agents** — Set scheduled agents to repeat on interval-based cadences such as every other day, twice a week, or every two weeks. Select multiple weekdays for a single agent, and rely on timezone-aware run times that hold through daylight saving changes. The schedule picker previews your next five runs, and you can run an agent immediately or skip its next run. [Configure scheduled agents](/agent/scheduled-agents)
**Faster documentation PR dashboard** — The dashboard now renders immediately from saved data. It then loads live pull request details in the background, removing the multi-second delay when you open it on larger accounts.
**More complete PR tracking** — The dashboard now includes documentation pull requests recovered automatically even when they have no linked session. It also filters out unrelated automated pull requests such as dependency updates, so the list shows only EkLine’s documentation work.
### Bug fixes
[Section titled “Bug fixes”](#bug-fixes-2)
* Fixed an issue where Docs Agent created informational comments on a GitLab merge request as resolvable threads, which could block the merge button on projects that require all threads to be resolved.
* Fixed Docs Agent not opening a documentation pull request from some sessions triggered by a pull request or merge request, even when your organization has automatic documentation PRs enabled.
* Fixed an infinite redirect loop that could stop the editor session page from loading.
* Fixed the editor preview crashing in some sessions.
* Fixed dialogs continuing to intercept clicks after you closed them, which could leave the app unresponsive until you refreshed the page.
* The @EkLine Slack bot now responds only when you mention it directly, so it no longer replies to other messages in a thread it has joined.
* Fixed the GitHub integration automatically reviewing pull requests in repositories you had not selected for review.
* Fixed the editor hiding the Code and Preview toggle and the View All Changes switch while you review changes.
* Fixed Docs Agent stopping partway through longer tasks and needing a follow-up message to finish.
* Fixed an internal storage path appearing in Docs Agent activity and the editor path when managing a Confluence knowledge base.
***
## June 2026
[Section titled “June 2026”](#june-2026)
### Docs Agent
[Section titled “Docs Agent”](#docs-agent-3)
**Typo-tolerant @EkLine mentions** — Docs Agent now responds to `@EkLine` mentions in GitHub and GitLab comments even when someone misspells or formats the handle incorrectly, so a typo no longer results in a silent no-op.
**Automatic merge requests on GitLab** — When Docs Agent flags a GitLab merge request as high-confidence for documentation changes, it now opens a documentation merge request automatically, matching the existing GitHub pull request flow. [Learn more](/agent/automatic-pr-review)
**Live progress in Slack** — The @EkLine Slack bot shows a live status indicator while it works on your request, so you can see it is making progress before the response arrives. [Set up the Slack bot](/agent/slack-bot)
**View PR for merged pull requests** — When a documentation pull request is already merged and has no new changes, the editor shows a **View PR** button instead of prompting you to raise a duplicate.
**Attach up to 20 files per message** — The chat panel now accepts up to 20 attachments per message and warns you when files exceed the limit instead of dropping them silently. [Supported file types](/agent/reference#supported-file-types)
**Slack thread responses** — The @EkLine Slack bot streams live progress in a single self-updating message, posts Docs Agent’s own reply with an expandable diff, and adds a **View EkLine chat** button on the first response. Follow-up mentions in that thread continue the same session, so the agent keeps context across messages. [Set up the Slack bot](/agent/slack-bot)
**Session reuse on PR comments** — Replying to a pull request comment Docs Agent created continues the existing session instead of starting a new one.
**90-day session history** — Resume Docs Agent sessions for up to 90 days, up from 30. [Learn more](/agent/reference/#session-history)
### Bug fixes
[Section titled “Bug fixes”](#bug-fixes-3)
* Fixed Docs Agent posting duplicate comments on a GitLab merge request, where a medium-confidence review note could trigger itself.
* Fixed Docs Agent occasionally showing a raw JSON object instead of a readable summary when assessing whether a pull request needs documentation.
* Fixed the Docs Reviewer flagging the `https` scheme inside a URL in document frontmatter as a spelling issue.
* Only authorized project members can now trigger Docs Agent from GitLab merge request comments.
* Fixed the Docs Reviewer flagging keys inside document frontmatter when the file started with a byte order mark (BOM).
***
## May 2026
[Section titled “May 2026”](#may-2026)
### Docs Agent
[Section titled “Docs Agent”](#docs-agent-4)
**GitLab automatic MR review** — Docs Agent monitors your GitLab merge requests and detects when documentation needs updating, matching the existing GitHub PR review feature. [Learn more](/agent/automatic-pr-review)
**HubSpot integration** — Connect HubSpot from the integrations page to give Docs Agent access to your customer-facing content. [Set up integrations](/agent/integrations)
**Organization memory** — Docs Agent remembers context about your repositories and conventions across sessions, so your whole team benefits from shared knowledge.
**Style review before PR creation** — Docs Agent runs a documentation style check before creating pull requests, catching formatting and tone issues before human review.
**Mark session as done** — Mark completed sessions from the sidebar menu to keep your workspace tidy. The sidebar hides done sessions by default, and you can toggle them back into view.
**Agentic PR workflow** — Click **Raise PR** or **Update PR** in the editor, and Docs Agent handles the entire process through the chat. It writes meaningful commit messages and detects existing PRs before creating duplicates.
**Real-time PR status** — Track documentation PR state — open, merged, or closed — directly in the editor toolbar with live webhook-driven updates from GitHub and GitLab.
**Session links in PRs** — Documentation PRs created by Docs Agent include a link back to the editor session that generated them, so reviewers can see the full context.
**Automatic diff view** — Sessions open with the diff view enabled by default when documentation changes exist, so you see proposed edits immediately.
**Smarter session titles** — Sessions initiated from Slack and other triggers now generate descriptive titles instead of showing the raw first message.
**Improved GitLab @mentions** — @mentioning Docs Agent in GitLab merge requests now supports reactions and editor replies, matching the GitHub experience.
**Pylon support review template** — A new scheduled agent template that reviews Pylon support tickets to identify documentation opportunities. [Configure scheduled agents](/agent/scheduled-agents)
**Chat-driven pull requests** — Creating and updating documentation pull requests now happens through the chat panel. Click **Raise PR** or **Update PR** and the agent prefills a prompt you can edit before sending, giving you more control over commit messages and PR descriptions. [Learn more](/agent/update-review#create-a-pull-request)
**PR analysis confidence** — GitHub-triggered sessions now show a colored confidence badge in the sidebar indicating how likely a PR requires documentation changes.
**Dashboard PR tracking** — Documentation PRs created by Docs Agent appear on the dashboard with reviewer assignments, diff stats, and review state, so you track docs work alongside code changes.
**Session initiator badges** — Sessions in the sidebar show who started them, with name badges for Slack-triggered sessions and source labels for GitHub-triggered ones.
**Expanded file upload support** — Upload code files, data files, and configuration files alongside documents and images in the chat panel. The agent now accepts 67 file types including `.json`, `.yaml`, `.py`, `.ts`, `.go`, `.rs`, and more. [Supported file types](/agent/reference#supported-file-types)
**Automatic PRs from Slack** — Slack-triggered sessions now create documentation pull requests automatically, so you get a ready-to-review PR without switching to the editor. Disable per-organization in **Settings > Organization > Docs Agent**. [Set up the Slack bot](/agent/slack-bot)
**Credit badge** — Embed a “Maintained by EkLine” credit on your documentation site using a lightweight web component or static SVG badge. Supports automatic light and dark theme switching and works with all major documentation frameworks. [Embed the badge](/credit)
### Bug fixes
[Section titled “Bug fixes”](#bug-fixes-4)
* Fixed GitHub repository deletions not persisting when saving integration settings.
* Fixed a brief “feature not available” flash when loading pages with feature flags.
* Fixed search modal disappearing when navigating between pages on the documentation site.
* Fixed blank onboarding page when the sign-up link did not include an email parameter.
***
## April 2026
[Section titled “April 2026”](#april-2026)
### Docs Agent
[Section titled “Docs Agent”](#docs-agent-5)
**Custom instructions** — Give Docs Agent context about your repositories, documentation structure, and company conventions in **Settings > Organization > Docs Agent**.
**GitLab integration** — Connect GitLab to let Docs Agent read merge requests, issues, and repository files when generating or updating documentation. [Set up integrations](/agent/integrations)
**Multiple GitHub organizations** — Connect more than one GitHub organization to a single EkLine organization. Manage all connected organizations from the integrations page.
**File attachments in Slack** — Attach files directly in Slack when chatting with the @EkLine bot to give the agent more context for documentation tasks. [Set up the Slack bot](/agent/slack-bot)
**Session rename** — Rename sessions directly from the sidebar by double-clicking the title or clicking the edit icon.
**Stop and queue messages** — Stop the agent mid-response and queue follow-up messages while it works, so you stay in control of the conversation.
**Session time groups** — The sidebar groups sessions by Today, Yesterday, Previous 7 Days, and Previous 30 Days for faster navigation.
**Session source filter** — Filter the sessions sidebar by source — EkLine editor, GitHub, Slack, or Scheduled — to find conversations faster.
**Customizable scheduled agent templates** — Select from 12 predefined templates when creating scheduled agents, then edit the prompt and toggle actions like raising a PR or sending a Slack notification. [Configure scheduled agents](/agent/scheduled-agents)
**PR reviewer settings** — Configure default reviewers and auto-assign behavior for documentation PRs in **Settings > Organization > Docs Agent**.
**GitLab MR comments** — @mention Docs Agent directly in GitLab merge request comments for context-aware responses.
### Docs Reviewer
[Section titled “Docs Reviewer”](#docs-reviewer)
**Review on open and save settings** — Control when automatic reviews run in VS Code with the new `ReviewOnOpen` and `ReviewOnSave` settings. Disable either to review only on demand.
**AI false-positive filtering** — Toggle AI-based false-positive filtering in VS Code with the `AiFalsePositiveFiltering` setting to reduce noise in review results.
**AI rules for repo-wide scans** — Control whether AI-powered rules run during full-repository scans in VS Code with the `EnableAiRulesForRepoWideScans` setting.
**Per-repository review rules** — Configure which pull requests trigger automatic reviews on a per-repository basis. Set target branch filters, ignore patterns, author lists, and file filters in **Settings > Organization > GitHub Integration** (select a repository to configure its review rules).
### Bug fixes
[Section titled “Bug fixes”](#bug-fixes-5)
* Fixed file uploads failing when the server returned a redirect.
* Fixed clicking inside a session rename input unexpectedly navigating away.
* Inaccessible GitHub repositories now show a warning on the integrations page instead of failing silently.
***
## March 2026
[Section titled “March 2026”](#march-2026)
### Docs Agent
[Section titled “Docs Agent”](#docs-agent-6)
**Automatic PR review** — EkLine now monitors your pull requests and automatically detects when documentation needs updating. Depending on confidence, it stays silent, posts a suggestion, or creates a docs PR for you. [Learn more](/agent/automatic-pr-review)
**Google Drive integration** — Connect Google Drive to give Docs Agent access to your documentation stored in Drive. [Set up integrations](/agent/integrations)
**Scheduled agents** — Automate recurring documentation tasks on a cron schedule. Any organization member can create and manage scheduled agents. [Learn more](/agent/scheduled-agents)
**File attachments in chat** — Attach PDFs, Word documents, spreadsheets, and other files directly in the chat panel to give the agent additional context when generating documentation. [Supported file types](/agent/reference#supported-file-types)
**PDF native rendering** — Uploaded PDFs now display as native document blocks in the editor instead of generic attachments.
**Smarter PR line comments** — When you @mention Docs Agent on a specific line in a pull request, it now sees the exact line range and diff context for more precise responses.
**Screenshot insertion** — Upload screenshots and images, and the agent inserts them directly into your documentation with appropriate markdown references. [Learn more](/agent/create#from-screenshots-and-images)
**Faster session startup** — Organizations with large repositories experience up to 2x faster session workspace setup.
### Bug fixes
[Section titled “Bug fixes”](#bug-fixes-6)
* Undo and redo now work correctly in the editor.
***
## February 2026
[Section titled “February 2026”](#february-2026)
### Docs Agent
[Section titled “Docs Agent”](#docs-agent-7)
**Slack bot** — Create documentation drafts without leaving Slack. @mention `@EkLine` in any channel or thread. [Set up the Slack bot](/agent/slack-bot)
**Unified Slack connection** — Connect Slack with a single authorization instead of two.
**Create pull requests from the editor** — Click **Raise PR** in the editor toolbar to create a GitHub pull request directly from your draft.
### Docs Reviewer
[Section titled “Docs Reviewer”](#docs-reviewer-1)
**AI suggestions in VS Code** — Get AI-powered writing suggestions as you write.
### Bug fixes
[Section titled “Bug fixes”](#bug-fixes-7)
* Fixed crash when linting large documentation sets in VS Code.
* Diagnostics now clear correctly when no issues are found.
* Default documentation path changed to workspace root for better compatibility.
***
Questions or feedback? Contact .
# Add the "Maintained by EkLine" credit
> Embed the EkLine credit on your documentation site. Find the snippet for your framework and paste it.
Find your docs framework below, copy the snippet, and paste it into your site. No account or API key required — the credit is a free hosted asset that adapts to your site’s theme automatically.
## Preview
[Section titled “Preview”](#preview)
The credit comes in two forms. The **web component** inherits your site’s font and color, so it blends in with any theme. The **SVG badge** is a fixed-style image for platforms that strip scripts.

Light background

Dark background
## Use an AI agent
[Section titled “Use an AI agent”](#use-an-ai-agent)
If you use an AI coding assistant, paste this prompt to add the credit automatically:
```text
Add the "Maintained by EkLine" credit to the footer of the documentation site.
For framework-specific instructions, fetch https://docs.ekline.io/credit/
Use the web component: load https://ekline.io/v1/credit.js as an async
script, then place in the site footer.
Detect which docs framework this project uses and follow its conventions
for adding a global script and footer element.
If the platform strips
```
## Markdown-only platforms
[Section titled “Markdown-only platforms”](#markdown-only-platforms)
Platforms that strip `