Workspace: What EkLine reads and writes in each tool you connect, how to connect GitHub, GitLab and Atlassian Teamwork Graph, the docs platforms you keep, members and roles, credits and usage, security and data, the Powered by EkLine badge, and troubleshooting
# Credits and usage
> What uses EkLine credits, where to see your organization's usage, when it resets, and what happens when credits run out.
Your organization has one credit balance. The agents and Journeys all draw on it. For prices, plans and how many credits a plan includes, see [ekline.io/pricing](https://ekline.io/pricing). ## What a credit measures [Section titled “What a credit measures”](#what-a-credit-measures) When an agent works, an AI model reads your request, the files and tickets it opens, the results of each step and the conversation so far, then writes its replies and drafts. All of that text is counted in tokens, which are small pieces of words, and your plan converts tokens into credits. Two requests that look alike can cost different amounts when one makes the agent read or write much more. ## What uses credits [Section titled “What uses credits”](#what-uses-credits) | What you do | What is counted | Usage page column | | ------------------------------------------------------------------------------------------------------- | ------------------------------------------------------------------------------------------------------------------ | ------------------------------------- | | A Docs Agent session, whether you start it in the editor or from an integration such as Slack or GitHub | Each turn: everything the agent reads and writes while it works on your message | **Docs Agent** | | An automation run | The same as a session of the agent the automation runs as, because each run starts one | **Docs Agent** or **Marketing Agent** | | A Marketing Agent session | Each turn, counted the same way | **Marketing Agent** | | Running a journey, on its own or as part of a collection | Each answer from an AI assistant or coding agent, plus grading its checks and analyzing the results for the report | **Journeys** | ## What makes one run cost more than another [Section titled “What makes one run cost more than another”](#what-makes-one-run-cost-more-than-another) * **How much the agent reads.** Many files, a large repository, or a long ticket or Slack thread cost more than a single page. * **How long the session is.** On each turn the agent rereads the conversation so far, so later turns in a long session cost more than early ones. Start a new session for a new task. * **How much the agent writes and checks.** Long drafts, many pages, and extra steps such as a fact check add to the count. * **For journeys, how many answers you collect.** Every agent you chose answers a journey as many times as **Number of runs** says, so more agents, runs and journeys mean more answers. ## Watch a session’s credits [Section titled “Watch a session’s credits”](#watch-a-sessions-credits) Under the message box in an agent session, a counter shows the credits the session has used so far, for example **12 credits**. Hover over it for the exact figure. The counter is an estimate; the **Usage** page is the record of what your balance was charged. ## The Usage page [Section titled “The Usage page”](#the-usage-page) Open your account menu at the bottom of the sidebar and click **Usage**. The page reads “Credits used by your organization.” ### Balance [Section titled “Balance”](#balance) The card at the top depends on how your plan is billed. | Your plan | The card shows | | ------------------------------------------- | --------------------------------------------------------------------------------------------------------------------------------------- | | Includes a set number of credits each cycle | **Credit balance this cycle**: credits used “of” the credits granted, credits remaining, a progress bar, and “Resets on” with the date. | | Bills your usage afterward | **Credits used this cycle**, and “You’re billed for this usage when the cycle ends on” with the date. | If your plan allows overage, the card adds one of: “Plus N credits of overage available.”, “Overage is available with no cap.” or “Overage is available.” If the card shows **No usage to show yet** and “Usage reporting is not available for your organization yet.”, contact . ### Filters, chart and table [Section titled “Filters, chart and table”](#filters-chart-and-table) * **Day** or **Month** groups credits by day or by calendar month. * The date picker offers **Last 7 days**, **Last 30 days**, **Last 90 days**, **Last 6 months** and **Last 12 months**, or dates you select. You can look back up to 12 months. * With no dates chosen, **Month** shows the last four calendar months, and **Day** shows the current billing cycle so far. * The chart is **Credits by month** or **Credits by day**, oldest first, with one series for each product: **Docs Agent**, **Marketing Agent** and **Journeys**. * The table, **Breakdown by month** or **Breakdown by day**, has a column for each product and a **Total**. The current month is marked **Current**. A range with no usage shows “No usage recorded for these dates.” All dates are in UTC, and figures are rounded to whole credits. If the page shows “We could not load your usage data”, try again shortly. ## When usage resets [Section titled “When usage resets”](#when-usage-resets) Usage resets at the end of each billing cycle. A cycle is a month or a year, depending on your plan, and it does not have to start on the first of the month. The balance card shows the date after “Resets on” or “when the cycle ends on”. ## When credits run out [Section titled “When credits run out”](#when-credits-run-out) EkLine checks your balance before it starts work, and stops starting new work shortly before the balance reaches zero. If your plan allows overage, work continues into the overage. When there are not enough credits, you see this message: > Your organization has used all of its EkLine credits, so this request can’t be started. An owner or admin can choose a plan in Settings, under Billing. It appears: * when you start an agent session or send a message in one; * when you run a journey or a collection; * in **Automations**, where a run that could not start for this reason is marked **Skipped**, with the reason under its start time. If you don’t see **Billing** under **Settings**, contact . ## FAQ [Section titled “FAQ”](#faq) ### Do Docs Reviewer checks use credits? [Section titled “Do Docs Reviewer checks use credits?”](#do-docs-reviewer-checks-use-credits) No. Docs Reviewer checks do not draw on your credit balance. ### Am I charged for a turn that fails? [Section titled “Am I charged for a turn that fails?”](#am-i-charged-for-a-turn-that-fails) No. A turn that ends in an error, or that you stop, is not charged. ### Do unused credits roll over or expire, and are free credits included? [Section titled “Do unused credits roll over or expire, and are free credits included?”](#do-unused-credits-roll-over-or-expire-and-are-free-credits-included) Rollover, expiry and free credits depend on your plan. See your plan on the [pricing page](https://ekline.io/pricing), or ask .
# Docs platforms you keep
> How EkLine works with Mintlify, GitBook, ReadMe, Docusaurus, Fern, Redocly, Astro, and Potluck Docs: it edits the docs in your Git repository and opens a pull request.
You keep your docs platform, whether it is Mintlify, GitBook, ReadMe, Docusaurus, Fern, Redocly, Astro, or a similar tool. EkLine works on the files it builds from. ## How EkLine changes your docs [Section titled “How EkLine changes your docs”](#how-ekline-changes-your-docs) EkLine works with docs that live as files in a Git repository, on GitHub or on gitlab.com. 1. You select the docs repository under **Where EkLine writes** in **Settings** > **Integrations** > **GitHub Integration** or **GitLab Integration**. 2. EkLine edits pages and sidebar files as plain files on a new branch. 3. EkLine opens a pull request on GitHub, or a merge request on GitLab. 4. Your team reviews and merges it. 5. Your platform builds and publishes the change, as it does for any other commit. EkLine does not connect to a docs platform’s API, editor, or dashboard. It never publishes your site. EkLine looks for your framework’s config file at the root of the repository. If it finds one, it follows that framework’s rules for folders, file types, navigation, and components. If not, it treats the files as plain Markdown or MDX. Review each pull request as you would any other. ## What works on each platform [Section titled “What works on each platform”](#what-works-on-each-platform) | Platform | What works today | | --------------------------------- | -------------------------------------------------------------------------------------------------------------------------------------------------------------------------------------------------------------------------------------------------------------------------------------- | | **Mintlify** | EkLine edits the pages, the navigation file and other files in your repository, then opens a pull request. Mintlify publishes once you merge. EkLine does not use Mintlify’s editor or API. | | **GitBook** | Works through GitBook’s Git Sync. EkLine edits the Markdown pages and `SUMMARY.md` in the synced repository, then opens a pull request. GitBook syncs the change once you merge. A space without Git Sync is not supported. EkLine does not use GitBook’s API. | | **ReadMe** | EkLine edits Markdown pages you keep in a Git repository, then opens a pull request. It does not run the `rdme` CLI or call ReadMe’s API. It cannot edit pages that exist only in ReadMe’s editor. To get a merged change into ReadMe, use the sync you already run, such as a CI job. | | **Docusaurus** | EkLine edits Markdown and MDX pages and the sidebar file in your repository, then opens a pull request. | | **Fern** | EkLine edits the pages and the navigation file in the `fern/` folder, then opens a pull request. Your usual Fern publish step picks up the change once you merge. | | **Redocly** | EkLine edits Markdown and OpenAPI files as plain files, then opens a pull request. It has no special handling for Redocly, so check Redocly syntax when you review. | | **Astro and Starlight** | EkLine edits Markdown and MDX pages and the sidebar in your Astro config, then opens a pull request. | | **Potluck Docs** | EkLine edits Markdown and MDX pages and the sidebar in `src/config/sidebar.mjs`, then opens a pull request. The template generates llms.txt, Markdown pages, the sitemap and JSON-LD. | | **MkDocs, VitePress, and others** | Any docs site built from Markdown or MDX files in Git works the same way. | ## Start a new docs site [Section titled “Start a new docs site”](#start-a-new-docs-site) [Potluck Docs](https://potluck.ekline.io) is EkLine’s open source docs template, built on Astro and Starlight. EkLine works with it like any Astro site. These docs run on it. ## What you need [Section titled “What you need”](#what-you-need) * A docs repository on GitHub, or a project on gitlab.com. See [Connect GitHub](/agent/github-app-setup/) or [Connect GitLab](/agent/gitlab-setup/). * That repository chosen under **Where EkLine writes**. Until you select one, the GitHub Integration page shows **Setup is not finished: no documentation repositories chosen**. * Your code repositories under **What else EkLine can read**, so EkLine can see what changed and why. It never writes to them. If you do not see the **GitHub Integration** or **GitLab Integration** tab, contact . ## Help centers and knowledge bases [Section titled “Help centers and knowledge bases”](#help-centers-and-knowledge-bases) Confluence and Pylon knowledge bases do not live in Git. EkLine updates them directly, after someone clicks **Update KB** in the editor. See [Manage a Confluence or Pylon knowledge base](/agent/manage-knowledge-base/). If you do not see the **KB Management** tab under **Settings** > **Integrations**, contact . For every tool EkLine connects to, see the [Integrations overview](/agent/integrations/). ## FAQ [Section titled “FAQ”](#faq) ### Does EkLine publish my docs site? [Section titled “Does EkLine publish my docs site?”](#does-ekline-publish-my-docs-site) No. EkLine opens a pull request or merge request. Your site changes only after your team merges it and your platform builds it. ### Can EkLine edit docs that live only in GitBook’s or ReadMe’s web editor? [Section titled “Can EkLine edit docs that live only in GitBook’s or ReadMe’s web editor?”](#can-ekline-edit-docs-that-live-only-in-gitbooks-or-readmes-web-editor) No. EkLine edits files in a Git repository. For GitBook, enable Git Sync. For ReadMe, keep your Markdown in Git and sync it to ReadMe with your own tools. ### Does EkLine work with self-managed GitLab or Bitbucket? [Section titled “Does EkLine work with self-managed GitLab or Bitbucket?”](#does-ekline-work-with-self-managed-gitlab-or-bitbucket) Not for editing your docs. EkLine edits docs and opens pull requests only on GitHub and gitlab.com. Self-managed GitLab and Bitbucket are not supported. To run Docs Reviewer checks in Bitbucket Pipelines, see the [Bitbucket integration guide](/reviewer/integrations/bitbucket-integration/). ### Can EkLine publish to Zendesk, Intercom, Webflow, or another CMS? [Section titled “Can EkLine publish to Zendesk, Intercom, Webflow, or another CMS?”](#can-ekline-publish-to-zendesk-intercom-webflow-or-another-cms) No. The **Zendesk** card in **Settings** > **Integrations** shows **Coming soon**. EkLine has no integration for Intercom, Webflow, or any other CMS.
# Members and roles
> The Owner, Admin and Member roles in an EkLine organization, what each can do, and how to invite, change and remove members.
An EkLine organization has three roles: **Owner**, **Admin** and **Member**. You manage members, roles and access under **Settings** > **Organization**. ## Roles [Section titled “Roles”](#roles) | Role | Who has it | | ---------- | --------------------------------------------------------------------------------------------------- | | **Owner** | The person who created the organization, until they transfer ownership to someone else. | | **Admin** | Anyone an Owner or Admin invites or promotes to Admin. | | **Member** | The role an invite starts with, and the role of anyone who joins through your claimed email domain. | ## What each role can do [Section titled “What each role can do”](#what-each-role-can-do) You can act only on people whose role is lower than yours. Nobody can change their own role or remove themselves. | Action | Owner | Admin | Member | | ----------------------------- | ----------------------- | ----------------------- | ------ | | Invite members | Yes, as Admin or Member | Yes, as Admin or Member | No | | Delete a pending invite | Yes | Yes | No | | Change a member’s role | For Admins and Members | For Members | No | | Remove a member | Admins and Members | Members | No | | Transfer ownership | Yes | No | No | | Claim or remove email domains | Yes | Yes | No | ## Invite members [Section titled “Invite members”](#invite-members) 1. Go to **Settings** > **Organization** > **Members** and click **Invite Members**. Only Owners and Admins see this button. 2. Enter an email address and select a role. The role starts as **Member**. 3. To invite more people at once, click **Add another one** and fill in the new row. 4. Click **Send Invites**. Each person gets an email with a link. The invite is listed under **Pending Invites** until they open the link, sign in or sign up, and click **Accept invite**. Invites expire after 7 days. To cancel an invite, click **Delete Invite** (the × on its row) under **Pending Invites** and confirm. To send someone a new invite, delete their pending one first, then invite the same email address again. ## Let teammates join by email domain [Section titled “Let teammates join by email domain”](#let-teammates-join-by-email-domain) When the first person from your company signs up with a company email address, EkLine offers to claim that domain for the organization. Anyone who later signs up with an address at that domain sees **Your company already uses EkLine!** and can join your organization or click **Create my own organization**. People who join this way are Members. To claim a domain later, an Owner or Admin opens **Settings** > **Organization** > **Domains**, enters it in **Domain** and clicks **Claim**. A domain can be claimed only when: * it is not a public email domain, such as gmail.com; * it matches your own email address; * your email address is verified; * no other organization has claimed it. ## Change a role, transfer ownership or remove someone [Section titled “Change a role, transfer ownership or remove someone”](#change-a-role-transfer-ownership-or-remove-someone) Each row in the members list has an actions menu (⋮). It is available only on rows whose role is lower than yours. | To | Select | Then | | ------------------------------- | ---------------------- | -------------------------------------------------------------------------- | | Change a role | **Change Role** | Select the new role in **Update Member’s Role** and click **Update Role**. | | Transfer ownership (Owner only) | **Transfer Ownership** | Confirm with **Transfer Ownership**. You become an Admin. | | Remove someone | **Remove** | Confirm with **Remove User from Organization**. | When you remove someone, any personal API keys they created stop working in your organization. To leave an organization, ask someone with a higher role than yours to remove you. An Owner transfers ownership first. Rows can carry these badges next to the role: * **You**: your own row. * **Joined from a shared report**: the person joined through a shared report link. * **Unknown user**: the account no longer exists. The only action offered is **Remove**. ## The Access tab [Section titled “The Access tab”](#the-access-tab) **Settings** > **Organization** > **Access** shows your organization’s EkLine token. Click **Copy** beside it to copy it. * Use it in the `EK_TOKEN` field when you set up the Docs Reviewer, for example in the GitHub Action. See [Check your docs in CI](/reviewer/quickstart/). * The token belongs to the organization, so anything done with it is recorded as the organization, not as a person. * For your own work in Claude, Cursor or ChatGPT, create a personal API key under **Settings** > **Profile** > **Personal API keys** instead. See [MCP clients](/agent/mcp/). Store the token as a secret in your CI system, as the Docs Reviewer quickstarts show, rather than in a file in your repository. ## Next [Section titled “Next”](#next) * [Credits and usage](/workspace/credits-and-usage/) * [Security and data](/workspace/security-and-data/)
# Security and data
> What EkLine can access and change in your repositories and tools, how agent runs use credentials, how your data is used, and EkLine's SOC 2 status.
The [EkLine Trust Center](https://ekline.io/trust-center) is the source of record for EkLine’s compliance status and subprocessors, which can change. Check it for the current details. ## What EkLine accesses [Section titled “What EkLine accesses”](#what-ekline-accesses) EkLine only accesses the repositories and tools you connect, with the permissions you grant. * **GitHub.** EkLine can see repositories only in GitHub accounts where the EkLine GitHub App is installed. When you install it, GitHub’s install screen lists the permissions the app requests and lets you give it all repositories or only the ones you select. See [Connect GitHub](/agent/github-app-setup/). * **GitLab.** EkLine uses an access token you create in GitLab, with the `api` and `read_repository` scopes. See [Connect GitLab](/agent/gitlab-setup/). * **Other tools**, such as Slack, Jira, Linear, Notion, Confluence and Google Drive. You connect each one under **Settings** > **Integrations**, and the connection belongs to your organization rather than to one person. See [Integrations](/agent/integrations/). ## What EkLine changes [Section titled “What EkLine changes”](#what-ekline-changes) EkLine opens pull requests and drafts, and nothing merges or publishes without your approval. In the **GitHub Integration** and **GitLab Integration** settings, you sort your repositories into two lists: | List | Badge | What EkLine does there | | ----------------------------- | ---------------- | ----------------------------------------------------------------------------------------------------------------------- | | **Where EkLine writes** | **Write access** | Opens pull requests (merge requests on GitLab). Pick the repositories that hold your documentation. | | **What else EkLine can read** | **Read-only** | Reads them to work out what changed and why. It never writes to them. Pick the repositories where product changes land. | Your team reviews and merges each pull request in GitHub or GitLab, as with any other contributor. A request in Slack can open the pull request without a click in EkLine; merging is still your team’s decision. See [How EkLine opens pull requests](/agent/how-ekline-opens-pull-requests/). Marketing Agent drafts stay in EkLine for you to copy or download. The Marketing Agent publishes only when you ask it to and say where. ## How agent runs use credentials [Section titled “How agent runs use credentials”](#how-agent-runs-use-credentials) Agent runs are sandboxed with scoped credentials. An agent works only through the repositories and tools your organization connected. You also manage two kinds of keys yourself: | Key | Where | Acts as | | ------------------------- | -------------------------------------------------- | -------------------------------------------------------------------------------------------------------------- | | Organization EkLine token | **Settings** > **Organization** > **Access** | Your organization. You add it as `EK_TOKEN` when you set up the Docs Reviewer. | | Personal API key | **Settings** > **Profile** > **Personal API keys** | You, in one organization. EkLine shows the key only once, when you create it. Click **Revoke** to turn it off. | A personal API key stops working in an organization when its owner is removed from it. See [Members and roles](/workspace/members-and-roles/). ## How your data is used [Section titled “How your data is used”](#how-your-data-is-used) Your data is never used to train models. The trust center lists the subprocessors EkLine uses to deliver its services, with the location of each. ## Compliance [Section titled “Compliance”](#compliance) EkLine is SOC 2 Type 2 compliant. See the [trust center](https://ekline.io/trust-center). For security questions the trust center does not answer, email . ## FAQ [Section titled “FAQ”](#faq) ### Is EkLine SOC 2 compliant? [Section titled “Is EkLine SOC 2 compliant?”](#is-ekline-soc-2-compliant) Yes. EkLine is SOC 2 Type 2 compliant. The [trust center](https://ekline.io/trust-center) shows the current status. ### Can EkLine change the code in our repositories? [Section titled “Can EkLine change the code in our repositories?”](#can-ekline-change-the-code-in-our-repositories) EkLine never writes to repositories under **What else EkLine can read**: it reads them to work out what changed and why. It opens pull requests only in repositories under **Where EkLine writes**, and your team decides whether to merge them. On a pull request in any connected repository, EkLine can post comments, for example when someone mentions it. See [For engineers](/agent/for-engineers/). ### Is our data used to train AI models? [Section titled “Is our data used to train AI models?”](#is-our-data-used-to-train-ai-models) No. Your data is never used to train models. ### Which subprocessors does EkLine use? [Section titled “Which subprocessors does EkLine use?”](#which-subprocessors-does-ekline-use) The [trust center](https://ekline.io/trust-center) lists them, with the location of each. ### How do we remove EkLine’s access? [Section titled “How do we remove EkLine’s access?”](#how-do-we-remove-eklines-access) * Click **Disconnect** on each tool under **Settings** > **Integrations**. * Uninstall the EkLine GitHub App in your GitHub account or organization settings. * For GitLab, click **Remove Token** under **Settings** > **Integrations** > **GitLab Integration**, and revoke the token in GitLab. * Click **Revoke** on each personal API key under **Settings** > **Profile** > **Personal API keys**.
# Troubleshoot common problems
> Fixes for the GitHub App not connecting, GitHub approval requests, running out of credits, Slack timeout messages, being signed out, and connecting GitHub sign-in to an existing account.
Find the symptom that matches what you see, then follow its fix. ## The GitHub App installs but does not connect [Section titled “The GitHub App installs but does not connect”](#the-github-app-installs-but-does-not-connect) **Symptom.** You installed the EkLine GitHub App on GitHub, but EkLine then sent you to sign in, to finish signing up, or to your dashboard. **Settings** > **Integrations** > **GitHub Integration** still shows **GitHub is not connected yet**, and installing again brings you back to the same place. **Cause.** After the install, GitHub sends you to `https://ekline.io/github/setup` with the installation’s details in the link. EkLine attaches the installation to your organization only when you arrive signed in and have finished signing up. * If you were signed out, EkLine asks you to sign in, then brings you back without those details. It keeps them for one hour, so a return within the hour can still connect. * If you had not finished signing up, EkLine takes you through sign-up and on to your dashboard, and the installation is not attached. **Fix.** 1. Finish signing up for EkLine, and stay signed in. 2. Open `https://ekline.io/github/setup?installation_id=`, replacing `` with your installation ID. On GitHub, it is the number at the end of the address of the EkLine app’s **Configure** page. 3. If EkLine shows **Select Organization**, select your EkLine organization. 4. Under **Ready to Connect**, click **Connect GitHub**. EkLine opens **Settings** > **Integrations** > **GitHub Integration**. If EkLine shows **GitHub App Already Set Up** instead, the installation is already attached. Click **Go to GitHub settings**. 5. Select at least one repository under **Where EkLine writes**. Until you do, the page shows **Setup is not finished: no documentation repositories chosen**. If **GitHub Integration** shows an **Install the GitHub App** button, start from that button instead. When GitHub sends you back within 15 minutes, EkLine connects the installation without asking. If the setup page shows **User is not a member of this organization**, you are signed in with an account that does not belong to the EkLine organization you picked. Sign in with the right account, or ask an Owner or Admin to [invite you](/workspace/members-and-roles/). ## A GitHub organization owner must approve the app [Section titled “A GitHub organization owner must approve the app”](#a-github-organization-owner-must-approve-the-app) **Symptom.** You selected a GitHub organization on GitHub’s install screen. Back in EkLine, **Ready to Connect** shows, but **Connect GitHub** stays grayed out, even after you select your organization. No message says the app is waiting for approval. **Cause.** You are not an owner of that GitHub organization, so GitHub sent an install request to its owners instead of installing the app. Until an owner approves, there is no installation for EkLine to connect. **Fix.** 1. Ask an owner of the GitHub organization to approve the EkLine app request on GitHub. 2. Once it is approved, connect the installation in EkLine by following the fix for [the GitHub App installs but does not connect](#the-github-app-installs-but-does-not-connect), from step 2. If a Docs Agent session shows **Install the GitHub App on** followed by an organization name, the session uses repositories in a GitHub organization where the app is not installed. An owner of that organization must install it. The **Install on** button in that message starts the install. ## You ran out of credits [Section titled “You ran out of credits”](#you-ran-out-of-credits) **Symptom.** EkLine refuses to start work and shows this message: > Your organization has used all of its EkLine credits, so this request can’t be started. An owner or admin can choose a plan in Settings, under Billing. It can appear when you start a session or send a message, as an agent’s reply, and when you run a journey or a collection. An [Automation](/agent/scheduled-agents/) run that hits it is recorded as skipped. **Cause.** EkLine checks your organization’s credit balance before it starts each piece of work, and refuses the work when the balance cannot cover it. So you can see this message shortly before the balance reaches zero. EkLine does not warn you before it happens. **Fix.** An owner or admin of your organization chooses a plan in **Settings** > **Billing**. If you don’t see **Billing**, contact . If your account menu has **Usage**, it shows your usage this cycle and when the cycle resets. See [Credits and usage](/workspace/credits-and-usage/). ## Slack replies with a timeout or connection message [Section titled “Slack replies with a timeout or connection message”](#slack-replies-with-a-timeout-or-connection-message) **Symptom.** You mentioned EkLine in Slack and it replied in the thread with one of these messages. | Message | Cause | Fix | | ------------------------------------------------------------------------------------------------------------------------- | --------------------------------------------------------------------------------------------------------------------------------------------------------- | --------------------------------------------------------------------------------------------------------------------------------- | | “⚠️ Your previous request is taking unusually long, so I couldn’t get to this one yet. Please send it again in a moment.” | EkLine works on one request per thread at a time. Your new request waited, for up to 70 minutes, and the earlier request in the thread was still running. | Wait for the earlier request to reply in the thread, then send yours again. | | “⚠️ I lost the connection to the agent before it finished, so I can’t tell how this request ended.” | EkLine heard nothing from the agent for 5 minutes. The agent may still be working. | Find the session in EkLine: filter the sessions list by **Source** > **Slack**. See [Find a past session](/agent/find-sessions/). | | “⚠️ The connection to the agent ended before a response arrived. Please try again.” | The connection closed before the agent sent its final reply. | Send the request again. | | “Sorry, something went wrong. Try again in a moment, or rephrase your request if the issue persists.” | A general failure, including EkLine not starting a session within 60 seconds. | Try again in a moment. If it keeps happening, rephrase the request or email . | | “⚠️ This workspace isn’t connected to EkLine. Ask an admin to reconnect.” | Your Slack workspace is not linked to an EkLine organization. | An admin connects the **Slack** card under **Settings** > **Integrations**. See [Slack](/agent/slack-bot/). | ## You are signed out [Section titled “You are signed out”](#you-are-signed-out) **Symptom.** EkLine shows **Signing out…** and returns you to the home page, or a page you open asks you to sign in. No message says your sign-in expired. **Cause.** A sign-in lasts 14 days. EkLine signs you out within a minute of it expiring, even in a tab you left open. **Fix.** Sign in again. If EkLine sent you to sign in from a page, it takes you back to that page afterwards. ## Signing in with GitHub asks you to connect GitHub [Section titled “Signing in with GitHub asks you to connect GitHub”](#signing-in-with-github-asks-you-to-connect-github) **Symptom.** You clicked **Sign in with GitHub**, and EkLine shows **Connect GitHub** with a message that your email address already has an EkLine account. **Cause.** EkLine keeps one account per email address. Your GitHub account uses an address that already has an EkLine account, one you created with Google or with a password. **Fix.** 1. In **Connect GitHub**, sign in the way you usually do: click **Sign in with Google**, or enter your email address and password. 2. EkLine connects GitHub to that account and signs you in. Next time, you can sign in with GitHub or the way you did before. If **Connect GitHub** says “You signed in as” followed by another address, you signed in to a different EkLine account, and EkLine did not connect GitHub. Sign in to the account for the address the message names. To connect GitHub to your account ahead of time, open **Settings** > **Profile** > **Authentication** and click **Connect with GitHub** under **Available Providers**. ## Still stuck [Section titled “Still stuck”](#still-stuck) Email with what you were doing, the exact message you saw, and the time it happened.
# Integration authentication requirements
> The integrations EkLine Docs Agent supports, the authentication each uses, the role required to connect it, and the exact scopes the agent requests.
Docs Agent connects to the tools your team already uses, such as source control, issue trackers, knowledge bases, and chat. It uses them to gather context and publish docs. Before you approve a connection, check what it grants. ## How authentication works [Section titled “How authentication works”](#how-authentication-works) Docs Agent connects to your tools in one of three ways. In every case, you authorize the connection. EkLine never asks for a user password. | Method | How you authorize | What EkLine receives | | ----------------------- | ------------------------------------------------------------------------------------------------------- | ------------------------------------------------------------------------------------- | | OAuth 2.0 | You approve the connection on the provider’s screen, which lists the exact permissions EkLine asks for. | A scoped grant from the provider. Revoke it at any time in the provider or in EkLine. | | Access token or API key | You create a scoped token in the provider and paste it into EkLine. | The token you made, with the scopes and role you gave it. | | GitHub App | You install the EkLine GitHub App on the repositories you select. | Short-lived tokens that GitHub issues for those repositories. | ## Data access and permissions [Section titled “Data access and permissions”](#data-access-and-permissions) These principles apply to every integration: * **The agent has the connecting account’s permissions.** Docs Agent can read or change only what the account that authorized the connection can access. It cannot reach anything that account cannot. * **Connections are organization-level.** You connect an integration once for the whole organization. Every member then uses it in Docs Agent sessions. * **You choose the scope.** Select the repositories, spaces, or knowledge bases the agent can work with. Content you do not select stays out of reach. * **Security.** See the [EkLine trust center](https://ekline.io/trust-center) for compliance and subprocessors. * **Read and write access is explicit.** Several integrations can write. The **Data access** column in [Supported integrations](#supported-integrations) shows each connection’s level. The [scope tables](#oauth-integration-scopes) list every permission each connection asks for. ## Supported integrations [Section titled “Supported integrations”](#supported-integrations) If you don’t see one of these under **Settings** > **Integrations**, contact . | Integration | Authentication | Role required to connect | Data access | How Docs Agent uses it | | ------------------------ | -------------------------------------------------------------------------------------- | --------------------------------------------------------------------------------------------- | -------------- | --------------------------------------------------------------------------------------------------------------------------------------------------------------------------------------------------------------------------------- | | GitHub | GitHub App installation | GitHub organization owner | Read and write | Reads repository code and pull requests for context, commits changes to open documentation pull requests, and posts or updates pull request comments. | | GitLab | Access token (group, project, or personal) with the `api` and `read_repository` scopes | Group Owner for a group token, or a member who can create a token with both scopes | Read and write | Reads merge requests, issues, and repository files, commits changes, and opens merge requests in your documentation projects. | | Jira | OAuth 2.0 | A member with access to the projects, or an Atlassian service account | Read and write | Reads issue titles, descriptions, and comments to update documentation or generate release notes. With [Jira triggers](/agent/jira-triggers/), the agent starts work when a ticket matches a trigger, and comments on the ticket. | | Linear | OAuth 2.0 | A member with access to the issues | Read and write | Reads issue titles, descriptions, and comments to update documentation or generate release notes. Creates or updates issues when you ask. | | Confluence | OAuth 2.0 | An Atlassian account with access to the spaces, ideally a service account | Read and write | Reads pages and spaces as source material. With **KB Management**, updates managed pages and their images and publishes changes back to Confluence. | | Notion | OAuth 2.0 | A member with access to the pages | Read and write | Reads pages and databases, such as product specs and design documents, as source material. Creates or updates pages when you ask. | | Google Drive | OAuth 2.0 | A member with access to the files | Read and write | Searches, reads, creates, uploads, moves, renames, and deletes files and folders on behalf of the connecting account. | | Slack | OAuth 2.0 (workspace app installation) | Slack workspace owner or administrator | Read and write | Reads the thread where you mention EkLine in a public or private channel, along with nearby channel messages and files shared in the thread. Replies in the thread, adds reactions, and uploads a `proposed-changes.diff` file. | | PostHog | Personal API key with a selected region | A member who can create a personal API key | Read | Reads insights, HogQL query results, and feature flag configurations to ground release notes and feature documentation in usage data. | | Pylon | API token | An administrator who can generate a Pylon API token | Read and write | Reads, updates, and creates help center articles, and publishes changes back to Pylon. | | Atlassian Teamwork Graph | Atlassian API token, ideally a service-account token | An Atlassian administrator who can create a service-account token with read and search access | Read only | Searches your whole Confluence site to find source material across every space the account can access. It never writes back. | The **Discord** card connects with OAuth 2.0. The **DevRev** card uses a DevRev personal access token. The **Pylon** card for support issues uses OAuth 2.0: you sign in with Pylon. The [Integrations overview](/agent/integrations/) lists what each one reads and writes. ## GitHub App permissions [Section titled “GitHub App permissions”](#github-app-permissions) The EkLine GitHub App asks for these repository and organization permissions. GitHub shows the exact set on the install screen before you approve it. | Permission | Access | Why the app needs it | | -------------------- | -------------- | --------------------------------------------------------------------------------------- | | Contents | Read and write | Read repository files for context and commit documentation changes on a new branch. | | Pull requests | Read and write | Read pull request details and open, update, and comment on documentation pull requests. | | Issues | Read and write | Post and update comments, add labels, and react on pull request threads. | | Metadata | Read | Baseline access GitHub requires for every app. | | Organization members | Read | Confirm that a requester belongs to the connected organization. | When you install the app, you give it access to all repositories or only the ones you select. EkLine acts only on the repositories you add under **Where EkLine writes** or **What else EkLine can read**. It writes only to the repositories under **Where EkLine writes**. ## OAuth integration scopes [Section titled “OAuth integration scopes”](#oauth-integration-scopes) For OAuth 2.0 integrations, EkLine asks for the scopes in these tables. The provider lists them on its screen when you connect. The connecting account’s own permissions still limit what the agent can reach. A scope grants a capability. It does not mean the agent uses it in every session. ### Slack [Section titled “Slack”](#slack) Bot-token scopes granted when you install the app on your workspace: | Scope | What it permits | | ----------------------------------- | ------------------------------------------------------------ | | `channels:read`, `channels:history` | List public channels and read their messages. | | `groups:read`, `groups:history` | List private channels the bot is in and read their messages. | | `im:read`, `im:history` | List direct message conversations and read them. | | `mpim:read`, `mpim:history` | List group direct messages and read them. | | `app_mentions:read` | Receive messages that mention the app. | | `metadata.message:read` | Read message metadata. | | `chat:write` | Post messages as the bot. | | `reactions:read`, `reactions:write` | Read and add emoji reactions. | | `files:read`, `files:write` | Read files shared in conversations and upload files. | | `users:read` | Read workspace member profiles. | | `users:read.email` | Read member email addresses. | | `team:read` | Read workspace metadata. | ### Jira [Section titled “Jira”](#jira) | Scope | What it permits | | ------------------------------------------------------------------- | ---------------------------------------------------------------------------------------------- | | `read:jira-work` | Read issues, comments, worklogs, and attachments. | | `write:jira-work` | Create and edit issues, comments, and worklogs. | | `read:jira-user` | Read user profiles and search for users. | | `read:project:jira` | Read project metadata. | | `read:issue-type-scheme:jira` | Read issue-type schemes. | | `read:sprint:jira-software` | Read sprints. | | `read:board-scope:jira-software`, `write:board-scope:jira-software` | Read and modify boards. | | `manage:jira-project` | Administer projects, versions, and components. | | `manage:jira-configuration` | Administer site-level Jira configuration. | | `manage:jira-webhook` | Register and delete webhooks. Jira triggers use this to start a session when a ticket changes. | | `manage:jira-data-provider` | Register a data provider on the site. | | `offline_access` | Keep the connection working after the access token expires. | ### Confluence [Section titled “Confluence”](#confluence) Confluence requests both the current granular scopes and Atlassian’s older classic scopes. | Scope | What it permits | | ---------------------------------------- | ----------------------------------------------------------- | | `read:content:confluence` | Read content across the site. | | `read:content-details:confluence` | Read detailed content information. | | `read:content.metadata:confluence` | Read content metadata. | | `read:page:confluence` | Read pages. | | `read:blogpost:confluence` | Read blog posts. | | `read:folder:confluence` | Read folders. | | `read:custom-content:confluence` | Read custom content. | | `read:attachment:confluence` | Read attachments. | | `readonly:content.attachment:confluence` | Read content attachments. | | `read:comment:confluence` | Read comments. | | `read:template:confluence` | Read templates. | | `read:label:confluence` | Read labels. | | `read:space:confluence` | Read spaces. | | `read:space-details:confluence` | Read space details. | | `read:hierarchical-content:confluence` | Read hierarchical content, such as page trees. | | `search:confluence` | Search content across the site. | | `write:content:confluence` | Create and update content. | | `write:page:confluence` | Create and update pages. | | `write:blogpost:confluence` | Create and update blog posts. | | `write:custom-content:confluence` | Create and update custom content. | | `write:comment:confluence` | Create and update comments. | | `write:label:confluence` | Add and remove labels. | | `write:attachment:confluence` | Upload and update attachments. | | `delete:attachment:confluence` | Delete attachments. | | `read:audit-log:confluence` | Read the audit log. | | `write:audit-log:confluence` | Write to the audit log. | | `read:confluence-content.all` | Read all content (classic scope). | | `read:confluence-content.summary` | Read content summaries (classic scope). | | `read:confluence-space.summary` | Read space summaries (classic scope). | | `write:confluence-content` | Create and update content (classic scope). | | `offline_access` | Keep the connection working after the access token expires. | ### Notion [Section titled “Notion”](#notion) | Scope | What it permits | | ---------------- | --------------------------------------------- | | `read:user` | Read the connected account’s Notion profile. | | `read:content` | Read pages and databases the account can see. | | `write:content` | Create pages and blocks. | | `update:content` | Update existing pages and blocks. | ### Linear [Section titled “Linear”](#linear) | Scope | What it permits | | ----------------- | ------------------------------------------- | | `read` | Read issues, comments, projects, and teams. | | `write` | Create and update Linear resources. | | `issues:create` | Create issues. | | `comments:create` | Create comments. | ### Google Drive [Section titled “Google Drive”](#google-drive) | Scope | What it permits | | ------------------------------------------------ | --------------------------------------------------------------- | | `https://www.googleapis.com/auth/drive` | Full read and write access to the files in the account’s Drive. | | `https://www.googleapis.com/auth/userinfo.email` | Read the account’s email address. | ## Access token and API key scopes [Section titled “Access token and API key scopes”](#access-token-and-api-key-scopes) These integrations connect with a token you create in the provider. You set its scopes and role when you create it. ### GitLab [Section titled “GitLab”](#gitlab) Create a group, project, or personal access token with both of these scopes. For a personal access token, EkLine checks for both and rejects the token if either is missing. | Scope | What it permits | | ----------------- | ---------------------------------------------------------------------------------------------------------------------------------------------------------------- | | `api` | Full read and write API access to repositories, merge requests, and issues, within the token’s role. Docs Agent uses it to read content and open merge requests. | | `read_repository` | Read repository files over HTTPS. | You need the Owner role to create a group access token. The token’s role also limits what it can do. Select the Developer role or higher so the agent can open merge requests in your docs projects. ### PostHog [Section titled “PostHog”](#posthog) PostHog uses a personal API key, not OAuth, so EkLine sets no scope list. You create the key in PostHog and select its scopes there. Then you paste the key and your region into EkLine. The key is only as broad as you make it. Give it the fewest PostHog scopes the agent needs to read insights, run HogQL queries, and read feature flags. ### Pylon [Section titled “Pylon”](#pylon) Pylon uses an API token that an administrator creates in Pylon. The token has the permissions of the Pylon account that created it. The agent reads, updates, and creates help center articles within those permissions. ### Atlassian Teamwork Graph [Section titled “Atlassian Teamwork Graph”](#atlassian-teamwork-graph) Teamwork Graph uses an Atlassian API token, ideally on a service account. Give the account read and search access to only the Confluence spaces the agent should search. The connection is read-only. It searches and reads, and never writes back. ## Webhooks [Section titled “Webhooks”](#webhooks) GitHub and GitLab send events to EkLine over webhooks, so the agent can act on pull requests, merge requests, and comments: * **GitHub** signs each delivery, and EkLine checks the signature before it processes the event. * **GitLab** sends each delivery with the secret token that EkLine creates for your organization. EkLine checks the token before it processes the event. ## Revoking access [Section titled “Revoking access”](#revoking-access) To remove an OAuth connection, revoke it in the provider, or click **Disconnect** on its card under **Settings** > **Integrations** in EkLine. To cut off a token-based integration, revoke the access token or API key in the provider. To remove GitHub access, uninstall the GitHub App from your GitHub organization settings. ## Related pages [Section titled “Related pages”](#related-pages) * [Connect GitHub to EkLine Docs Agent](/agent/github-app-setup/): install the GitHub App and select repositories. * [Connect GitLab to EkLine Docs Agent](/agent/gitlab-setup/): add a scoped access token and configure the webhook. * [Connect Atlassian Teamwork Graph](/agent/teamwork-graph-setup/): add an Atlassian API token for whole-site Confluence search. * [Docs Agent integrations](/agent/integrations/): reference content from each connected source in your prompts. * [Manage a Confluence or Pylon knowledge base](/agent/manage-knowledge-base/): let the agent update pages and publish changes back.
# Connect GitHub to EkLine Docs Agent
> Install the EkLine GitHub App and configure which repositories and documentation paths to monitor.
Connect your GitHub organization to EkLine. Docs Agent can then watch your repositories, review pull requests, and write docs. ## Prerequisites [Section titled “Prerequisites”](#prerequisites) * An EkLine account with an organization. [Sign up](https://ekline.io) if you haven’t already. * Admin access to the GitHub organization you want to connect. If you do not see the **GitHub Integration** tab or the **Install the GitHub App** button, contact . ## Install the GitHub App [Section titled “Install the GitHub App”](#install-the-github-app) You start the install from the **GitHub Integration** settings page. The first time, it shows the **Install the GitHub App** button. 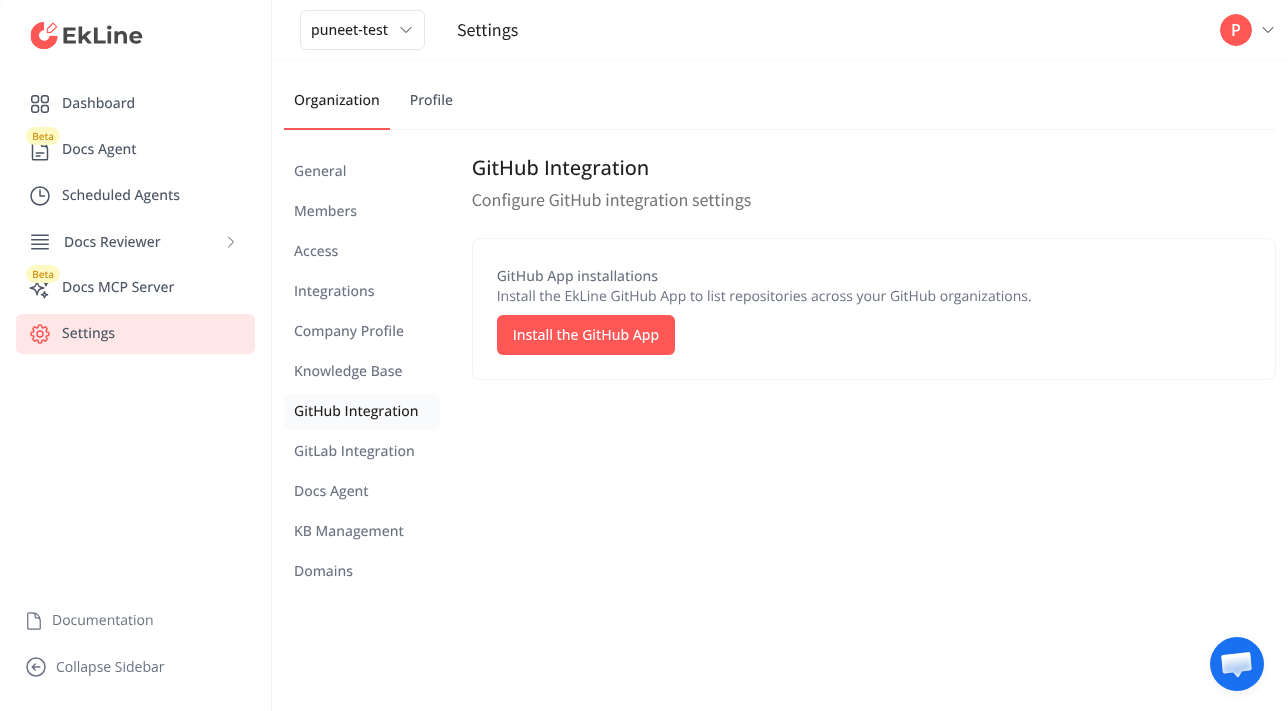 1. **Open GitHub integration settings.** Go to your [EkLine Dashboard](https://ekline.io/dashboard), then open **Settings** > **Integrations** > **GitHub Integration**. 2. **Start the installation.** Click the **Install the GitHub App** button. GitHub opens so you can authorize the EkLine app. 3. **Select your GitHub account.** On the GitHub page, select the user account that authorizes EkLine. 4. **Select the target organization.** Select the GitHub organization to install the EkLine app on. 5. **Select repository access.** GitHub shows two options: * **All repositories**: EkLine can access every repository in the organization. * **Only select repositories**: you select the repositories. Select **Only select repositories**, then search for the repositories EkLine should watch. You can change this later in your GitHub organization settings. 6. **Complete the GitHub installation.** Click the **Install** button. GitHub sends you back to EkLine to finish the connection. ## Connect the organization in EkLine [Section titled “Connect the organization in EkLine”](#connect-the-organization-in-ekline) When GitHub sends you back, EkLine links the install to your EkLine organization. If EkLine shows the **GitHub App Setup** page with an organization picker, finish the connection there. 1. **Select your organization.** On the **GitHub App Setup** page, use the **Select an organization** dropdown. Select the EkLine organization to link to this install. 2. **Finish the connection.** Click the **Connect GitHub** button. EkLine links your GitHub organization and loads your repositories. ## Connect another GitHub organization [Section titled “Connect another GitHub organization”](#connect-another-github-organization) One EkLine organization can connect more than one GitHub organization. Any member of your EkLine organization can add one. 1. On the **GitHub Integration** settings page, find **Connected GitHub accounts**, which lists the accounts already connected. 2. Click **Install on another GitHub account**, then follow the same steps as the first install. Repositories from every connected account appear together in the repository lists. If EkLine can no longer reach a connected account, for example because the app was uninstalled there, a warning naming that account appears on the page. If you don’t see **Connected GitHub accounts**, contact . ## Configure repositories [Section titled “Configure repositories”](#configure-repositories) Once you connect, the GitHub integration page shows two lists of repositories. Each list has a badge that shows whether EkLine writes there. | Section | Badge | Purpose | | ----------------------------- | ---------------- | -------------------------------------------------------------------------------------------------------------------------- | | **Where EkLine writes** | **Write access** | Repositories that hold your docs. EkLine opens pull requests here. You can set paths to target certain folders or files. | | **What else EkLine can read** | **Read-only** | Code repositories where your product changes land. EkLine reads them to see what changed and why. It never writes to them. | ### Add documentation repositories [Section titled “Add documentation repositories”](#add-documentation-repositories) 1. **Search and select a repository.** Use the search field under **Where EkLine writes** to find and select a repository. 2. **Add documentation paths.** Click the **Add Path** button next to the repository. Enter the file or folder path for EkLine to watch, such as `docs/`, `README.md`, or `content/`. Click **Save**. The path shows as a tag that you can remove later. 3. **Check that monitoring is on.** The **Enable monitoring** switch is on by default for each repository you add. While it is on, EkLine runs [automatic PR review](/agent/automatic-pr-review/) on the repository’s pull requests, if automatic PR review is on for your organization. Turn it off only to stop automatic review for that repository. 4. **Check that your selection saved.** Your selection saves as you change it, so there is no save button. A message under the list reads **Saving…**, then **Saved**. If a save fails, it reads **Could not save the repository selection.** and shows a **Try again** control. ### Add code repositories [Section titled “Add code repositories”](#add-code-repositories) Use the search field under **What else EkLine can read** to select code repositories. They give EkLine context when it writes and reviews docs. Like the repositories under **Where EkLine writes**, they can get [automatic PR review](/agent/automatic-pr-review/). They need no paths. ## Verify the connection [Section titled “Verify the connection”](#verify-the-connection) When setup is done, check that: * The **Connected GitHub accounts** section lists the GitHub account you installed the app on. * Your selected repositories appear under **Where EkLine writes** or **What else EkLine can read**. * Docs paths show as tags next to their repositories. * **Enable monitoring** is on for each repository you want EkLine to review automatically. ## Next steps [Section titled “Next steps”](#next-steps) * [Use the GitHub PR bot](/agent/github-integration/) to write docs from pull request comments. * [Set up automatic PR review](/agent/automatic-pr-review/) so EkLine spots PRs that need docs updates. * [Set up the GitHub Action](/reviewer/quickstart/github-action/) to run style checks on every pull request. *** ## Stuck? [Section titled “Stuck?”](#stuck) Reply to your welcome email or contact . We read every message.
# Connect GitLab to EkLine Docs Agent
> Add a GitLab access token to connect your projects so Docs Agent can reference merge requests, issues, and repository files.
Connect GitLab to EkLine so Docs Agent can reference your merge requests, issues, and repository files when it generates and updates documentation. GitLab connects with a GitLab access token. You add the token once at the organization level, and every member of your EkLine organization can then reference GitLab content in their Docs Agent sessions. ## Prerequisites [Section titled “Prerequisites”](#prerequisites) * An EkLine account with an organization. [Sign up](https://ekline.io) if you haven’t already. * A gitlab.com account with access to the projects you want EkLine to reference. Self-managed GitLab is not supported. * Permission in GitLab to create an access token with the required scopes. If you do not see the **GitLab Integration** tab under **Settings** > **Integrations**, contact . ## Generate a GitLab group access token [Section titled “Generate a GitLab group access token”](#generate-a-gitlab-group-access-token) A group access token covers every project in the group with a single token, so it’s the recommended option when your organization has multiple projects. EkLine also accepts personal and project access tokens if you prefer to scope access differently. For full details, see the [GitLab group access tokens reference](https://docs.gitlab.com/user/group/settings/group_access_tokens/). 1. **Open the group’s access tokens page in GitLab.** Go to the group you want EkLine to access, then navigate to **Settings** > **Access tokens**. 2. **Add a new token.** Click **Add new token** and enter a recognizable name, such as `EkLine Integration`. 3. **Set an expiration date.** Set the expiration as needed. 4. **Select a role.** Select the **Developer** role or higher. The role determines what the token can read across the group’s projects. 5. **Select the required scopes.** Select both the `api` and `read_repository` scopes. EkLine needs both. 6. **Create and copy the token.** Click **Create group access token** and copy the generated token. The token starts with `glpat-`. Caution GitLab shows the token value only once. Copy it before you leave the page. ## Connect GitLab in EkLine [Section titled “Connect GitLab in EkLine”](#connect-gitlab-in-ekline) The **GitLab Integration** settings page holds your token. Before you add a token, the status reads **Token is not set**. 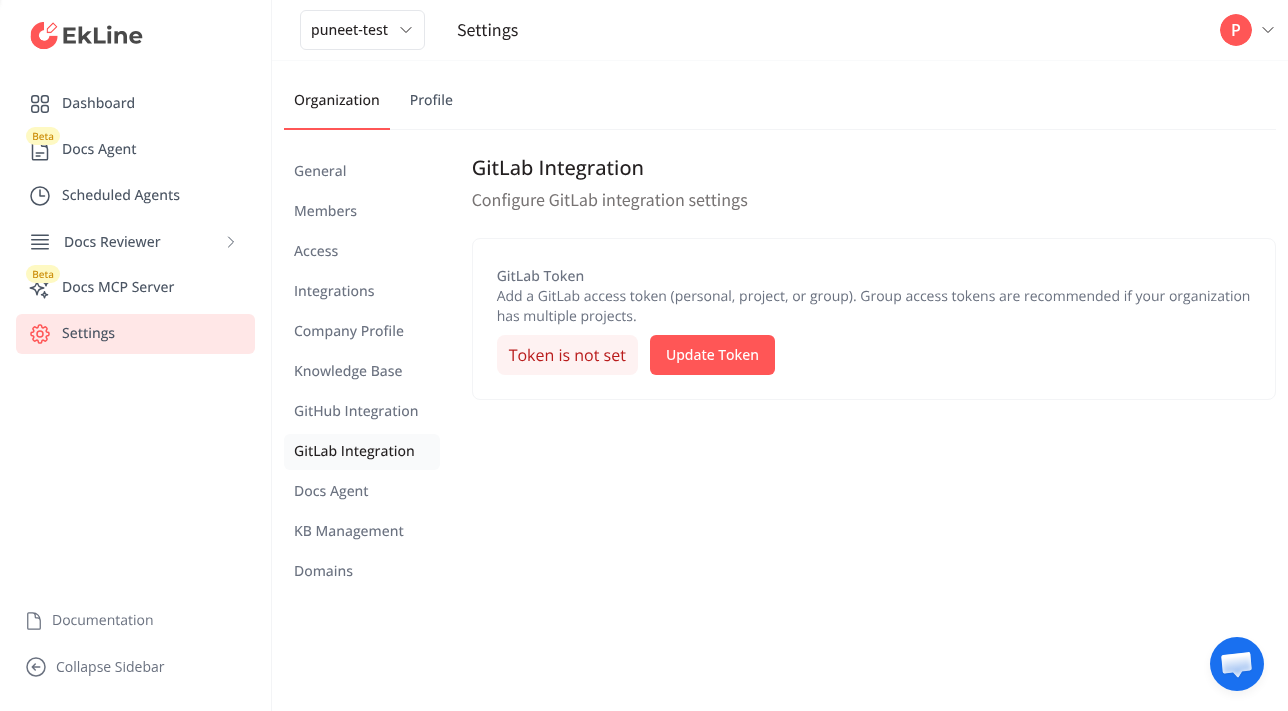 1. **Open GitLab integration settings.** Go to your [EkLine Dashboard](https://ekline.io/dashboard) and navigate to **Settings** > **Integrations** > **GitLab Integration**. 2. **Add your token.** Click the **Update Token** button. Paste your GitLab token into the **GitLab Token** field. 3. **Save the token.** Click **Save Token**. EkLine checks the token with GitLab, and for a personal access token it also confirms both scopes. When the connection succeeds, the status changes to **Token is set**. ## Select code repositories [Section titled “Select code repositories”](#select-code-repositories) After you connect a token, EkLine loads the GitLab projects the token can access. 1. **Find the “What else EkLine can read” section.** The **What else EkLine can read** section lists the GitLab projects available to the token. It carries a **Read-only** badge: EkLine reads these projects to work out what changed and why, and never writes to them. 2. **Select your projects.** Select the GitLab projects where your product changes land. 3. **Check that your selection saved.** Your selection saves automatically as you change it, so there is no save button to click. A status message below the list reads **Saving…**, then **Saved** once the selected projects are available in Docs Agent sessions. If a save fails, the message reads **Could not save the repository selection.** and shows a **Try again** control. ## Select documentation repositories [Section titled “Select documentation repositories”](#select-documentation-repositories) Select the GitLab projects that hold your documentation. Docs Agent opens merge requests in these projects when it drafts or updates docs. 1. **Find the “Where EkLine writes” section.** The **Where EkLine writes** section lists the same GitLab projects available to the token. It carries a **Write access** badge: EkLine opens merge requests in these projects. 2. **Select your docs projects.** Select the GitLab projects where Docs Agent should propose documentation changes. 3. **Check that your selection saved.** Your selection saves automatically as you change it, so there is no save button to click. A status message below the list reads **Saving…**, then **Saved**. Docs Agent can then open merge requests in the selected projects. If a save fails, the message reads **Could not save the repository selection.** and shows a **Try again** control. ## Configure the GitLab webhook [Section titled “Configure the GitLab webhook”](#configure-the-gitlab-webhook) A webhook lets GitLab notify EkLine about events in your project, such as new merge requests and comments. After you add a token, EkLine shows the **Webhook Configuration** section with the values you need. 1. **Copy the webhook details from EkLine.** In the **Webhook Configuration** section on the GitLab integration settings page, copy the **Webhook URL** and the **Secret Token**. 2. **Open the webhooks page in GitLab.** In your GitLab project, navigate to **Settings** > **Webhooks** and click **Add new webhook**. 3. **Enter the webhook URL and secret.** Paste the EkLine webhook URL into the **URL** field, then paste the secret into the **Secret token** field. 4. **Select the triggers.** Enable these triggers: **Push events**, **Comments**, **Emoji events**, and **Merge request events**. 5. **Save the webhook.** Click **Add webhook**. GitLab now sends events to EkLine for that project. ## Verify the connection [Section titled “Verify the connection”](#verify-the-connection) Confirm that the integration is ready: * The token status shows **Token is set**. * Your selected projects appear under **What else EkLine can read**, and your documentation projects under **Where EkLine writes**. * The **Webhook URL** and **Secret Token** appear in the **Webhook Configuration** section. * A team member can reference a GitLab merge request or issue in a Docs Agent session and the agent fetches the content. ## Use GitLab content in Docs Agent [Section titled “Use GitLab content in Docs Agent”](#use-gitlab-content-in-docs-agent) After you connect GitLab, reference GitLab content directly in your prompts. The agent recognizes GitLab URLs and IDs automatically and pulls the details from your connected projects. ```text Create a changelog entry based on this GitLab merge request: https://gitlab.com/your-org/platform/-/merge_requests/42 ``` ```text Update the authentication docs based on the changes in GitLab issue #215. ``` ```text Document the new API endpoints by referencing the files changed in merge request !87. ``` The agent accesses content using the permissions of the account that created the token. You can only pull content that account has permission to view. ## Next steps [Section titled “Next steps”](#next-steps) * [Generate documentation from GitLab merge requests](/agent/gitlab-integration/): trigger Docs Agent by mentioning `@ekline-ai` in a merge request comment. * [Docs Agent integrations](/agent/integrations/): see every source you can reference, including Slack, Notion, Jira, and Confluence. * [Create documentation](/agent/create/): generate a draft from your connected sources. * [Update and review](/agent/update-review/): refine and review documentation with the agent. *** ## Stuck? [Section titled “Stuck?”](#stuck) Reply to your welcome email or contact . We read every message.
# Integrations overview
> What EkLine reads and what it writes in each tool you connect: code hosts, sources, support tools, chat, and the docs platforms you keep.
Connect tools under **Settings** > **Integrations**. A connection applies to your whole EkLine organization, not only to the person who connected it. For the sign-in method and the permissions each connection asks for, see [Integration authentication requirements](/agent/connector-auth-requirements/). Changes to your docs arrive as pull requests or merge requests that your team merges. In the editor, knowledge base edits publish when someone clicks **Update KB**. If you don’t see **GitHub Integration**, **GitLab Integration**, **KB Management**, **Pylon**, **Atlassian Teamwork Graph**, **Jira triggers**, or **Slack triggers**, contact . ## Code hosts [Section titled “Code hosts”](#code-hosts) EkLine writes your docs through a code host. It works on the repositories you select, in two lists: * **Where EkLine writes**: the repositories that hold your documentation. EkLine opens pull requests here. * **What else EkLine can read**: the repositories where product changes land. EkLine reads these to work out what changed and why. It never writes to them. | Tool | What EkLine reads | What EkLine writes | Where to connect it | | ---------- | -------------------------------------------------------------------------------- | ------------------------------------------------------------------------------------------------------------------------------------- | ----------------------------------------------------------------------------------------------------------------------------------------------------------------------------------------------------- | | **GitHub** | Repositories in both lists, and pull request comments that mention `@ekline-ai`. | Branches and pull requests in **Where EkLine writes** repositories only, and replies on pull requests where someone mentioned EkLine. | **Settings** > **Integrations** > **GitHub Integration**, by installing the EkLine GitHub App. See [Connect GitHub](/agent/github-app-setup/) and [GitHub pull requests](/agent/github-integration/). | | **GitLab** | Projects in both lists, and merge request comments that mention EkLine. | Branches and merge requests in **Where EkLine writes** projects only, and replies on merge requests where someone mentioned EkLine. | **Settings** > **Integrations** > **GitLab Integration**, with a GitLab access token. See [Connect GitLab](/agent/gitlab-setup/) and [GitLab merge requests](/agent/gitlab-integration/). | * GitLab works with gitlab.com only. Self-managed GitLab is not supported. * The **GitLab** card in the integrations grid is a separate connection. It lets the agent read merge requests, issues, and repository files you mention in a prompt. Merge requests that EkLine opens come from the **GitLab Integration** tab. ## Sources [Section titled “Sources”](#sources) Sources give the agents context. Mention a ticket or page in a prompt, and the agent reads it. | Tool | What EkLine reads | What EkLine writes | Where to connect it | | ---------------------------- | ---------------------------------------------------------------------------------- | ------------------------------------------------------------------------------------------ | ---------------------------------------------------------------------------------------------------------------------------------------------------------------------------------------------------------------------------------------------------------------------------------------------------------------------------------- | | **Jira** | Issue details for the tickets you mention, or the ticket a Jira trigger picked up. | A comment on the ticket, when a [Jira trigger](/agent/jira-triggers/) starts the work. | **Jira** card. Enter your Atlassian subdomain (`acme` for `acme.atlassian.net`), then sign in with Atlassian. | | **Confluence** | Pages you mention, from the spaces the connected Atlassian account can reach. | Not supported from this card. See [Confluence](#confluence). | **Confluence** card. Enter your Atlassian subdomain, then sign in with Atlassian. | | **Atlassian Teamwork Graph** | Searches your whole Confluence site for source material. | Not supported. | **Atlassian Teamwork Graph** card, with your site, an account email, and an Atlassian API token. See [Connect Atlassian Teamwork Graph](/agent/teamwork-graph-setup/). | | **Linear** | Issue details for the issues you mention. | Creates or updates issues when you ask. | **Linear** card. | | **Notion** | Pages you point the agent to, as source material. | Creates or updates pages when you ask. | **Notion** card. | | **Google Drive** | Files and folders in your Drive. | Creates, uploads, moves, renames and deletes files and folders in your Drive when you ask. | **Google Drive** card. | | **PostHog** | Insights, HogQL query results, and feature flags. | Not supported. | **PostHog** card, with a PostHog personal API key (it starts with `phx_`). Create the key in PostHog under **Personal API Keys** in your settings. Select your region: **US (Public)**, **US (Private)**, **EU (Public)** or **EU (Private)**. For a self-hosted PostHog, select **Custom (self-hosted)** and enter your hostname. | | **DevRev** | Issue tracking and product insights. | Not supported. | **DevRev** card, with a DevRev personal access token. | “Not supported” means no EkLine workflow writes to that tool. The permissions each connection asks for are listed in [Integration authentication requirements](/agent/connector-auth-requirements/). The **HubSpot** card shows **Coming soon**. You cannot connect it yet. To give the agents files instead of a connected tool, upload them as [reference documents](/agent/reference-documents/). ### Confluence [Section titled “Confluence”](#confluence) EkLine has three Confluence connections, each for a different job: | You want the agent to | Connect | | -------------------------------------------------------------- | -------------------------------------------------------------- | | Read a page you name in a prompt | The **Confluence** card | | Find pages across your whole site when you do not know the URL | The **Atlassian Teamwork Graph** card | | Update pages in a Confluence knowledge base | The **KB Management** tab, described under [Support](#support) | ## Support [Section titled “Support”](#support) Support tools give the agents your customers’ questions, and let them keep your help center current. | Tool | What EkLine reads | What EkLine writes | Where to connect it | | ----------------------------- | ------------------------------------------------- | ----------------------------------------------------------------------------------- | -------------------------------------------------------------------------------------------------------------------------------------------------------------------------- | | **Pylon** | Support issues and conversations. | Not supported from this card. | **Pylon** card, signing in with Pylon. | | **Pylon** knowledge base | Articles in the Pylon knowledge bases you select. | Updates existing articles and creates new ones, when you click **Update KB**. | **Settings** > **Integrations** > **KB Management**, with a Pylon API token. See [Manage a Confluence or Pylon knowledge base](/agent/manage-knowledge-base/). | | **Confluence** knowledge base | Pages in the Confluence spaces you select. | Updates existing pages, when you click **Update KB**. It does not create new pages. | The **Confluence** card first, then **Settings** > **Integrations** > **KB Management**. See [Manage a Confluence or Pylon knowledge base](/agent/manage-knowledge-base/). | The **Zendesk** card shows **Coming soon**. You cannot connect it yet. ## Chat [Section titled “Chat”](#chat) Chat tools let your team ask for docs changes where they already talk. | Tool | What EkLine reads | What EkLine writes | Where to connect it | | ----------- | -------------------------------------------------------------------------------------------------------------- | -------------------------------------------------------------------------------------------------------------------------------------------------------- | ----------------------------------------------------- | | **Slack** | The thread where you mention EkLine, nearby channel messages, channel details, and files shared in the thread. | Replies and reactions in the thread, and a `proposed-changes.diff` file. Summaries from an [Automation](/agent/scheduled-agents/) to a channel you name. | **Slack** card. See [Slack](/agent/slack-bot/). | | **Discord** | The thread where you mention EkLine. | Replies in the thread. | **Discord** card. See [Discord](/agent/discord-bot/). | A request from Slack can also open a docs pull request. That pull request is written to GitHub or GitLab, not to Slack. You control it with **Automatically raise PRs from Slack requests** under **Settings** > **Docs Agent** > **Slack triggers**. ## Docs platforms you keep [Section titled “Docs platforms you keep”](#docs-platforms-you-keep) EkLine does not connect to a docs platform’s own API. It edits the files in the Git repository your platform builds from, and your platform publishes after you merge. To see what works for Mintlify, GitBook, ReadMe, Docusaurus, Fern, Redocly, and Astro, see [Docs platforms you keep](/workspace/docs-platforms/). ## Disconnect a tool [Section titled “Disconnect a tool”](#disconnect-a-tool) To stop EkLine reading or writing a tool, click **Disconnect** on its card under **Settings** > **Integrations**. For a token you created yourself, revoke it in that tool too. To remove the GitHub App, uninstall it in your GitHub settings.
# Connect Atlassian Teamwork Graph to EkLine Docs Agent
> Add an Atlassian API token so Docs Agent can search your entire Confluence site for source material. Use a service account for stable, scoped access.
Connect Atlassian Teamwork Graph so Docs Agent can search your entire Confluence site for source material. Instead of pointing the agent at a single page, you let it find the relevant pages across every space the connected account can access. It then uses what it finds to draft and update documentation. This connection is read-only. The agent searches and reads Confluence through it, and never writes back. Publishing edits to Confluence stays in the [knowledge base management](/agent/manage-knowledge-base/) workflow. ## Prerequisites [Section titled “Prerequisites”](#prerequisites) * An EkLine account with Docs Agent. * An Atlassian account with access to the Confluence content you want the agent to search. * Permission to create an Atlassian API token for that account. If you do not see the **Atlassian Teamwork Graph** card under **Settings** > **Integrations**, contact . ## Use a service account [Section titled “Use a service account”](#use-a-service-account) Connect with a dedicated Atlassian service account rather than an individual’s account. A service account is a standard Atlassian account your team creates for automated access. A service account gives you: * **Stable ownership.** The connection keeps working when a team member changes roles or leaves. A token tied to a personal account stops working when that account is deactivated. * **Scoped access.** Grant the service account access to only the spaces the agent should search. The account’s Confluence permissions are the boundary for what the agent can read. * **Clear auditing.** Activity in Confluence appears under a recognizable account, such as `EkLine AI`, instead of a person’s name. ## Create an Atlassian API token [Section titled “Create an Atlassian API token”](#create-an-atlassian-api-token) Create the token from one of two places, depending on the account you connect. A service account token is the recommended option. ### Create a service account API token (recommended) [Section titled “Create a service account API token (recommended)”](#create-a-service-account-api-token-recommended) An organization administrator creates the token from the Atlassian admin console. For full details, see the Atlassian guides to [service accounts](https://support.atlassian.com/user-management/docs/understand-service-accounts/) and [API tokens for service accounts](https://support.atlassian.com/user-management/docs/manage-api-tokens-for-service-accounts/). 1. **Open the Atlassian admin console.** Go to [admin.atlassian.com](https://admin.atlassian.com) and select your organization if you have more than one. 2. **Open your service accounts.** Select **Directory** > **Service accounts**. If you don’t have a service account yet, create one for EkLine first, such as `EkLine AI`. 3. **Create credentials.** Select the service account, then click **Create credentials**. Select **API token**, then click **Next**. 4. **Name the token and set an expiration.** Enter a recognizable name such as `EkLine Docs Agent`, then set an expiration date. Atlassian allows an expiration between 1 and 365 days. 5. **Select scopes.** Select every scope with the **Classic** scope type and a **Read**, **Read only**, or **Search** action. These give the agent read and search access to Confluence without granting write access. Click **Next**. 6. **Create and copy the token.** Review the token, click **Create**, then click **Copy to clipboard** and store the token securely. Caution Atlassian shows the token value only once. Copy it before you leave the page. ### Create a personal API token [Section titled “Create a personal API token”](#create-a-personal-api-token) Connect with an individual account when you want to test the integration quickly. A personal token stops working when that account is deactivated, so prefer a service account for ongoing use. 1. **Open the API tokens page.** Sign in as the account the agent uses, then go to [id.atlassian.com/manage-profile/security/api-tokens](https://id.atlassian.com/manage-profile/security/api-tokens). For full details, see the [Atlassian guide to managing API tokens](https://support.atlassian.com/atlassian-account/docs/manage-api-tokens-for-your-atlassian-account/). 2. **Create a token.** Click **Create API token**, enter a recognizable label such as `EkLine Docs Agent`, and set an expiration date that fits your organization’s rotation policy. 3. **Copy the token.** Copy the generated token and store it securely. It starts with `ATATT`. Caution Atlassian shows the token value only once. Copy it before you leave the page. ## Connect Teamwork Graph in EkLine [Section titled “Connect Teamwork Graph in EkLine”](#connect-teamwork-graph-in-ekline) 1. **Open your integrations.** Go to your [EkLine dashboard](https://ekline.io/dashboard) and navigate to **Settings** > **Integrations**. 2. **Start the connection.** Find the **Atlassian Teamwork Graph** card and click **Connect**. 3. **Enter your Atlassian site.** In the **Atlassian site** field, enter your full site URL, such as `mycompany.atlassian.net`. 4. **Enter the account email.** In the **Atlassian account email** field, enter the email of the account whose token you created. For a service account, this is the service account’s email. 5. **Enter the API token.** Paste the token into the **API token** field. EkLine never shows the token again after you connect. 6. **Connect.** Click **Connect**. EkLine validates the credentials against Confluence before saving. If validation fails, EkLine shows an error and stores nothing. ## Verify the connection [Section titled “Verify the connection”](#verify-the-connection) Confirm the integration is ready: * The **Atlassian Teamwork Graph** card shows a connected status. * In a Docs Agent session, ask the agent to find a Confluence page you know exists, and confirm it returns a result: ```text Search Confluence for our internal runbook on database failover and summarize the recovery steps. ``` ## Use Teamwork Graph in Docs Agent [Section titled “Use Teamwork Graph in Docs Agent”](#use-teamwork-graph-in-docs-agent) After you connect, ask the agent to find source material in Confluence as part of a documentation task. ```text Find the Confluence pages that describe our authentication flow, then draft a public "How authentication works" guide from them. ``` ```text Search Confluence for anything we've written about rate limiting and list the pages so I can pick which to turn into docs. ``` The agent reads only content the connected account has permission to view. Grant the service account access to a space to make that space searchable; remove access to take it out of scope. ## Troubleshooting [Section titled “Troubleshooting”](#troubleshooting) | Problem | Cause | Fix | | ----------------------------------------------- | ------------------------------------------------------------------- | ---------------------------------------------------------------------------------------------------------------------- | | The connection fails when you click **Connect** | The email or token is wrong, or the token was revoked | Confirm the email matches the account that created the token, then create a fresh token and try again | | The agent finds no pages | The connected account can’t see the space | Grant the account access to the space in Confluence, then search again | | The agent can’t find a page you can see | You and the connected account have different Confluence permissions | Give the connected service account access to that space | | The token stopped working | The token expired or the account was deactivated | Create a new token and reconnect. Create it on a service account, so the connection does not break when someone leaves | ## Next steps [Section titled “Next steps”](#next-steps) * [Manage a Confluence or Pylon knowledge base](/agent/manage-knowledge-base/): let the agent update Confluence pages and publish changes back. * [Docs Agent integrations](/agent/integrations/): reference Slack, Notion, Jira, Confluence, and more in your prompts. * [Create documentation](/agent/create/): generate a draft from your connected sources. *** ## Stuck? [Section titled “Stuck?”](#stuck) Reply to your welcome email or contact . We read every message.
# Add the "Powered by EkLine" credit
> Embed the EkLine credit on your documentation site. Find the snippet for your framework and paste it.
Find your docs framework, copy the snippet, and paste it into your site. You need no account or API key. The credit is a free hosted asset that adapts to your site’s theme. ## Preview [Section titled “Preview”](#preview) The credit comes in two forms. The **web component** inherits your site’s font and color, so it blends in with any theme. The **SVG badge** is a fixed-style image for platforms that strip scripts.  Light background  Dark background ## Use an AI agent [Section titled “Use an AI agent”](#use-an-ai-agent) If you use an AI coding assistant, paste this prompt to add the credit automatically: ```text Add the "Powered by EkLine" credit to the footer of the documentation site. For framework-specific instructions, fetch https://docs.ekline.io/credit/ Use the web component: load https://ekline.io/v1/credit.js as an async script, then place in the site footer. Detect which docs framework this project uses and follow its conventions for adding a global script and footer element. If the platform strips ``` ## Markdown-only platforms [Section titled “Markdown-only platforms”](#markdown-only-platforms) Platforms that strip `